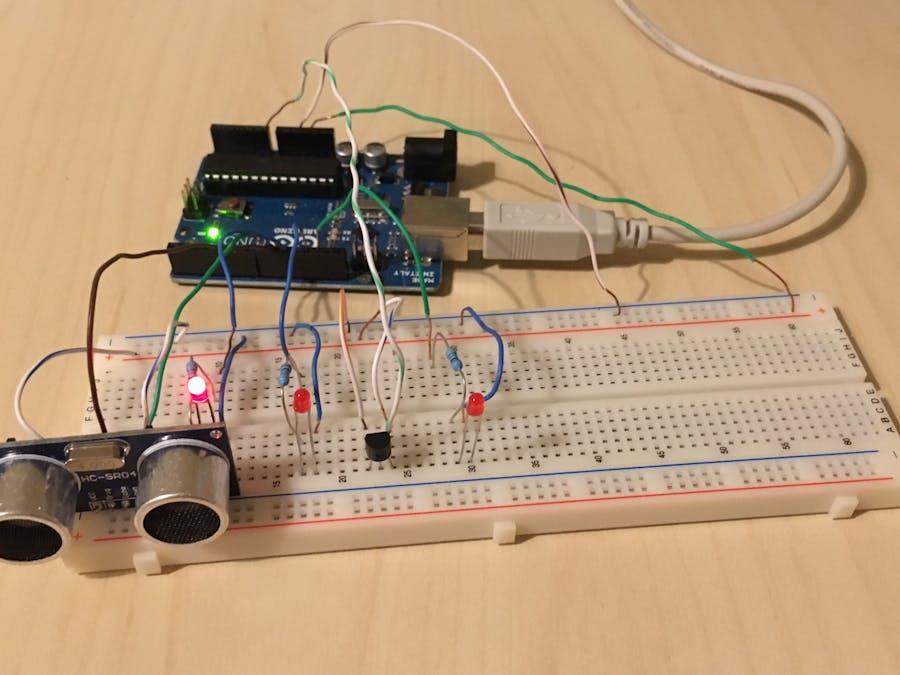
This simple project shows how Arduino can be used with a real time operating system (Erika). The project is designed to show how Arduino can be integrated with a Real-Time operating system and how to use hardware and software components. A special version of Arduino called ARTe was used for software development. For more information on how to use ARTe, visit the official developer site (http://arte.retis.santannapisa.it/index.html or http://retis.sssup.it/?q=arte).
For more details how to install ARTe it is better if you visit the github page (https://github.com/melvin-mancini/Multitasking-RealTime-Arduino-System).
ARTe (Arduino Real-Time extension)ARTe (Arduino Real-Time extension) is an extension to the Arduino framework that supports multitasking and real-time preemptive scheduling. Thanks to ARTe, the user can easily specify and run multiple concurrent loops at different rates, in addition to the single execution cycle provided by the standard Arduino framework. Today ARTe supports the most popular platforms: Arduino UNO and Arduino DUE. In addition to the single loop present in the standard Arduino approach, the user can easily specify a number of concurrent loops to be executed at specific rates. Concurrency and real-time scheduling is provided by the ERIKA Enterprise (http://erika.tuxfamily.org/drupal/) open-source real-time kernel. Loops can use the standard Arduino libraries, which have been enhanced to guarantee mutual exclusion in the access of shared data structures. The impact of ARTe in terms of footprint and runtime overhead has beed evaluated by extensive tests and resulted to be negligible. You can use ARTe and develop Arduino code only with Windows platforms. The project under consideration was developed on a machine with Windows 8.1.
About this projectThanks to ARTe it has been possible to implement a system in which there are 3 periodic processes. Each of them has a given priority and is managed according to a real time scheduler algorithm made available by the ERIKA operating system. Processes, when they are running, handle different activities. A process for managing every 3 milliseconds the acquisition of the distance through the sensor HC-SR04. When an obstacle is placed at a distance of less than 10 cm, an "alarm" LED lights up. Another process for flashing a LED every 7 milliseconds. A final process to read the temperature returned by the LM35 sensor expressed in degrees Celsius. If the temperature exceeds 23 degrees Celsius then a warning LED is switched on. All processes are managed in real time mode. The system is efficient and effective with responsive response times.
How to useARTe installationIn order to develop applications with ARTe you have to download the development tool. The version of ARTe used to develop this project can be found on the following web page: http://retis.sssup.it/?q=arte . ARTe is evolved and the new version can be downloaded from the site: http://arte.retis.santannapisa.it/index.html . The developer site provides all the information on how to use the development tool, providing documentation and examples. Once installed the tool is quite similar to Arduino's editor but with the ability to use the Arte Extension. You can then enable or disable the ARTe extension by clicking on the Tools item in the menu bar. The item ARTℇ will appear and click on it you can select enable or disable.
Run the projectIn order to realize the system described above, you must have the following hardware components:
- Arduino Uno
- HC-SR04 (distance sensor)
- LM35 (temperature sensor)
- LED
- Electrical resistor
- Simple connectors for electronic devices.
In the Circuit Diagram folder there are two files that show how to connect the various components to the Arduino. The file .fzz format was created using the Fritzing software, the recommended tool for building electronic circuits. In addition, there is an image that shows more intuitive how the various components must be connected.
After installing ARTe and implementing the circuit, you can connect the Arduino to the PC and wait for the software to recognize the device. Then, through the Arduino editor with ARTe, you should open the src.ino file located in the src folder of the project. I recommend opening the src.ino file using the ARTe editor directly, by clicking on the menu bar File -> Open -> Select src.ino file. You must enable ARTe as explained in the previous section ARTe installation and then you can compile the project and upload it to the Arduino board.
ProblemsProblem with DigitalToggle Arduino LibraryARTe is an extension of an Arduino version so you may encounter compilation errors when using some Arduino libraries. Compilation errors may occur when using the Arduino DigitalToggle library. You should edit a file in order to use the library properly. Follow the steps below:
- Download the file DigitalToggle.zip from Official Arduino Site (https://playground.arduino.cc/Code/DigitalToggle)
- Before importing the library through the Arduino IDE, you must unzip the DigitalToggle.zip file and open the DigitalToggle.h file
- Replace the line of code #include <pins_arduino.h> with #include "Arduino.h"
- Once the DigitalToggle.h file has been modified, compress the folder into a .ZIP file and run the procedure to import the new library (See the section "Download, install and import" from the site https://playground.arduino.cc/Code/DigitalToggle).


_ztBMuBhMHo.jpg?auto=compress%2Cformat&w=48&h=48&fit=fill&bg=ffffff)


Comments
Please log in or sign up to comment.