


Welcome to the Sound Meter project, where we delve into the fascinating world of sound monitoring. In this project, we'll guide you through the process of building your very own sound meter device that can measure and display the level of sound in your surroundings.
ComponentsIn this project, you need the following three major components.
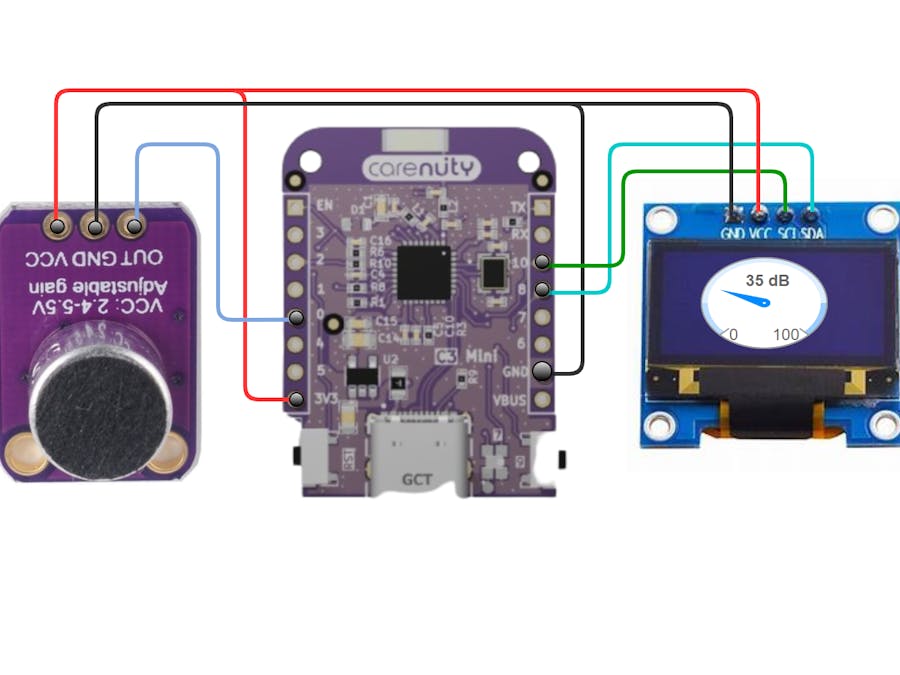
- A Max4466
- A Carenuity C3-Mini microcontroller
- A 0.96 Oled display.
- Jumper wires
- Breadboard
We'll begin with a straightforward setup to connect these components. Refer to the provided schematic for guidance.
Once you've connected everything correctly on your breadboard, it's time to move on to the software side.
Upload the Code:In your Arduino IDE, make sure you've selected the correct board (LOLIN C3-Mini) and COM port. Also, ensure that all necessary libraries are installed. Then, simply copy and paste the provided code into your Arduino IDE. Click on upload, and voila! Your sound monitoring system is now up and running.
YOU MADE IT. If you encounter any difficulties or need assistance, don't hesitate to ask for help in the comments section below. Happy sound monitoring!


Comments
Please log in or sign up to comment.