


Hardware components | ||||||
| × | 1 | ||||
| × | 1 | ||||
| × | 1 | ||||
_ztBMuBhMHo.jpg?auto=compress%2Cformat&w=48&h=48&fit=fill&bg=ffffff) |
| × | 1 | |||
 |
| × | 1 | |||
| × | 1 | ||||
 |
| × | 1 | |||
 |
| × | 2 | |||
| × | 1 | ||||
| × | 1 | ||||
 |
| × | 1 | |||
Hand tools and fabrication machines | ||||||
 |
| |||||
 |
| |||||
 |
| |||||
 |
| |||||
EDIT: 3/18/19 The world has been shut down from the corona virus outbreak. During this time I remade the designs for this clock with actual UI and not just through the serial port. A lot of design changes and a whole new code was created, so I'm not posting the new edition. However you can get the version two clock here on my Etsy page: https://www.etsy.com/shop/LeboeufLasing
Why?
Why not!
But really, I had a clock and it's alarm sound was basically an air raid siren. Therefore I took an Ipad and made it my alarm. You could then change alarm noise to something pleasant. The desk they were sitting on was too small though. I wanted an alarm clock that was customizable. Not an alarm and a clock.
The quest begins...
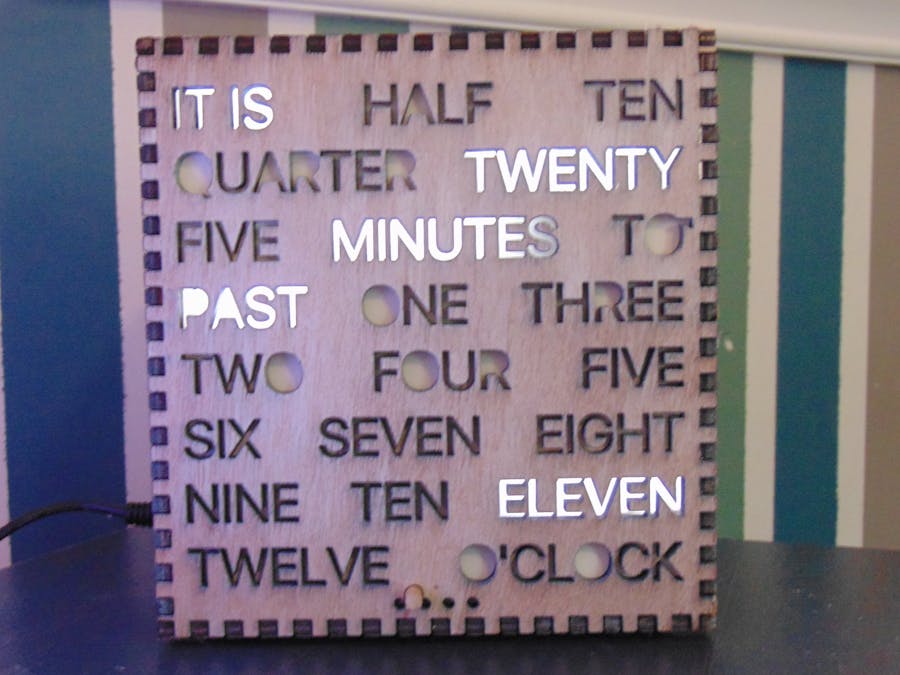
I immediately chose DIy because that is the ultimate customizability! For what type, I searched clocks on thingiverse. There was a clock that struck me as interesting. It used words! With a plan now, I hopped into Tinkercrap- cough cough sorry- Tinkercad and began designing. Tests wastes some wood but, eventually I got a design I was happy with. Cut, Assemble with hot glue, and add LED strips. As an aesthetic bonus I "stained" it white by lightly applying white spray paint.
Onto the electronics.
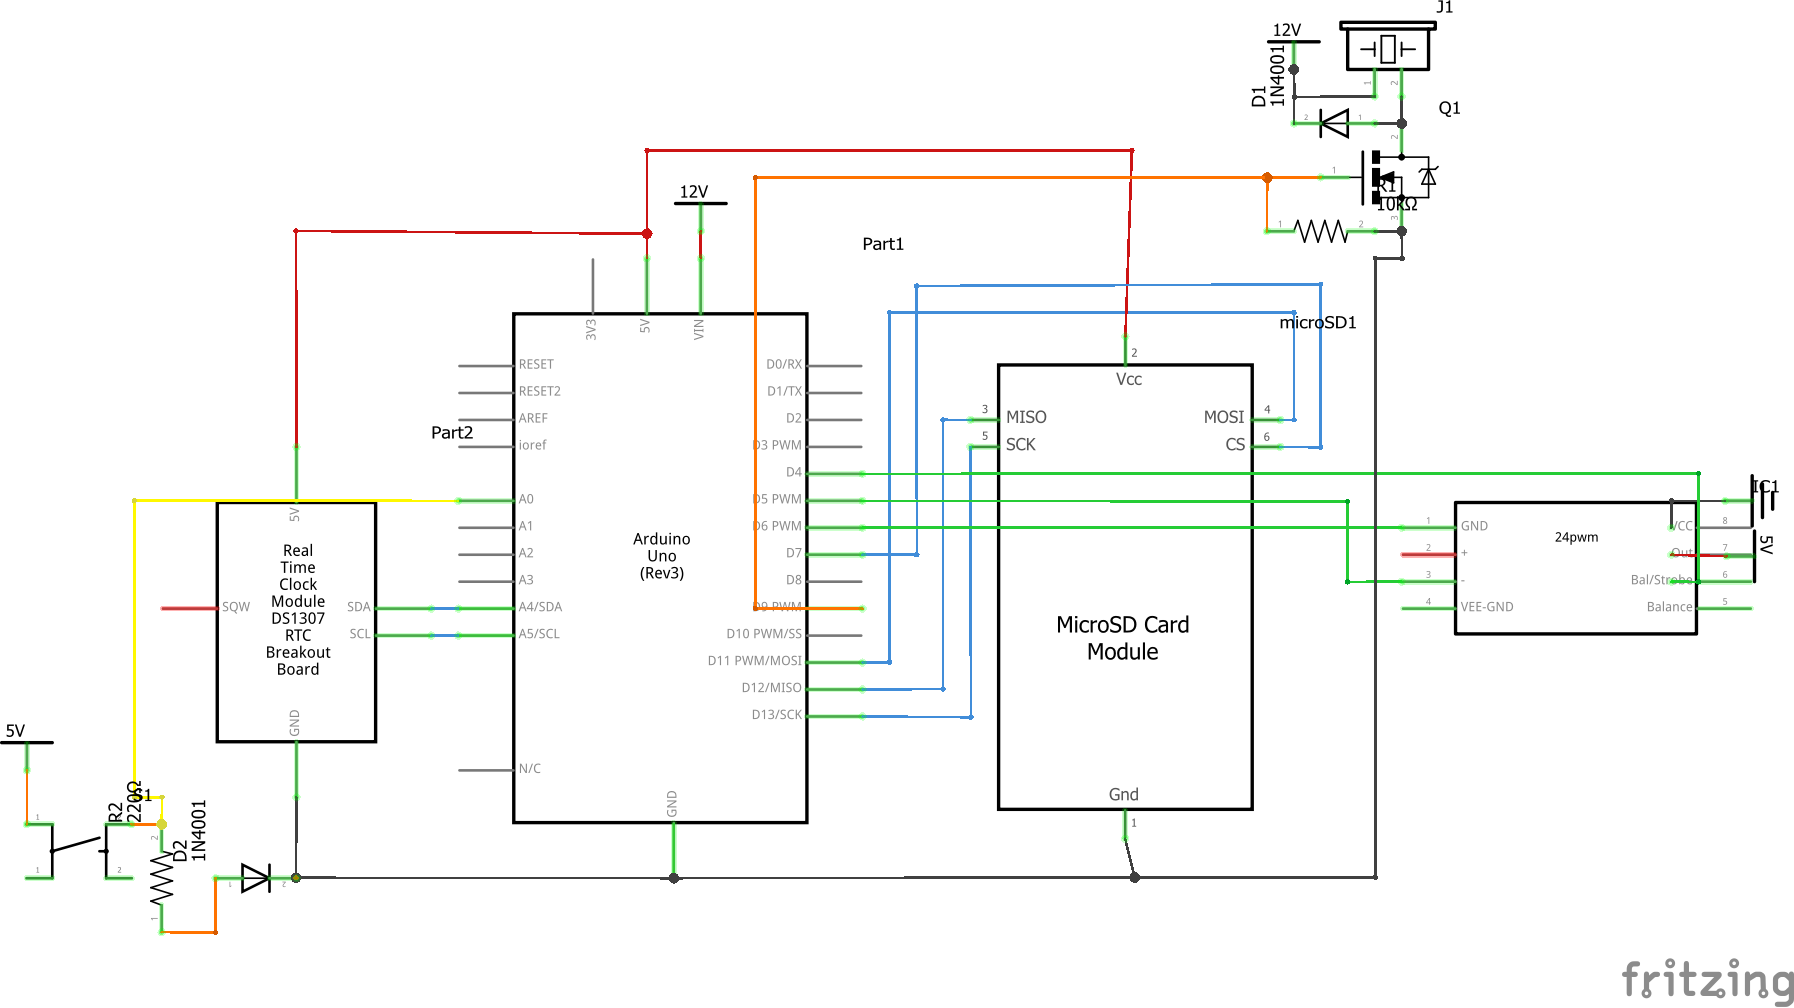
To control the 22 led strips, my original design was a board that had 22 transistors on it and connected an arduino mega, a 12 volt power supply and the LEDS. It caught on fire and I quickly moved to a purchased solution. Not because I was scared though. I just could not take any more soldering. The 24 Channel PWM Led Driver from Adafruit was the answer. 1 hour of soldering later, the LEDs worked and because of the drivers interface, I could downside to an arduino uno.
The clock needs an accurate way of keeping time. Adafruit to the rescue. Their ds1307 breakout board was very simple to hook up, and worked great. Not much excitement here.
The library I went with is called TMRPCM. It plays sound files off of an SD Card. The Adafruit SD Card adaptor I had lying around worked great! I quickly wired up a simple amplifier hooked to a speaker and stop button, and then it was time to code!
Code
This was uneventful, and took way less time than any of the other sections. In just one hour, the clock was fully functional. Except for one bug... Which was patched so don't worry about it.
How to operate:
For the alarm:
The variables alarmmin and alarmhour: set them to a time you wish the alarm to go off. For no alarm, set the alarmhours to -1. This clock operates in military time. Then reupload code. Follow this tutorial to make the sound for your alarm acceptable for TMRpcm: https://www.instructables.com/id/Audio-Player-Using-Arduino-With-Micro-SD-Card/
For the RTC:
The real time clock must be set to the right time. Upload code. Open the serial monitor, and set the baud rate to 57600. Then type in the current hour. Press enter. Then the current minute. Press enter. Then do the same for the seconds. The clock will update to this new time as soon as you update the seconds. Give about 1 second between entering each time(hours mins seconds) for the code to cycle.
Now you hopefully have a clock, or at least you know how I have mine. :)


Comments
Please log in or sign up to comment.