Hackster is hosting Hackster Holidays, Ep. 7: Livestream & Giveaway Drawing. Watch previous episodes or stream live on Friday!Stream Hackster Holidays, Ep. 7 on Friday!
Gabriele Scordamaglia
Published © GPL3+

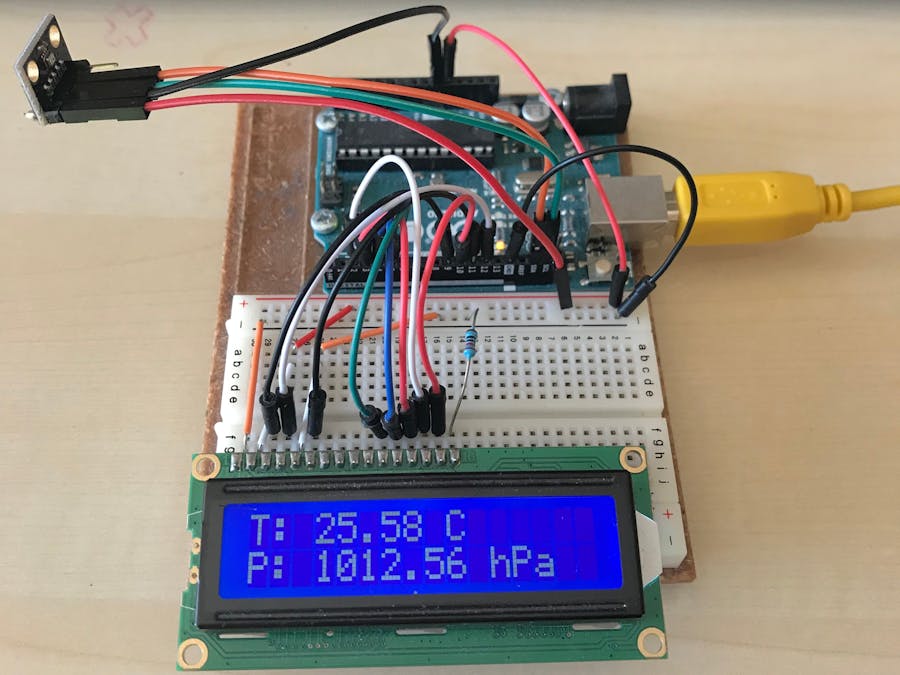
Arduino Weather Station v1.0 (BMP280)

This is the first version of my Arduino Weather Station, a very simple project that will give you weather information.

BeginnerFull instructions provided12 minutes25,385
Arduino Weather Station v1.0 (BMP280)

Things used in this project

Story

Read more

Schematics

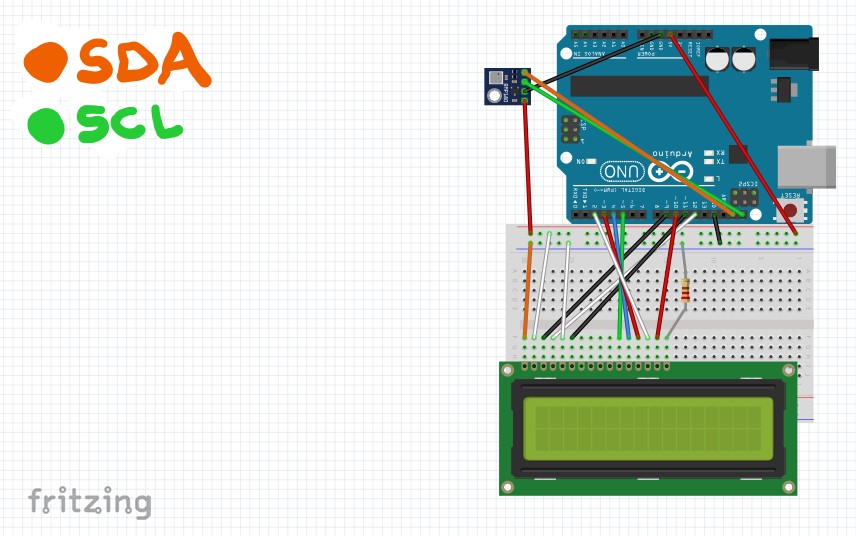
wiring_lwR7Z3oZQ0.jpg

With this wiring you shouldn't have problem

Code

Arduino Code

C/C++
With this code you'll be able to send data from the sensor to the LCD.
#include <LiquidCrystal.h> //Library for the LCD screen
#include <BMP280.h> // Library for the BMP280 sensor

BMP280 bmp; //Initialize your sensor
LiquidCrystal lcd(12, 11, 5, 4, 3, 2); /*Initialize your LCD, make sure you wired                                                       it correctly */

#define P0 1013.25 //Standard atmospheric pressure
#define contrast 9 //9 and 10 are the pins where you wire the matching LCD pins
#define brightness 10 //for contrast and brightness regulation

double T = 0; //Starting temperature value
double P = 0; //Starting pressure value
char measure = 0;

void collectData() {
  measure = bmp.startMeasurment();
  if(measure != 0) {
    delay(measure);
    measure = bmp.getTemperatureAndPressure(T, P);
    if(measure != 0) {
      P = P + 17; // '+17' is a correction for the sensor error
      T = T - 0.8; // like said above
      lcd.clear();
      lcd.print("T: ");
      lcd.print(T);
      lcd.print(" C");
      lcd.setCursor(0, 1);
      lcd.print("P: ");
      lcd.print(P);
      lcd.print(" hPa");
    }
    else
      lcd.print("Error.");
  }
  else
    lcd.print("Error.");
}

void setup() {
  lcd.begin(16, 2);
  pinMode(contrast, OUTPUT);
  pinMode(brightness, OUTPUT);
  analogWrite(contrast, 100); // '100' and '255' are the contrast and brightness
  analogWrite(brightness, 255); // values I suggest, but you can change them as
  if(!bmp.begin()) {             // you prefer
    delay(1000);
    lcd.print("Init. failed.");
    lcd.setCursor(0, 1);
    delay(1000);
    lcd.print("Check wiring.");
    while(1);
  }
  else
    lcd.print("Init. OK.");
    
    bmp.setOversampling(4);
    delay(2000);
    collectData();
}

void loop() {
  collectData();
  delay(2000);
}

Credits

Gabriele Scordamaglia
6 projects • 42 followers
23 YO, Automation Engineering student in Italy.

Comments