


Hardware components | ||||||
_ztBMuBhMHo.jpg?auto=compress%2Cformat&w=48&h=48&fit=fill&bg=ffffff) |
| × | 1 | |||
 |
| × | 1 | |||
 |
| × | 1 | |||
 |
| × | 1 | |||
 |
| × | 1 | |||
Software apps and online services | ||||||
 |
| |||||
Hand tools and fabrication machines | ||||||
 |
| |||||
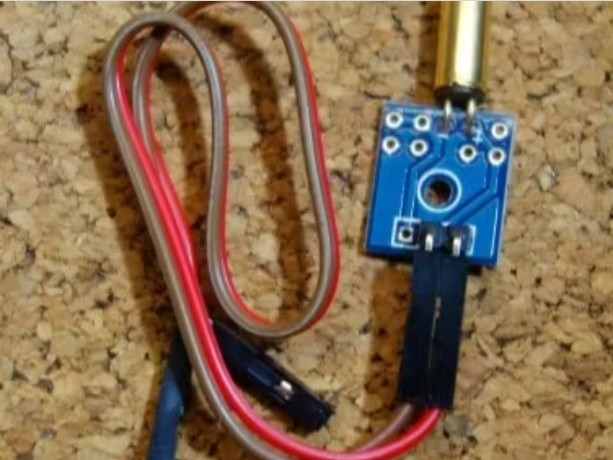
This post shows how to use the tilt sensor module with Arduino. Tilt sensors are many times referred to as inclinometers, tilt switches or rolling ball sensors. Using a tilt sensor is an easy way to detect orientation or tilt.
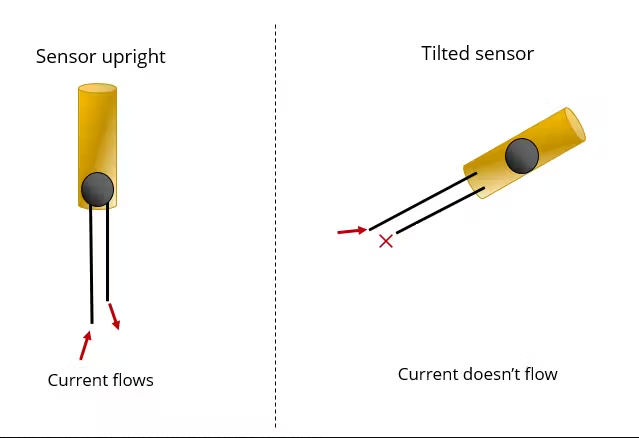
Step 1: How Does It Work
Here's how it works:
When the sensor is fully upright, the ball drops to the bottom of the sensor and connects the poles, allowing current to flow.
When the sensor is tilted, the ball does not touch the magnetic pole, the circuit is broken, and current does not flow.
In this way, the tilt sensor acts like a switch, turning it on or off depending on its tilt. Therefore, it will provide digital information to the Arduino, whether it is a high signal or a low signal.
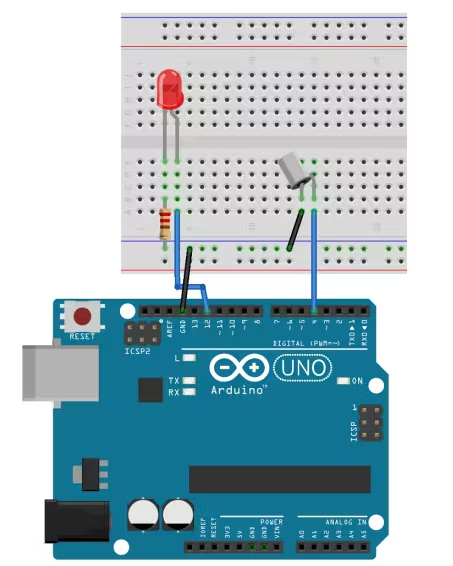
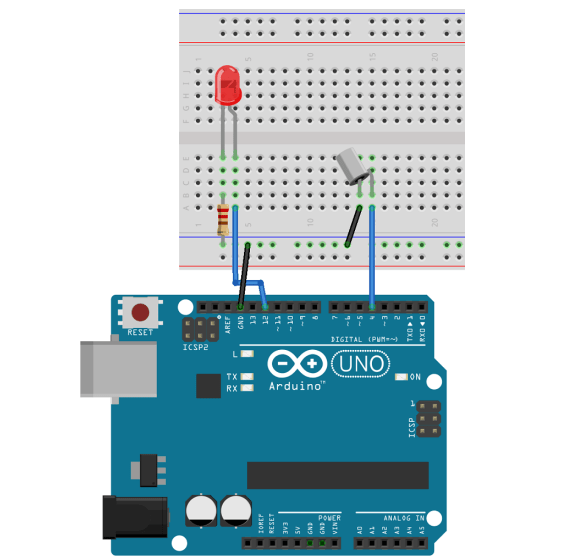
Step 2: Pin Wiring
Connecting the tilt sensor to the Arduino is very simple. You just need to connect one pin to the Arduino digital pin and GND to GND. In this case, you just add an LED to the schematic in the "Pin Wiring" section.
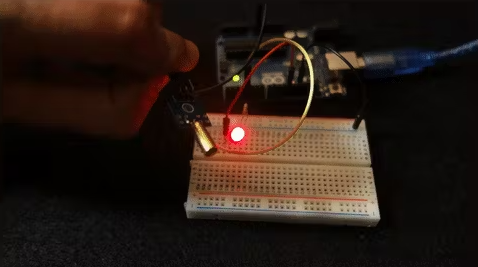
Step 3: Programming
To complete this example, upload the following code to the Arduino board.
int ledPin = 12;
int sensorPin = 4;
int sensorValue;
int lastTiltState = HIGH; // the previous reading from the tilt sensor
// the following variables are long's because the time, measured in miliseconds,
// will quickly become a bigger number than can be stored in an int.
long lastDebounceTime = 0; // the last time the output pin was toggled
long debounceDelay = 50; // the debounce time; increase if the output flickers
void setup(){
 pinMode(sensorPin, INPUT);
 digitalWrite(sensorPin, HIGH);
 pinMode(ledPin, OUTPUT);
 Serial.begin(9600);
}
void loop(){
 sensorValue = digitalRead(sensorPin);
 // If the switch changed, due to noise or pressing:
 if (sensorValue == lastTiltState) {
 // reset the debouncing timer
 lastDebounceTime = millis();
 }
 if ((millis() - lastDebounceTime) > debounceDelay) {
 // whatever the reading is at, it's been there for longer
 // than the debounce delay, so take it as the actual current state:
 lastTiltState = sensorValue;
 }
 digitalWrite(ledPin, lastTiltState);

 Serial.println(sensorValue);
 delay(500);
}
int ledPin = 12;
int sensorPin = 4;
int sensorValue;
int lastTiltState = HIGH; // the previous reading from the tilt sensor
// the following variables are long's because the time, measured in miliseconds,
// will quickly become a bigger number than can be stored in an int.
long lastDebounceTime = 0; // the last time the output pin was toggled
long debounceDelay = 50; // the debounce time; increase if the output flickers
void setup(){
pinMode(sensorPin, INPUT);
digitalWrite(sensorPin, HIGH);
pinMode(ledPin, OUTPUT);
Serial.begin(9600);
}
void loop(){
sensorValue = digitalRead(sensorPin);
// If the switch changed, due to noise or pressing:
if (sensorValue == lastTiltState) {
// reset the debouncing timer
lastDebounceTime = millis();
}
if ((millis() - lastDebounceTime) > debounceDelay) {
// whatever the reading is at, it's been there for longer
// than the debounce delay, so take it as the actual current state:
lastTiltState = sensorValue;
}
digitalWrite(ledPin, lastTiltState);
Serial.println(sensorValue);
delay(500);
}

2 projects • 2 followers
Ovaga Technologies Limited was established in Hong Kong in 2014. We sells original, high-quality electronic components, parts and kits.


Comments
Please log in or sign up to comment.