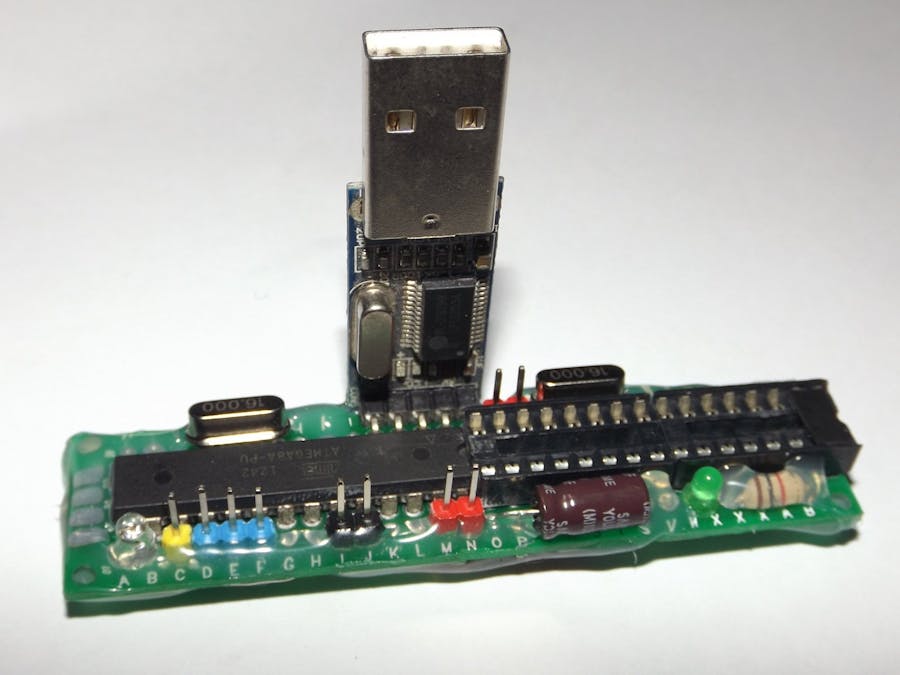
Every time you do a new project with Arduino, do you just buy a new board or rip off your last project to reuse Arduino?
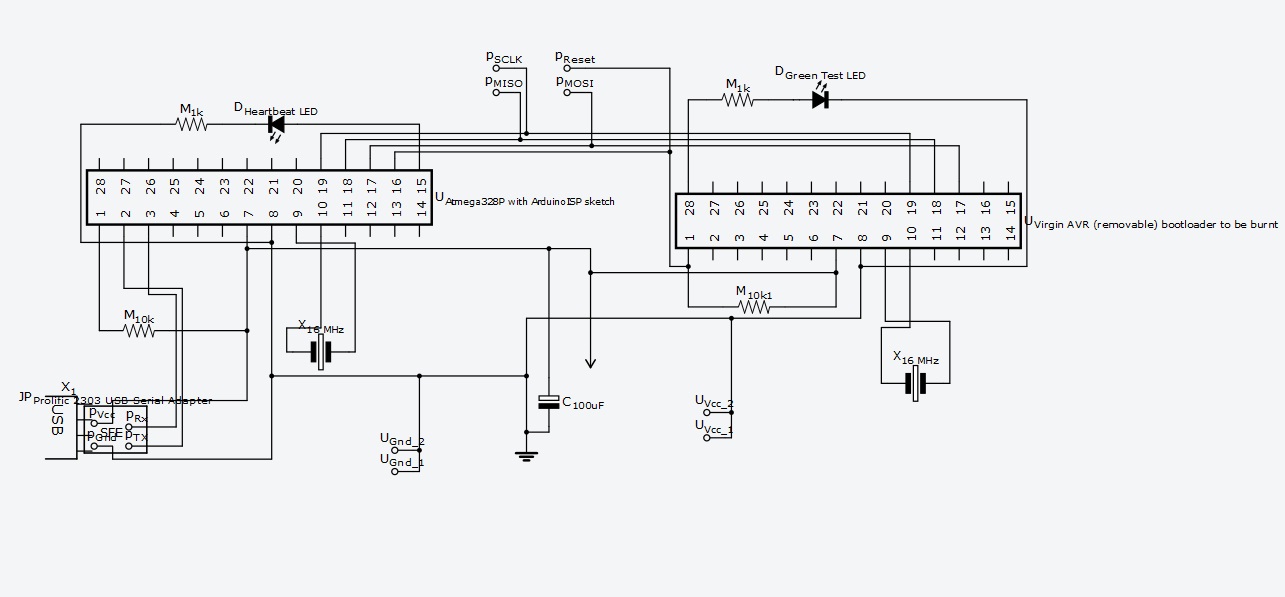
Many of us just don't. Specially for soldered/permanent projects it's not the way to go. Many of us make a clone of Arduino by burning bootloader on virgin Atmega328P/168/8A or Attiny45/85 AVR microcontroller. There is a nice tutorial how to do so on Arduino homepage where an existing Arduino Board is used as ISP (In System Programmer). This project is just a permanent version of that method, a permanent Arduino ISP for plug-n-play burning bootloaders.
Benefits- No lost wire
- Saves time and trouble
- Production ready
- Can burn Arduino code directly into AVRs without bootloader
- Support burning AVRs on breadboard through SPI and Power headers
Step 1: Follow the Arduino ISP Tutorial and first burn a bootloader in a fresh Atmega328P with the help of an existing Arduino Uno board.
Step 2: Now swap the fresh bootloaded Atmega328P with the Atmega328P on Arduino Uno board. We are doing this, because the on board microcontroller already has the sketch/code for Arduino ISP program. Also placing the freshly burnt chip on Uno board will work - no worries.
Step 3: Now plug in the Prolific USB-Serial adapter into computer and install the driver. A new COM port will appear. In my case COM12. Then remove the USB-Serial adapter. (Show com port pic in h/w properties).
Step 4: Next, solder the USB-Serial adapter, IC socket, two 16 MHz crystals, LEDs and SPI+Power pin headers on the protoboard by placing the components on front side and connecting those components with wires on the back side.
Step 5: Finally insulate the back side with Hot Glue, fill the gaps among wires and wait for cooling up to five minutes. Now the Rig is ready. Expand your Arduino family and enjoy the fatherly joy!
Step 1: Place a fresh Atmega328P/168/8A on the IC base of the Rig and connect it the PC/Laptop.
Step 2: Run Arduino IDE, since the mother microcontroller already has the ISP programmer mode code in it, all we need is to do following 3 steps:
- First select the item in the Tools > Board menu that corresponds to the board on which you want to burn the bootloader (for example for Atmega328P select Arduino Uno, for for Attiny45 select it). For clocking either use any internal clock or 16 MHz external clock option.
- The select the Arduino as ISP in the Tools>Programmer menu.
- Finally, use the Burn Bootloader command.


_ztBMuBhMHo.jpg?auto=compress%2Cformat&w=48&h=48&fit=fill&bg=ffffff)


_3u05Tpwasz.png?auto=compress%2Cformat&w=40&h=40&fit=fillmax&bg=fff&dpr=2)
Comments
Please log in or sign up to comment.