Turn your Raspberry Pi into a vending machine to accept credit card payments using Bot Framework and Cortana Skills. Checkout this video.
Bot FrameworkThe Bot Framework is a platform to build, connect, test and deploy intelligent bots. You can use .NET, Node.JS and REST to start building bots with Bot Framework.
Here's the link to learn more about the Bot SDK.
Check out my tutorial on Getting Started with Cortana Skills, Bot Framework and Raspberry Pi. It's a gentle introduction and step by step tutorial to run Bot Framework on Raspberry Pi.
Request PaymentLearning more about Bot Framework, I found out that you can easily request for payment. Set up your bot to allow users to purchase items, then it can request payment by including a special type of button within a rich card. Here's the article:
There are few prerequisites before requesting for payment using Bot Builder SDK.
1. Register your Bot with Bot Framework
2. Setup a merchant account via Stripe
I followed the instructions outlined here. It's straightforward and easy to follow.
If you watch the video, there are 3 parts of the payment process. First, the bot sends payment request (once you click the buy button). Second, the user will have to sign in to their Microsoft Account and provide credit card information; if the bot requested for shipping and contact information, it will prompt as well. After the user completes the payment, the bot processes the callback that it receives and sends the command to the candy dispenser.
Our bot must implement the First Step and Last Step of this process; Second step takes place outside the context of your bot. So, you don't receive any credit card information, Microsoft Wallet handles all that for you.
Raspberry PiRunning the Bot Builder SDK on Raspberry Pi is easy. You need to install NodeJS. There's an NPM package for the Bot Builder SDK.
Here's a sample application that Microsoft provides that you can test out on Raspberry Pi.
You have to open a port outside your network so Cortana and Bot Framework can reach it. The easiest way to accomplish this is to use Ngrok.
Here are steps to configure it. Ngrok offers the ability to create a secure tunnel to your localhost environment. You have to install Ngrok.
To install, go to https://ngrok.com/:
Since we're running the bot in Raspberry, we need to get an endpoint to use by running tunneling software. To use ngrok to get an endpoint, from a console window type:
ngrok http 3978
This will configure and display an ngrok forwarding link that forwards requests to your bot hosted on port 3978. The URL to the forwarding link should look something like this: https://0d6c4024.ngrok.io.
Append /api/messages
to the link, to form an endpoint URL, it should look something like this: https://0d6c4024.ngrok.io/api/messages.
The endpoint URL is what you would use to register your bot.
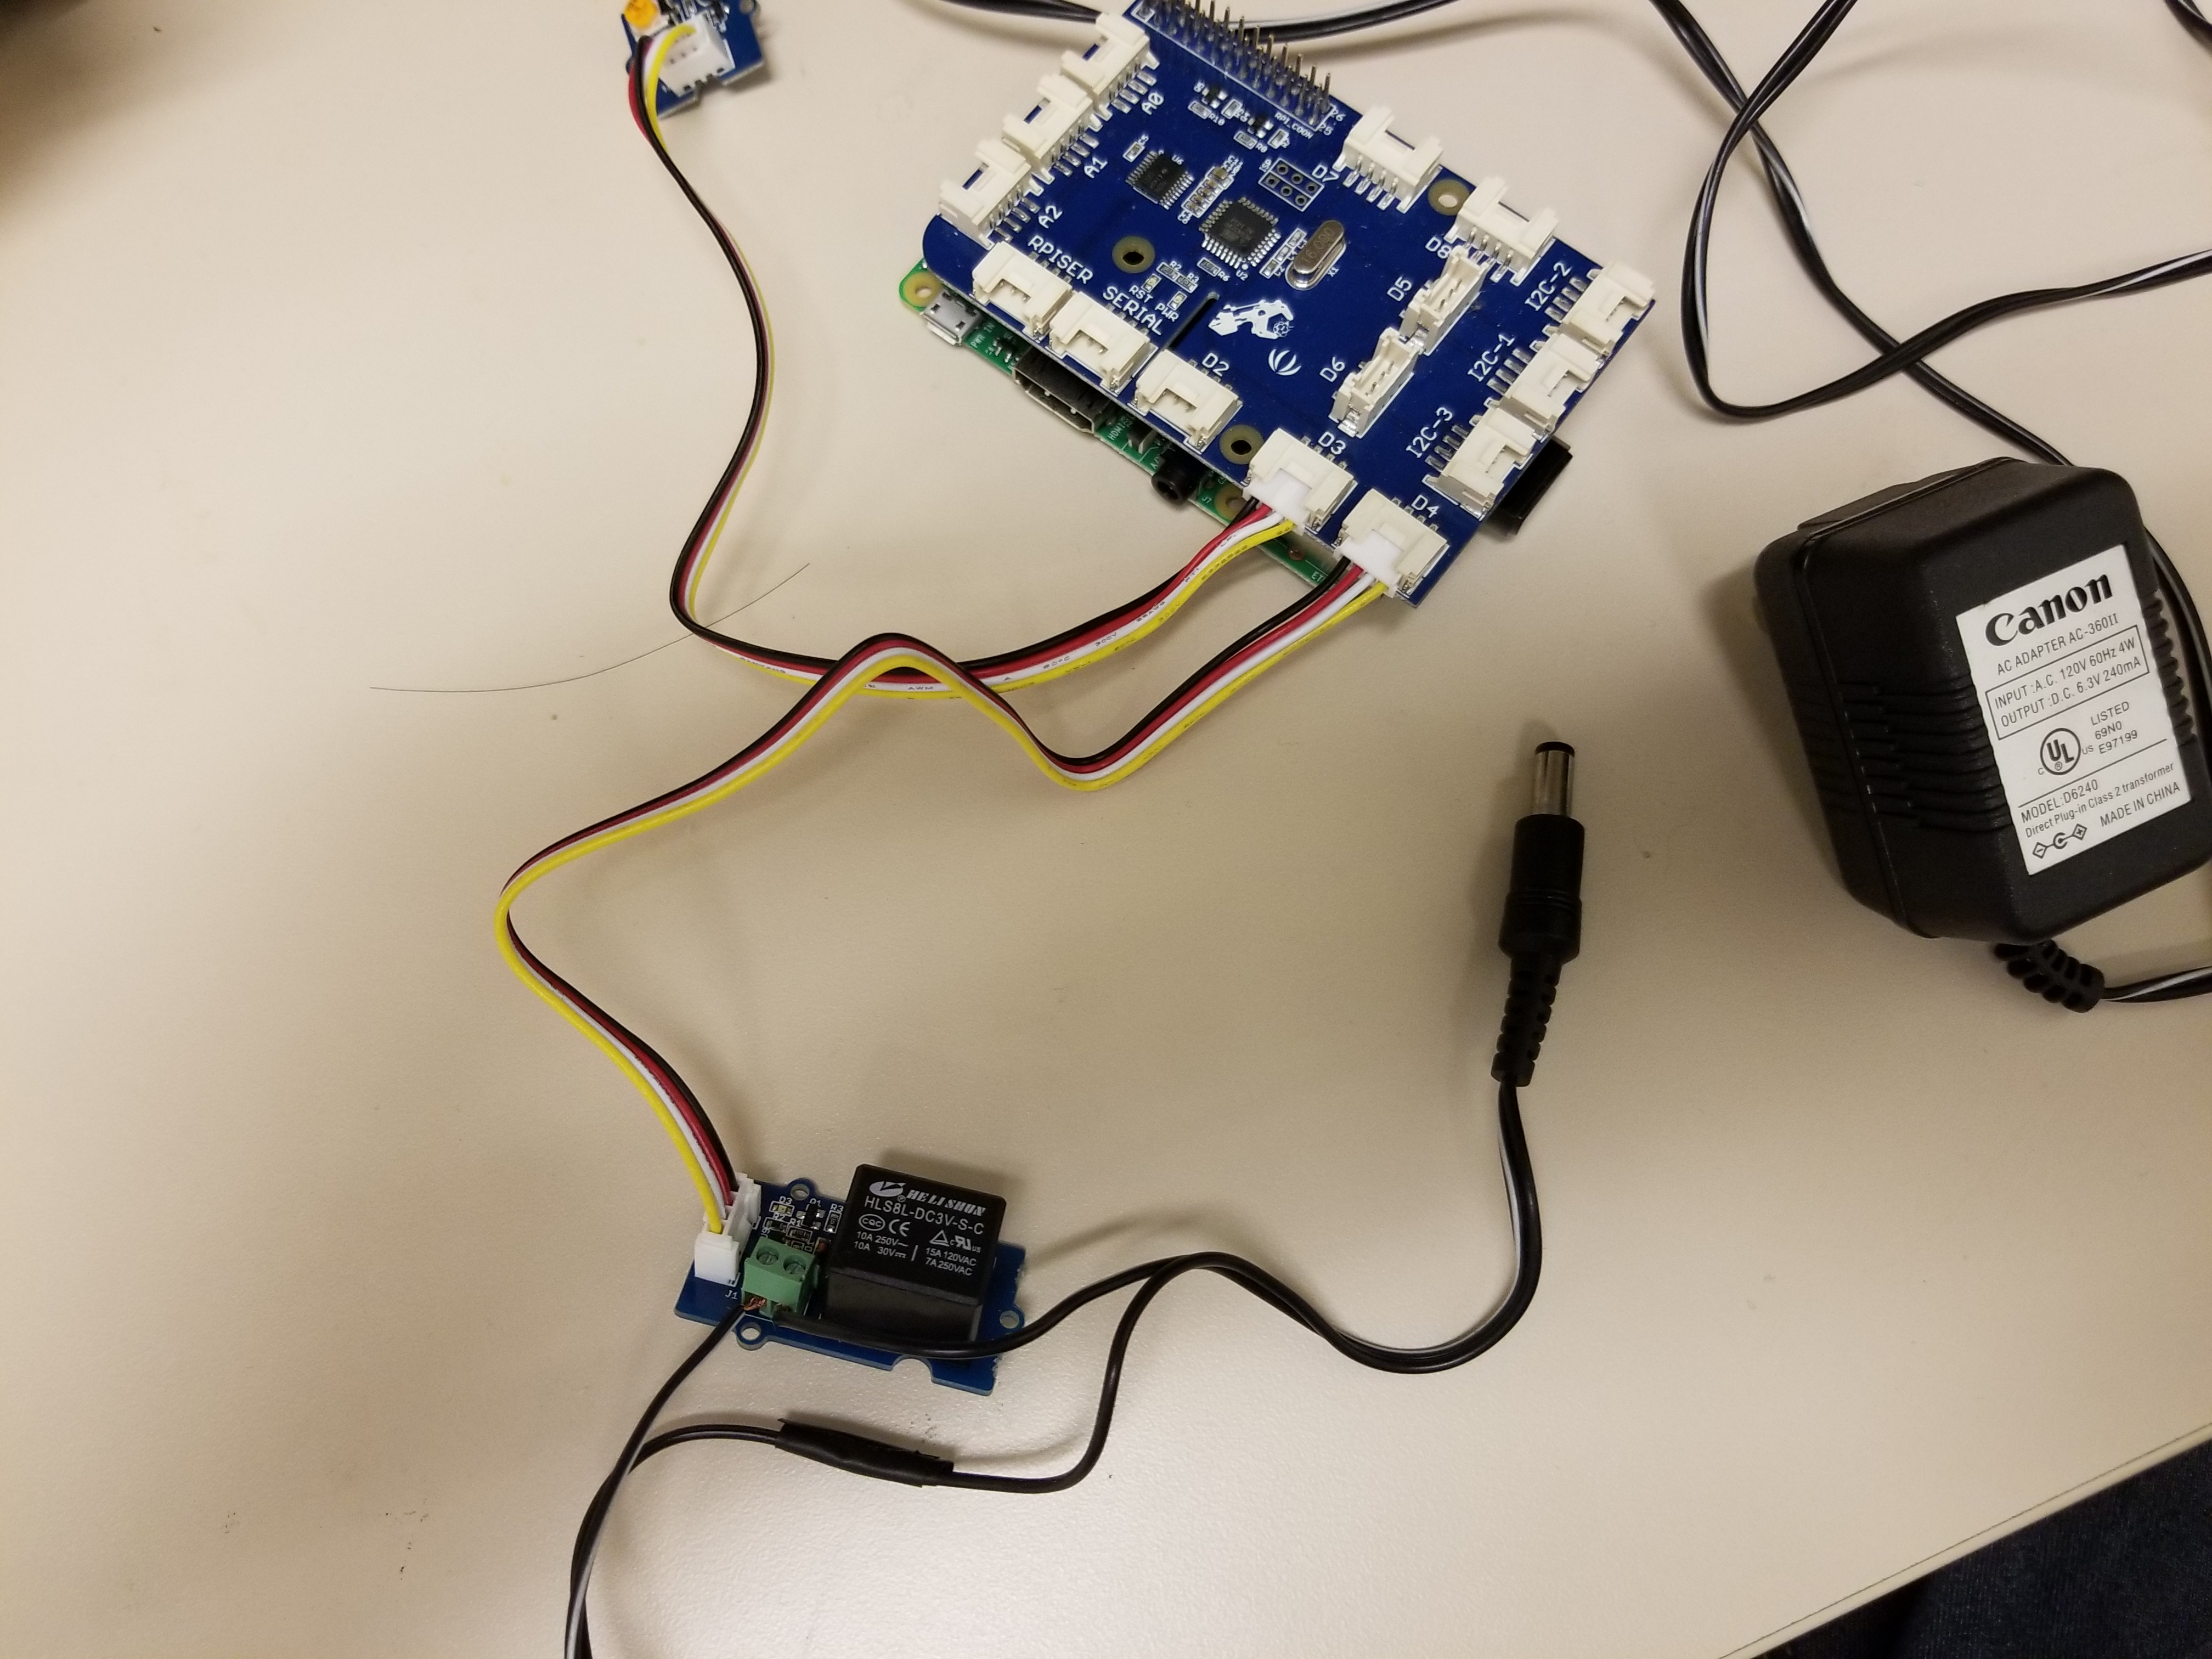
GroveRelayI am using GrovePi and GroveRelay to connect the Raspberry Pi to the candy dispenser.
GrovePi is an electronics HAT board to connect different Grove sensors that can be used to program, monitor, control, and automate devices. In this case, I just want to turn on/off the candy dispenser using a relay. It's like tapping the switch to the candy dispenser when a signal is received.
The Grove-Relay is digital normally-open switch. You can control circuit of high voltage with low voltage. There is an indicator LED on the board that lights up when the controlled terminals get closed. The Candy Dispenser needs 6V on the controller, so I split up the positive wire on the adapter and connected it to the relay.
Let's try to put this together.1. Register your bot, create a Stripe account, register to Microsoft Seller Center. I followed this example here.
2. Setup your Raspberry Pi. I have instructions how to setup Raspberry Pi on this article: Getting Started - Cortana Skills, Bot Framework, RaspberryPi.
3. Connect Grove Pi and Grove relay. In order to get Grove Pi running, clone the GitHub repo https://github.com/DexterInd/GrovePi. Go to the Grove relay python and test if it's working.
Connect the Grove relay to digital port D4. Once you run the app, It should turn on/off the Grove relay.
4. Connect your Candy Dispenser to Grove Relay. (optional)
5. Update your bot after getting ngrok to run and the URL is setup. See below:
6. Clone this repository. And run npm install.
Here are the dependencies. Notice the Bot Builder SDK is just a package.
"dependencies": {
   "base64url": "^2.0.0",
   "bluebird": "^3.5.0",
   "botbuilder": "^3.8.2",
   "dotenv-extended": "^1.0.4",
   "lodash": "^4.17.4",
   "node-grovepi": "^2.1.1",
   "restify": "^4.3.1",
   "stripe": "^4.15.1",
   "uuid": "^3.0.1"
 }
7. Update update the following .env
settings shown below:
 # Bot Framework Credentials
MICROSOFT_APP_ID=
MICROSOFT_APP_PASSWORD=
PAYMENTS_LIVEMODE=false
PAYMENTS_MERCHANT_ID=merk_123
PAYMENTS_STRIPE_API_KEY=stripe_123
8. Run the app
>> npm run start
9. Now setup the channels. connect to channels, by default Skype and Web chat is enabled. Click on Cortana Channel:
Fill in Display Name, Invocation name (must be unique and also easy to say), Description then click Save.
10. Install Cortana Digital Assistant for Android. Use same credentials as you login to Bot Framework. Checkout this video.
Feel free to ask questions if you're stuck. If this project interested you in learning more about Cortana, Bot Framework, NodeJS and Raspberry Pi, please click 'Respect project' button and follow me. Stay tuned, we'll work on more projects related to this.


Comments
Please log in or sign up to comment.