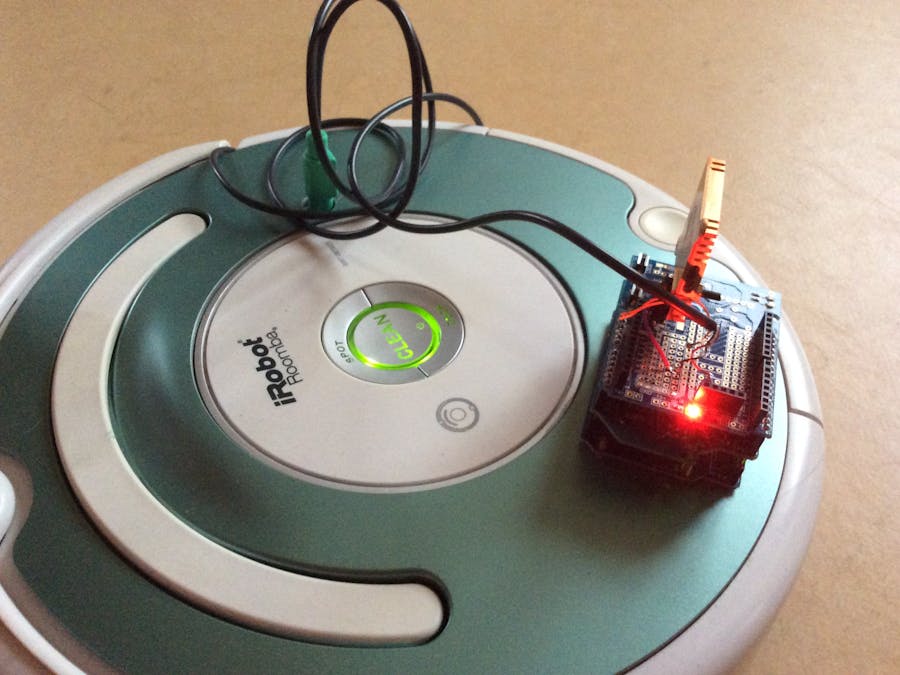
This project is about a Roomba(robotvacuum) which is controlled by an Arduino, which is connected(via WiFi) to a Raspberry Pi 2 with Windows 10 for IoT, which shows for example the battery level and other sorts of data. On the RPi2 you can start the cleaner, or if you want some fun, connect your xbox controller and race around your house while cleaning! The data is also uploadable to Windows Azure, and can be downloaded by an smartphone app.
Roomba ------UART ---- Arduino ----WiFi ------- RaspberryPi (------ Internet ----- The Cloud)
*/For the Windows 10 for IoT challenge: I really appreciate it if you would check out my project. I know I am a little bit late, but I was on vacation untill yesterday and have been thinking all the time about it. /*
Preparing the Roomba- First get off the greenish plate at the top with a screwdriver
- You will see a connector at the top of the robot:
ONLY IF YOU THINK YOU CAN DO IT!!!!
If needed repair the battery:
- Remove the plate at the underside of the Roomba
- Remove the battery
- Take off the yellow plastic
- Use a multi-meter to test which cell/cells is/are dead
- use a hobbyknife to remove the sticky paper on the sides of the battery
- Use some other tools to remove the wire from the battery
- Get your new battery
- Solder the new battery in the old battery(Make sure to solder it in the right direction)
- Use a lot of duct tape to wrap it in, to keep it safe.
You need to add a WifiShield to your Arduino and some basic wires and a linear voltage regulator to step down the voltage from 14-20 volts to 5v.
- Get an old mouse, with a ball ( :P ) and cut the wire so you have the green connector. Now remove the plastic pin from the middle or it wont fit into the Roomba.
- Wire the connector to the Arduino:
My final setup:
- Download the code from GitHub.
- Open the Arduino Code in the Arduino IDE
- Change the SSID and the Password to fit your situation
- Make sure the Arduino is disconnected from the Roomba.
- Upload the code to your Arduino.
- Now you can connect the Arduino to the Roomba
- The booting time of the Arduino will take 20-30 seconds
- Connect a keyboard, a mouse and a internet connection to it.
- Set up your Raspberry Pi installation as stated here.
- Open the .sln(solution) from the RaspberryPi folder in Visual Studio 2015 (on a Windows 10 pc!)
- Use an IP-scanner, such as Advanced IP Scanner , to detect the correct IP address of the Arduino
- Go to MainPage.xaml.cs, line 30 and change the IP to your IP.
- Run the code on your own pc by clicking on the "Local Machine" button or by executing "RaspberryPi.exe" from the "bin/Release/x64" folder.
- Or run it on the Raspberry Pi by selecting "ARM" in the drop-down and then "Remote machine". To further get info check out the example project.
- To set it as a startup application, visit this page.
The screen you will see after "logging" in:
The AutoControl-feature uses a smart way to get the Roomba to seek its dock, but when you use the control fields when it is cleaning, it will fail.
Sometimes the Time is not correctly set.
If the Roomba is currently working, when you used the Control! buttons, you need to press one of the buttons to stop the Roomba, and click again to start that mode.
The XBOX controller Feature is not yet implemented, this will be done somewhere in the next week. (I had to repair the battery twice...)


_ztBMuBhMHo.jpg?auto=compress%2Cformat&w=48&h=48&fit=fill&bg=ffffff)


Comments
Please log in or sign up to comment.