Hardware components | ||||||
_PnKPri8a6q.jpg?auto=compress%2Cformat&w=48&h=48&fit=fill&bg=ffffff) |
| × | 1 | |||
Software apps and online services | ||||||
 |
| |||||
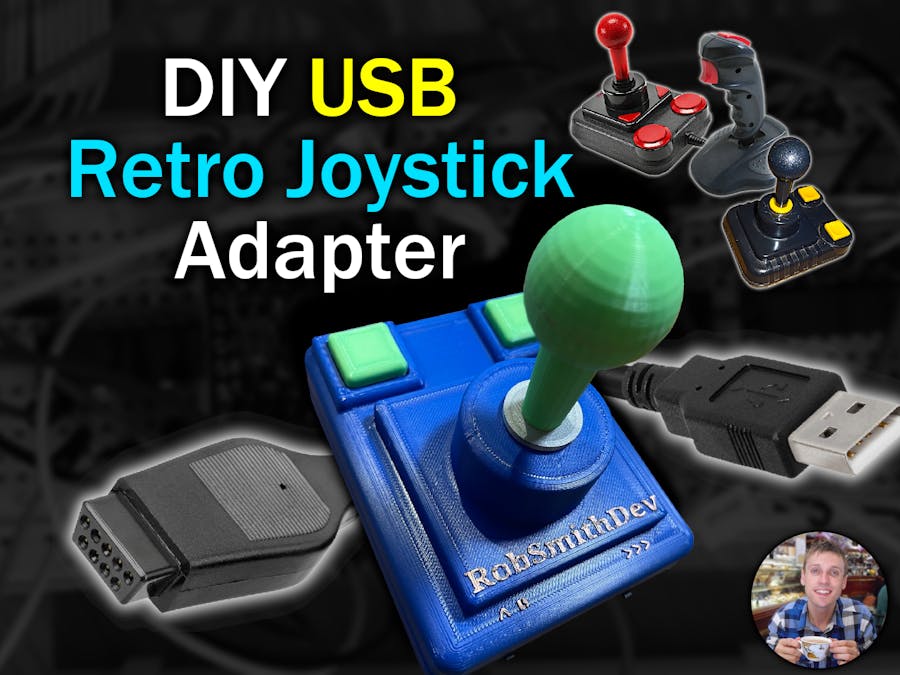
This is a follow-on from my "Can I Make My Own Retro 3D Printed Joystick" video. In this video I show how to make an adapter so these common DB9 style joysticks can be connected to a modern PC via USB. Once you understand how it works it is easy to see how you could support lots more features than a few buttons and four directions.
See the video description for full details.
/***********************************************************************************
 * Simple DB9 Joystick Adapter Copyright(C) 2022 RobSmithDev
 *
 * For more information see the video at https://youtu.be/v05jIFji7xw
 *
 * https://robsmithdev.co.uk
 * https://www.youtube.com/c/RobSmithDev
 * https://www.patreon.com/RobSmithDev
 *
 * This project is designed to be used with an Arduino Micro (ATMega32U4)
 * and requires the ArduinoJoystickLibrary by Matthew Heironimus
 * available at https://github.com/MHeironimus/ArduinoJoystickLibrary
 *
 ************************************************************************************
 *
 */

#include <Joystick.h>

// Define the pins we're using for the various buttons
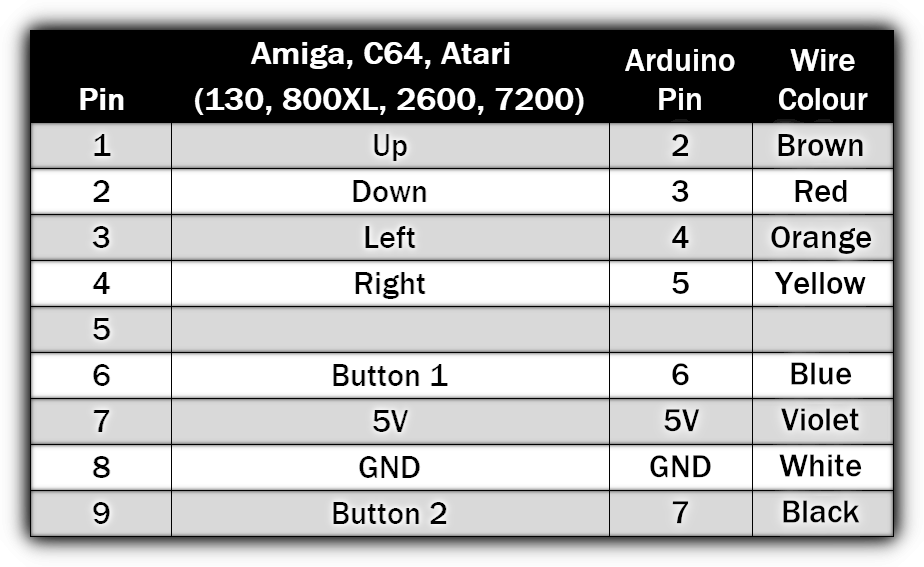
#define JOY_UP        2
#define JOY_DOWN      3
#define JOY_LEFT      4
#define JOY_RIGHT     5
#define JOY_BUTTON1   6
#define JOY_BUTTON2   7

// Create the Joystick class, with just the features we're using
Joystick_ joystick(JOYSTICK_DEFAULT_REPORT_ID, JOYSTICK_TYPE_JOYSTICK,
                   2,      // Number of buttons
                   0,      // Number of Hatswitches
                   true,   // X axis
                   true,   // Y axis
                   false,  // Z-Axis
                   false,  // Rotate X-Axis
                   false,  // Rotate Y-Axis
                   false,  // Rotate Z-Axis
                   false,  // Rudder
                   false,  // Throttle
                   false,  // Accelerator
                   false,  // Brake
                   false  // Steering
                   );

// To hold the current state
char currentDirectionX = 0;
char currentDirectionY = 0;
bool currentButton1 = false;
bool currentButton2 = false;


void setup() {
  // put your setup code here, to run once:

  pinMode(JOY_UP, INPUT_PULLUP);
  pinMode(JOY_DOWN, INPUT_PULLUP);
  pinMode(JOY_LEFT, INPUT_PULLUP);
  pinMode(JOY_RIGHT, INPUT_PULLUP);
  pinMode(JOY_BUTTON1, INPUT_PULLUP);
  pinMode(JOY_BUTTON2, INPUT_PULLUP);

  // Initialize Joystick Library.
  // We pass FALSE here, so we can control when the data is sent
  joystick.begin(false);

  // Set the range of movement - they are digital so -1, 0 or 1
  joystick.setXAxisRange(-1, 1);
  joystick.setYAxisRange(-1, 1);
}


// Main loop.  This could be done with an array checking each of the pins, but this is more readable.
void loop() {
  // put your main code here, to run repeatedly:

  // Track if anything was updated
  bool changed = false;

  // Check the Y direction
  char nextDirectionY = 0;
  if (digitalRead(JOY_UP) == LOW) nextDirectionY = -1; else
    if (digitalRead(JOY_DOWN) == LOW) nextDirectionY = 1;

  // Check the X direction
  char nextDirectionX = 0;
  if (digitalRead(JOY_LEFT) == LOW) nextDirectionX = -1; else
    if (digitalRead(JOY_RIGHT) == LOW) nextDirectionX = 1;

  // Apply the Y change
  if (nextDirectionY != currentDirectionY) {
    currentDirectionY = nextDirectionY;
    joystick.setYAxis(currentDirectionY);
    changed = true;
  }

  // Apply the X change
  if (nextDirectionX != currentDirectionX) {
    currentDirectionX = nextDirectionX;
    joystick.setXAxis(currentDirectionX);
    changed = true;
  }

  // Check the buttons
  bool nextButton1 = digitalRead(JOY_BUTTON1) == LOW;
  bool nextButton2 = digitalRead(JOY_BUTTON2) == LOW;

  // Button 1
  if (nextButton1 != currentButton1) {
    currentButton1 = nextButton1;
    joystick.setButton(0, currentButton1);
    changed = true;
  }

  // Button 2
  if (nextButton2 != currentButton2) {
    currentButton2 = nextButton2;
    joystick.setButton(1, currentButton2);
    changed = true;
  }

  // And if anything changed send a report to the computer
  if (changed) joystick.sendState();

  // We don't need to worry about debouncing if we delay by this amount.
  delay(10);
}
11 projects • 21 followers
I'm a Youtuber, programmer, electronics hobbyist and Amiga/Retro Fan. Creator of DrawBridge FloppyBridge DiskFlashback Retro.Directory


Comments
Please log in or sign up to comment.