RobSmithDev
Published © CC BY-NC-SA

Make Your Own 3D Printed Retro Joystick

With the price of retro going through the roof, I ask the question, can I 3D print my own!?

IntermediateFull instructions provided12 hours257
Make Your Own 3D Printed Retro Joystick

Things used in this project

Hardware components

RS232 Data Cable
×1
C-Clips 6.4mm (Box of various sizes)
×1
Aluminium Rod 8mm x 100m (T6)
×1
Microswitches (box of 10)
×1
SPDT Slide Switch
×2
Spring 1.2mm wire di, 15mm outer, 30mm
×1
Cable Ties (3.6mm x 100mm)
×1
Threadded Inserts (M3) (9 needed)
×1
Pan-Head Machine Screws (M3 x 20mm) (9 needed)
×1
Rapid Fire: 1k and 10k Resistor
×1
Rapid Fire: Electrolytic Capacitor (4.7uF)
×1
Rapid Fire: 10nF Ceramic Capacitor
×1
Rapid Fire: NE555 Timer
×1
Rapid Fire: 8-Pin DIP Socket
×1
Rapid Fire PCB
×1

Hand tools and fabrication machines

3D Printer (generic)
Junior Hacksaw (With metal cutting blade)
Wire Stripper
Wire Sleeve Cutter

Story

Read more

Custom parts and enclosures

3D Print Files

Schematics

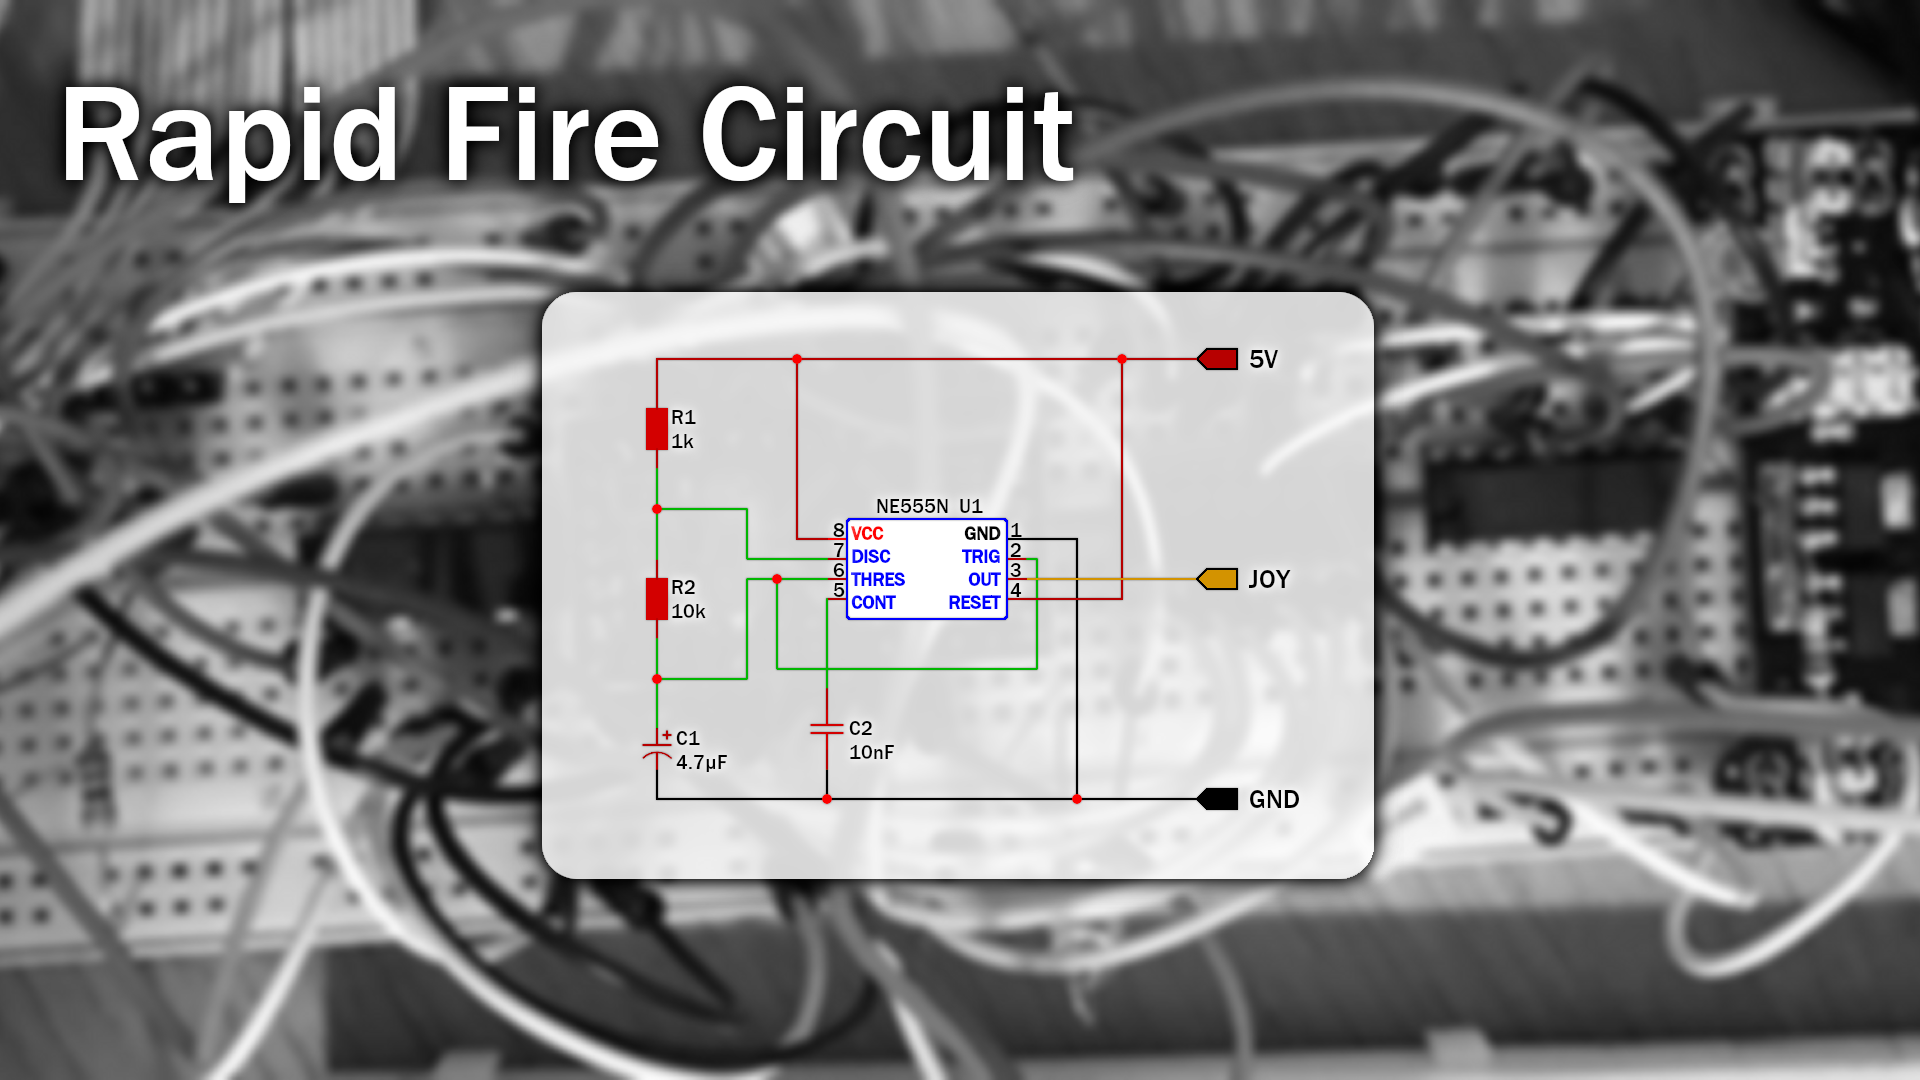
Rapid Fire Schematics

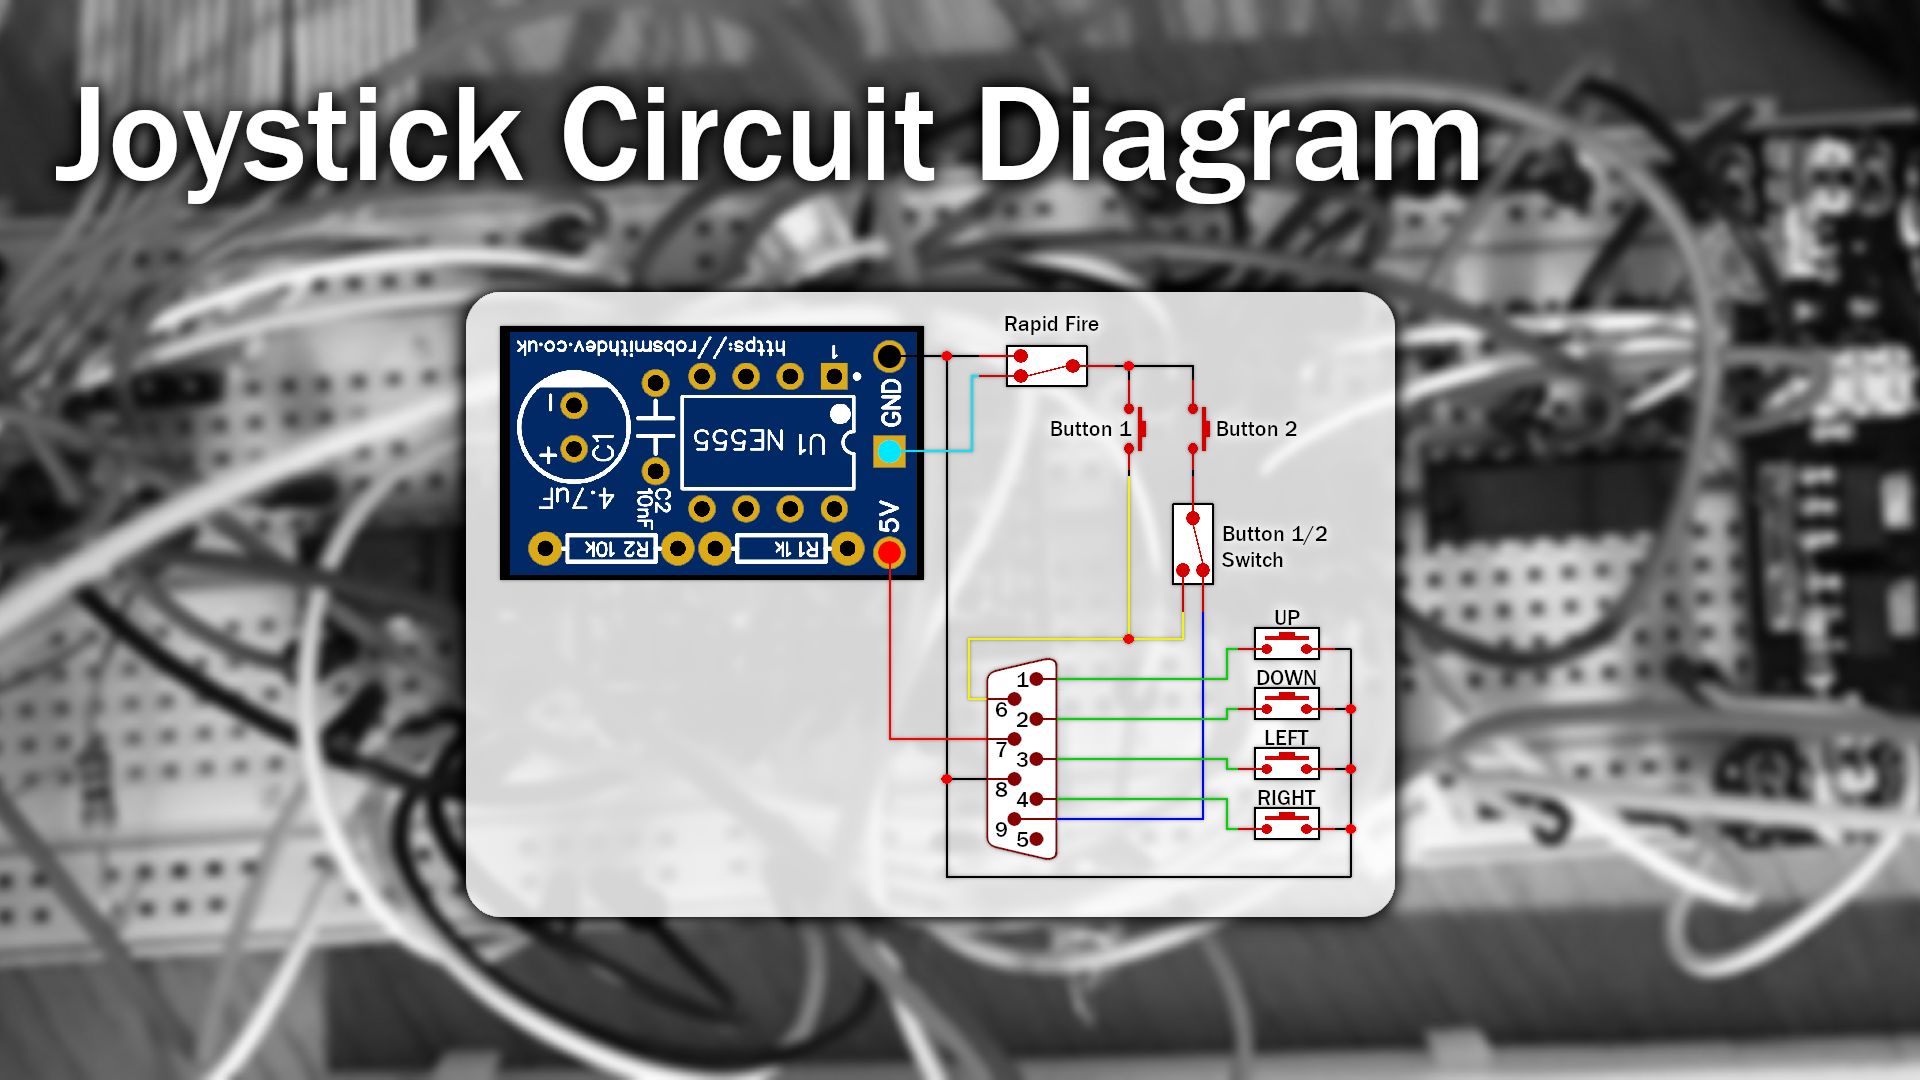
Joystick Wiring

Credits

RobSmithDev

RobSmithDev

11 projects • 21 followers
I'm a Youtuber, programmer, electronics hobbyist and Amiga/Retro Fan. Creator of DrawBridge FloppyBridge DiskFlashback Retro.Directory

Comments