DSTR Hackathon Sponsored by Texas Instruments and Texas A&M University
MissionTo utilize the DSTR robot and design and build a custom solar tracking unit to recharge the on-board battery system. The only stipulation was to leave the suspension as is and not interfere with it so as to keep the maximum articulation of the legs.
Design Phase: From the beginning of this Hackathon we wanted to maintain a simplistic construction. We designed our hack utilizing a small solar panel, an upgraded battery pack, and 3-D printed parts. We wanted to keep the component lightweight, durable, and scalable, so we decided to go with a design that allowed tracking in the vertical direction as well as the horizontal direction. Our solar panel would sit on top of the robot and have a DC motor at the base of the support system, as well as another DC motor in the center which would be attached to a cross member to rotate the solar panel in the vertical direction. The entire support system would be sitting atop a bearing that was able to spread the weight of the solar panel and support system along the top structure of the robot and keeping the weight off of the motor. We would utilize 3D printed parts for the motor brackets and aluminum, plastic, and other lightweight materials for the rest of the support structure.
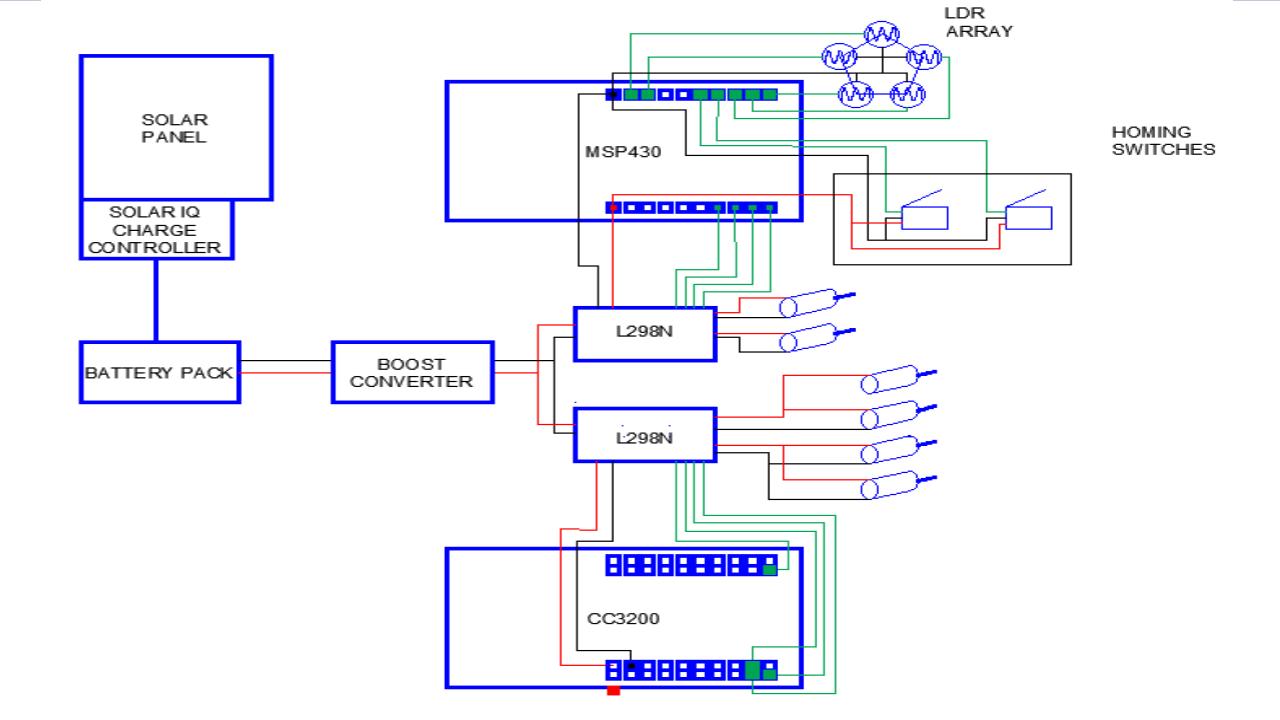
To track the sun we planned on using a simple 3D printed channel with four light dependent resistors placed in a square pattern separated by dividers so that each photoresistor would be pointed to a specific quadrant of the sky. The photoresistors return values to the micro-controller based on the amount of light that they receive. In our code, we would compare the top two values with the bottom two values, and the left two values with the right two values, and this would provide the needed information to determine the best location for the solar panel to point. Please see pictures below.
Front view of support structure:
Rear view of support structure:
This design would, or so we thought, would be lightweight, easy to produce, and straightforward to implement, but as we now know, this would not be the case.
First Implementation Phase: During this phase our team decided to make a couple of changes to the original plan. We did this to maximize our power so as to be able to keep the DSTR Robot running for an extended period of time. We made the decision to go from a 10W solar panel to a 40W solar panel. This massive change in size and weight developed a number of problems for us during the building stage. We made use of PVC instead of aluminum for the support system and we chose to rotate only in the horizontal direction and not the vertical direction. PVC, we thought, would help us keep our build within our budget and be easier to manipulate since our time frame was growing short. Since upgrading to a 40W solar panel we decided to position the solar panel so that it would not need to rotate in the vertical direction, but it would still receive sunlight no matter where the sun was in the sky. The upgraded battery pack did not meet advertised specifications, thus we utilized the stock battery pack of the DSTR robot to power our tracking system as well as the solar tracking system. We also had to upgrade our DC motor so that it would be able to rotate the weight of the solar panel and support system. All of these changes culminated in a DSTR Robot that was top heavy and not up to the quality that our team was striving for. Please see the photo of the first implementation below.
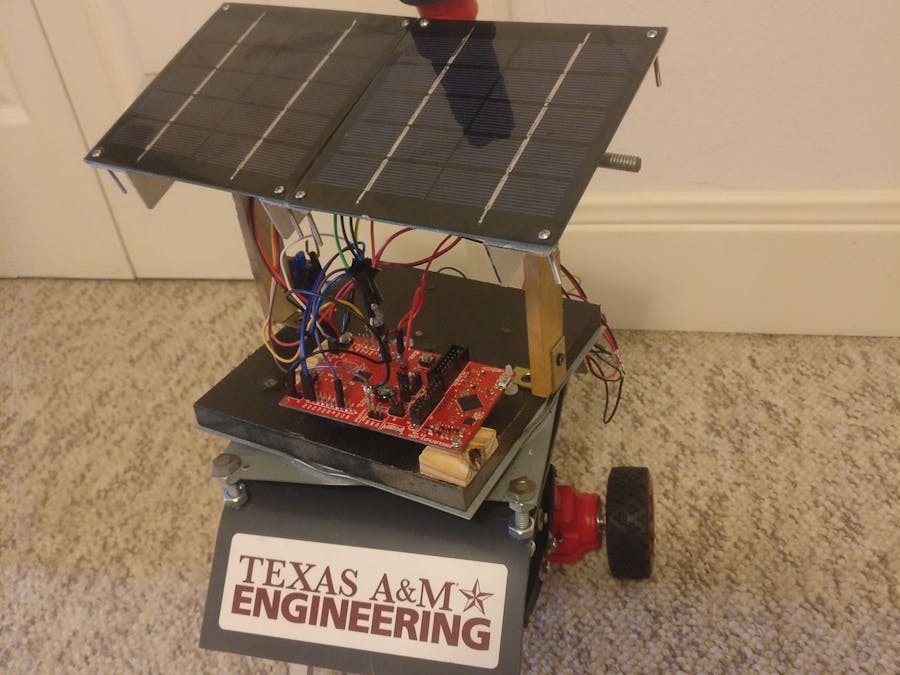
Second Implementation Phase: After the first implementation phase our team was directed to change our solar panel out for two smaller 1.25W solar panels. We moved back to a two axis rotational system since the panels were smaller and less flexible, we were able to drastically reduce the size of our support structure, and exchange our one DC motor out for two servo motors. Instead of a single “stem” approach, we have two supporting arms holding up the solar cells on a large bearing which distributes the weight. Throughout this entire process we have kept our solar tracking channel which will work the same as described in the design phase. See pictures below for completed build.


_t9PF3orMPd.png?auto=compress%2Cformat&w=40&h=40&fit=fillmax&bg=fff&dpr=2)


Comments
Please log in or sign up to comment.