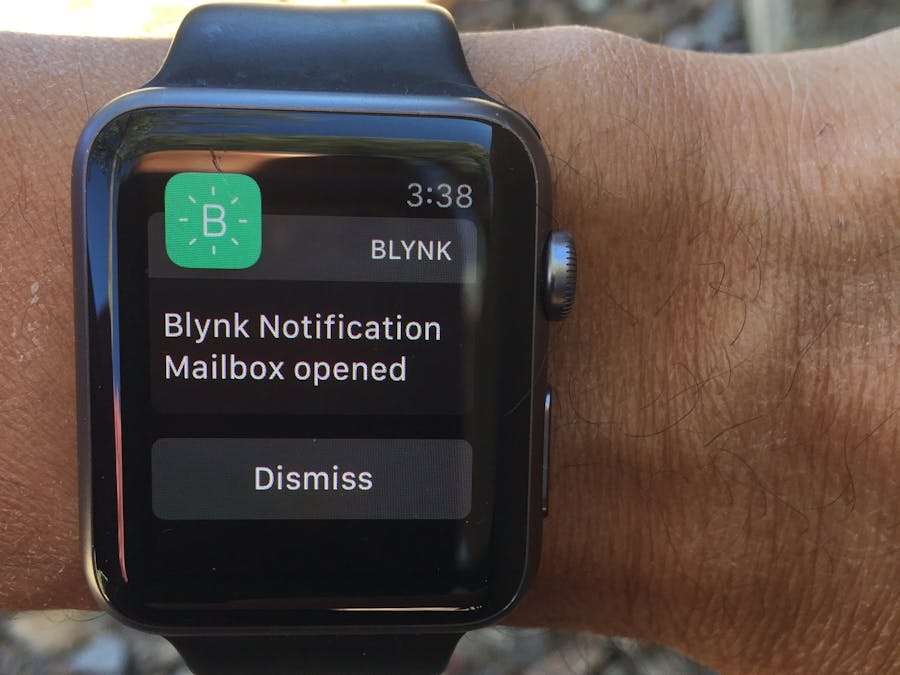
This is a simple system that will notify you when your mailbox has been delivered. You get a notification for the first opening (mail delivered) and the second (mail collected). These notifications will be sent to your phone using both Blynk and SMS text. If you have an Apple Watch, the notification will be displayed on the watch as well. The Blynk dashboard provides more information and options, including the date and time the mail was delivered, what the operating hours are, and status LEDs.
Since the wiring was already in place for my home I designed this with a wired connection to my mailbox using a standard magnetic reed switch such as that found in security systems. Any normally closed switch can be used to sense when the mailbox is open. If your installation requires a normally open switch instead, there is a single define in the code that allows you to change the sense.
NOTE: this describes Version 2, which includes new fabricated PCB you can purchase and new software which better protects against false alerts due to EMI (electromagnetic interference, e.g. lightning) and eliminates extraneous notifications.
HardwareThe hardware is quite simple.
A WeMOS D1 R2 Mini (ESP8266) is used as the controller. There are just 3 connections:
- the reed switch (which should be normally closed (e.g. magnet is engaged)), and
- a status LED
- 5V DC power
The system requires a 5V 1A DC power supply.
Earlier versions of this system suffered from EMI (electromagnetic interference) when lightning stuck nearby (a common occurrence during the summer monsoons here) due in part to a long wire out to the mailbox acting as an antenna. In Rev B hardware (and Rev 2 software), this issue is handled sensing the switch differently to distinguish an open event from EMI.
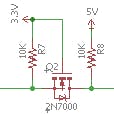
Moreover, the lightning-caused high-voltage EMI over time caused the input port to go deaf requiring replacement of the MCU. Rev B hardware insulates the ESP8266 input port from the external line with a diode and a MOSFET; these parts have much higher voltage tolerances are easier and cheaper to replace than the ESP8266 MCU module.
PCBs may be ordered from PCBs.io here. I have some boards left from my fab run; DM me if you you'd like one for $7.00 (PayPal) including US First Class shipping. Offer good while supplies last.
Blynk User InterfaceThe user interface is shown below:
- The "READY" LED (green) indicates that the mailbox is currently closed. Note that the ready light will not be on outside operating hours (see below).
- The "OPENED" LED (red) indicates that the mailbox has been opened.
- The "CLLCTD" LED (blue) indicates that the mail has been collected. This is a heuristic: it is activated if the mailbox is opened again after 10 minutes.
- "DATE" and "TIME" indicate the date (YYYY.MM.DD) and time (24 hr) the mailbox was first opened. If the mailbox is opened multiple times, the date & time do not change; you must reset the system (see below) to clear the date & time and reset the indicators.
- The "STOP/START" field is used to set operating hours. The default is 1100 to 2000 hours.
- "IGNORED" indicates how many times the mailbox was opened outside operating hours.
- The "RESET" button resets the LEDs and the date & time displays. Note that the system will reset itself automatically at midnight each day.
- The "REBOOT" slider is used to reboot the system. To reboot, slide the switch all the way to the right. You have 5 seconds to change your mind and slide it back to the left. The "READY" LED will extinguish, a message about canceling the reboot will appear in the DATE and TIME displays, and the system will reboot after a 5 second delay. Note that this mechanism can also be used to ensure the end-to-end system is running: if the reboot message comes up this indicates the system is active - just quickly slide the switch back to the left.
Note that all of the built-in delays and timing heuristics can be easily personalized by changing the C++ preprocessor defines in the sketch.
FirmwareThe C++ code uses the Blynk service. You must first download the Blynk app for your smartphone (iOS or Android) and sign up for the service. You can then clone this app from within Blynk using the QR code below.
The code uses the Blynk Library, my NTP (Network Time Protocol) clock library, and Paul Stoffregen's Time Library. (If you are curious, see the comments in the code for why I chose to not use the Blynk RTC widget).
The following code changes need to be performed:
1. Change the "auth", "SSID", and "password" strings for your app and network in the file "locals.h". (See the Blynk getting started guide.)
2. Set the SMS email address string to the address your carrier uses to send an SMS to your phone.
3. Change the timezone (UTC offset) in the NTP initialization function "NTP_UTC_Timezone" for your locality. See the "WorldTimezones.h" header file in the NTPRTC library.
The code may be updated using OTA (Over The Air) updates. You can still upload the code in the traditional way, but after the firmware has been uploaded for the first time, you can upload subsequent updates over WiFi. See the ESP8266 OTA documentation for more details.
Important: access to the current time is essential to the operation of the system. Therefore, you must have Internet access for the NTP library to work.
EnclosureThe STL files to 3D print the enclosure are included in the GitHub repo: one file for the base and one for the lid. The wiring I piggybacked onto to reach my mailbox happens to come into a patch panel, so I have an RJ45 jack opening in my enclosure, which is what you see in the picture.
In your slicing software you should turn on support for the RJ45 opening. Just about any filament is fine - I used PLA with a layer height of 0.4mm. The HEX address you see on the label is the unit address for OTA updates.
ImplementationAssembly
- 3D print the enclosure base and lid.
- Assemble the discrete components to the PCB.
- Solder the female headers that come with the WeMOS to the PCB.
- If using the RJ45 connector, punch down the switch connection wires into the RJ45 keystone connector, leaving enough wire to comfortably reach the PCB. Then insert the RJ45 into the case.
- Solder the connection for the LED and use some 2mm shrink wrap tubing to protect the leads from shorting (or electrical tape if you don't have this).
- Mount the LED. The hole is sized for a 3mm LED. If the fit is too loose, then secure the LED to the case with some UV-curable resin (preferred) or hot melt glue. If you don't use a green LED, you should recalculate the value of the current limiting resistor to match the Vf of your LED. If you don't know what this means, just use a green LED.
- Solder the power wires to the DC power jack and fasten to the case.
- Solder the wires to the PCB: power, switch, and LED, being sure to observe the correct polarity (marked on the PCB).
- Insert the WeMOS into the headers. Note: You can mount the PCB to the enclosure now, but you will probably find it easier to program it first (see below).
- Fasten the board to the mounting post in the base of the enclosure.
- Attach the lid using the flat head screws.
Placing the Sensor
- It is wise to do some testing using a multimeter (continuity mode) to properly place the two halves of the magnetic reed switch. I temporarily fastened the magnet to the mailbox door and experimented with various placements of the wired contact to ensure that the door could be partially open and still read as closed while opening most (but not all) of the way would read as open.
Programming
- Ensure the aforementioned changes have been implemented in the file "locals.h".
- For the first upload, connect a microUSB cable to the WeMOS.
- In the Arduino IDE, select the "
LOLIN(WeMos) D1 R2 & mini" board.
Board settings:
- CPU Frequency: 160 MHz
- Flash Size: 4M(1M SPIFFS)
- Upload Speed: 921600
- Port: <your USB serial port>
The WeMOS has an automatic system for enabling the flash sequence so no reset or flash buttons need to be pressed. After the sketch is uploaded, the LED on the enclosure will illuminate when all of the setup and initialization steps are complete.
While the serial cable is still connected, open the serial port (115200 baud) and reset the WeMOS. The HEX address you need to do OTA updates will be printed. Save this for future use. At this point, you can launch the Blynk app and run the notifier app dashboard.
Copyright Notice
Copyright 2018 Rob Redford
This work is licensed under the Creative Commons Attribution-ShareAlike 4.0 International License.
To view a copy of this license, visit BY-SA 4.0


Comments