


Hardware components | ||||||
_ztBMuBhMHo.jpg?auto=compress%2Cformat&w=48&h=48&fit=fill&bg=ffffff) |
| × | 1 | |||
 |
| × | 1 | |||
 |
| × | 1 | |||
 |
| × | 1 | |||
Software apps and online services | ||||||
 |
| |||||
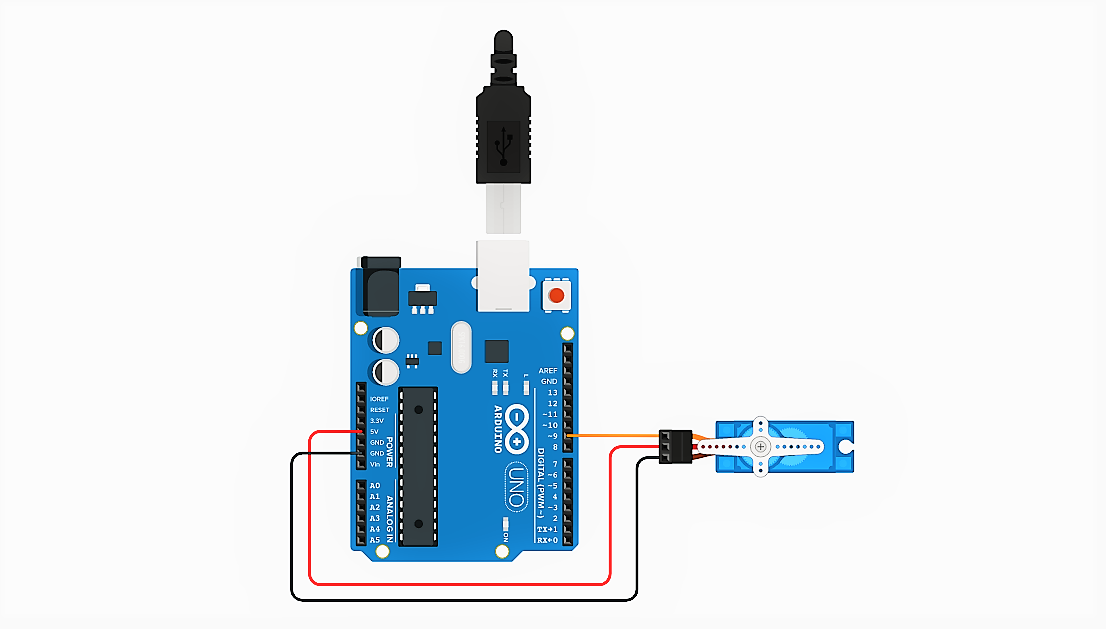
Hello Friends welcome back to Techno-E-Solution, In this Video I'll show you how to "Interface Servomotor With Arduino Uno". For making this project I used a Servomotor SG-90 & Arduino Uno microcontroller. Generally all motors rotate 360 degree but servo motor rotates at 180 degree.The servomotor has two types AC Servomotor & DC Servomotor. A Servo motor is a rotary actuator which rotate the motor in 180 degree.The servomechanism are connected to the motor to rotate it in 180 degree. The servo motor is mainly used in robotics for specific angular movement. The servo motor is used in RC cars for steering.The rotational angle of the servo motor can be controlled by using Arduino.
Here is the complete Video Tutorial :-
If you like this project follow us on :-
YOUTUBE | INSTAGRAM | FACEBOOK | INSTRUCTABLES | DAILYMOTION | HACKSTER |
------------------------------------------------------------------------------------------------------------
NextDFM Software From NextPCB
2 / 4
A PCB Design Problems Detector, An Engineering Solution ProviderImport the Gerber file with one click. No need for complicated file reading steps to review easily and improve efficiency.
Help you quickly familiarize DFM design specifications and production needs to determine whether there are any manufacturing constraints
1 / 3
Features
Make PCB design more standard Prevent the quality flaw
Impedance calculation function and lamination automation
Automatically generate the best puzzle
CAM350 free alternative version
Check Gerber files anytime, anywhere and parse it with one click
Instate Quote and evaluate delivery time Reduce cost and improve benefit
these are advantage comparing to Eagle and Altium


Comments
Please log in or sign up to comment.