How to make one?
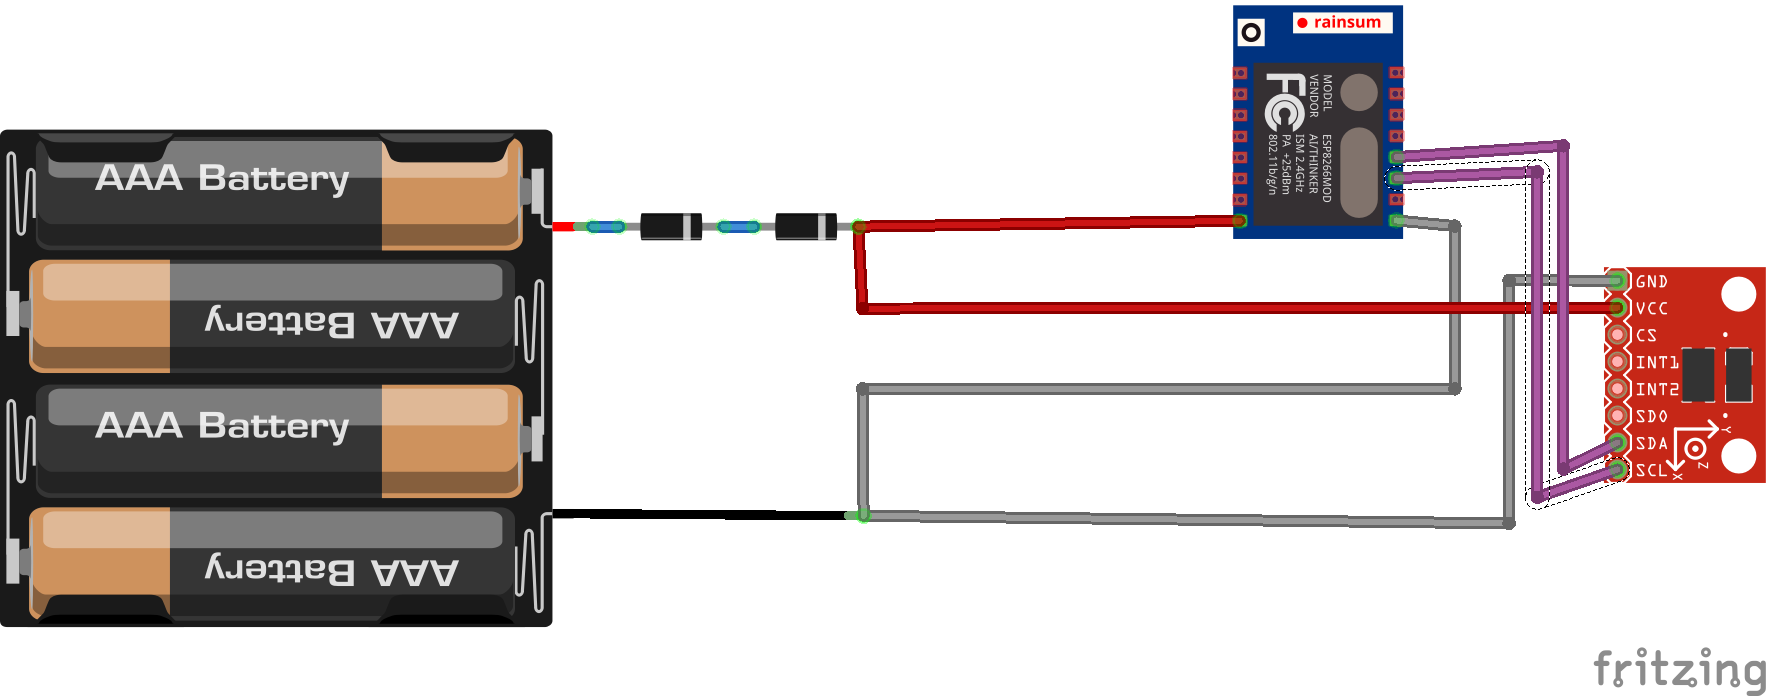
1. Putting ESP8266-01 and ADXL345 togetherProgram ESP8266 with Arduino IDE for convenience. ADXL345 accelerometer communicates using I2C protocol. I've used ESP8266-01, in later versions of ESP we have dedicated pins for I2C bus to communicate with ADXL345. But in ESP8266-01 we can use any of the 4 GPIO pins for I2C, here I've used GPIO 0 and GPIO 2, since GPIO 1 and GPIO 3 (Tx & Rx) will be used for debugging.
- Download ADXL345 library for Arduino.
- Move it to Documents > Arduino > libraries
- Open the corresponding
.cppfile ADXL345.cpp
- Find the line Wire.begin() and change it to Wire.begin(0,2)
- Do the above only when interfacing with ESP8266-01 and change back to normal when using for other boards like Arduino.
Nothing much in this part except we have to make Raspberry Pi automatically connect to ESP8266 access point. Open the following file in Nano editor:
$ sudo nano /etc/wpa_supplicant/wpa_supplicant.conf
And add the following lines which is the SSID and password of ESP8266 that you've changed in the program.
network = {
ssid="ESP8266"
psk="secretPassword"
}
Press Ctrl+X to save and exit.
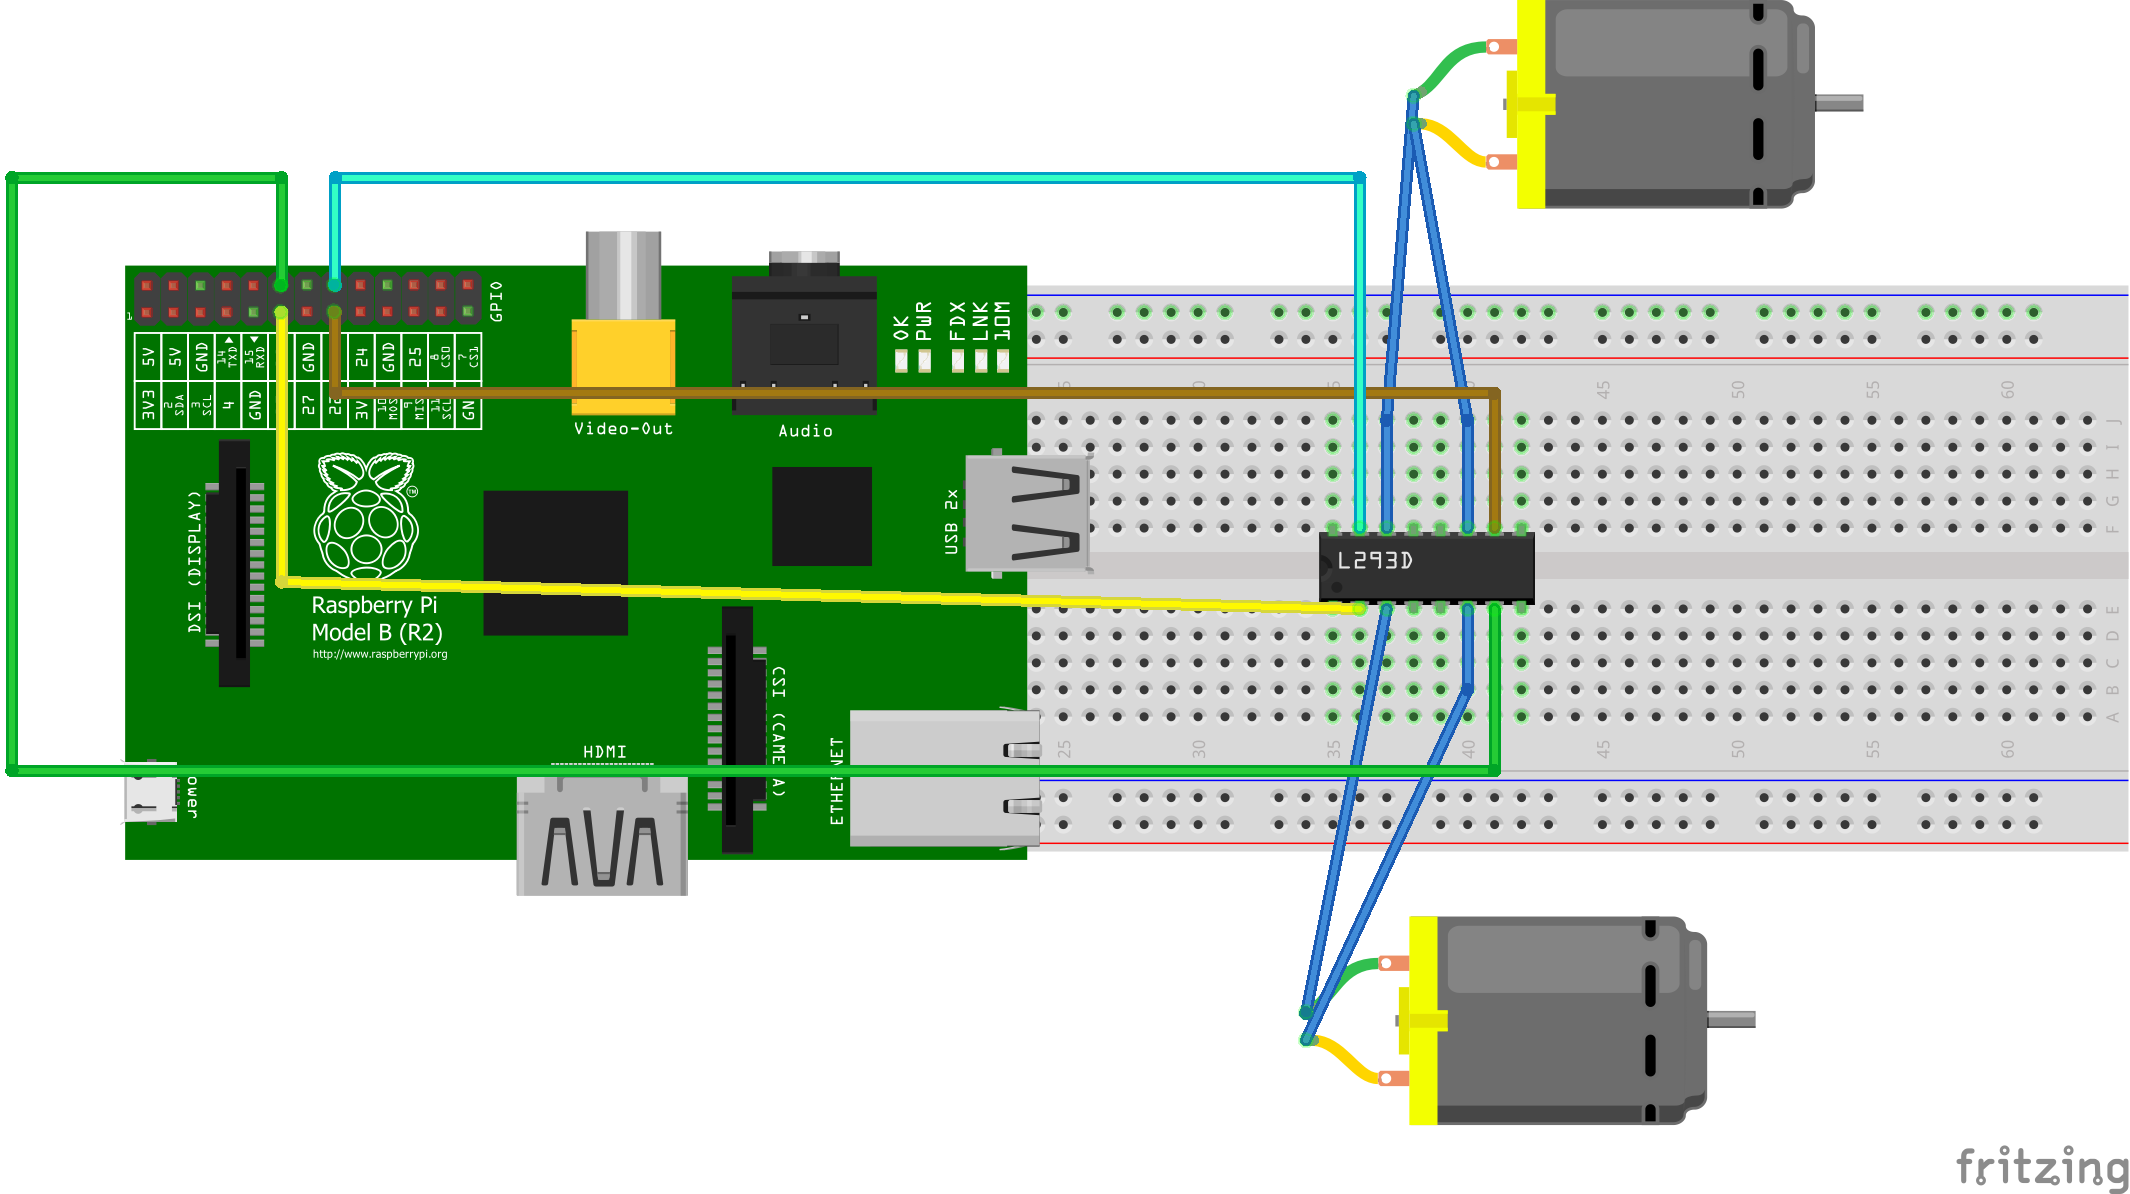
3. Do server side first!Firstly copy the code named 'Rasperry Pi robot' and put it anywhere in your Raspberry Pi.
The code uses 'rpi-gpio' framework to control GPIO pins and 'express' framework, because it makes the code simple and friendly when compared to the traditional 'http' module. So, before running the code we must install express and rpi-gpio.
Make sure that you have Node.js and npm installed on your Raspberry Pi.
$ sudo apt-get install nodejs npm node-semver
Create a folder anywhere in Pi and dedicate it for installing node modules. Enter the folder and start installing required modules.
$ npm install rpi-gpio
$ npm install express
After getting the packages, change the first 2 lines in the given Node.js program to full path where you've installed the nodes. Now run the program by typing node followed by the filename.js.
Upload the code to ESP8266 and power it on.
In case of debugging or customizing, turn off the Pi, use serial monitor to read the orientation and change the commands, variable 'tri' in the program accordingly. Remember to run Node.js code in Raspberry Pi first and then power up ESP8266 in normal mode.


Comments
Please log in or sign up to comment.