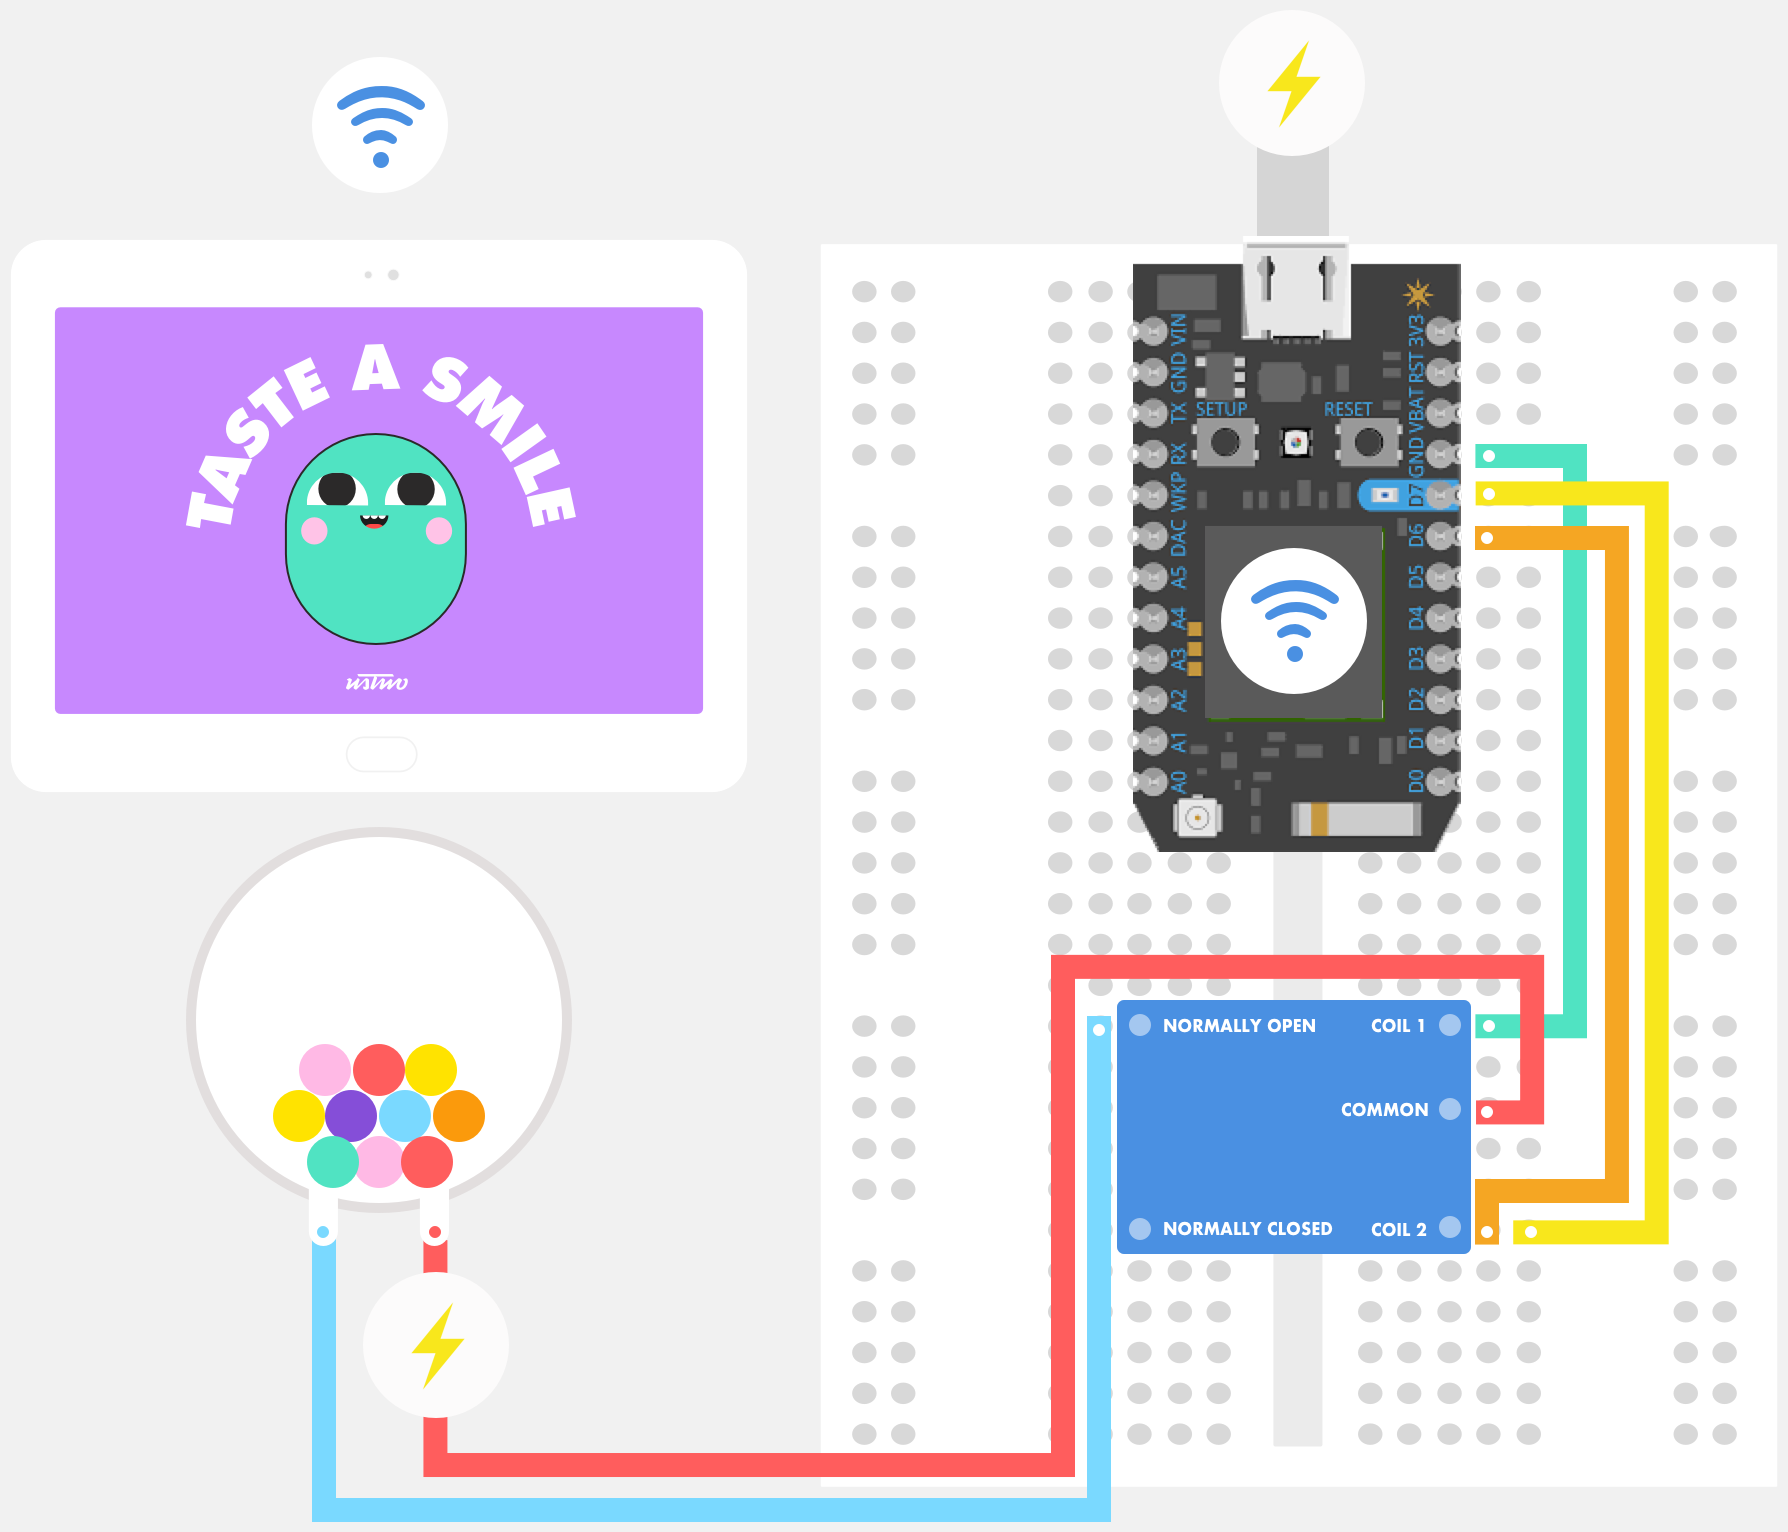
We kept the batteries, but removed the touch sensor and, instead, connected straight to the candy machine motor to complete the circuit. This may require some wire stripping, soldering and/or duct tape. And remember to remove the batteries before you start taking things apart. :-)
2.Setup your circuit
Check out our handy circuit diagram below for how to connect your kit.
We've used a power bank to power our particle Photon, it's great because of it's size it can be placed anywhere and rarely needs to be recharged.
We also kept it simple with the Photon code by using a tweaked version of the Blink an LED starter projects include in the Photon set-up tutorial, and used our Android app to tell it when to run. Include a third variable "int led3 = D6" to each section, and adjust how much candy is dispensed by updating the delay time in the code - simples!
3. Makeitraincandy
For our project we made an Android app using the new Google ML Kit face recognition. But you can trigger your Photon with a simple post function. Try it out with the simple html web page included below.
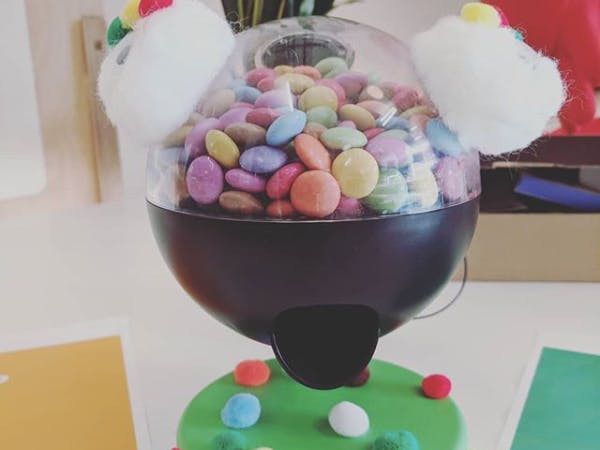
Smarties, Skittles or M&Ms are the perfect size for this dispenser. Now get yourself some candy and enjoy the smiles!
First look inside before removing the touch sensor
Use this web page to test you photon and/or circuit.
/* Paste the code between the dashes below into a .txt file and save it as an .html file. Replace your-device-ID-goes-here with your actual device ID and your-access-token-goes-here with your actual access token.
---------------------------
<!DOCTYPE><html><head><style>body{Background:#00e7a3;/* Teal */}.button{background-color:#009cf3;/* Blue */border:none;color:white;padding:15px32px;text-align:center;text-decoration:none;display:inline-block;font-size:16px;border-radius:10px;}.button:hover{background-color:#02a4ff;/* Lighter Blue */color:white;}</style></head><body><center><divclass="everything"><br><formaction="https://api.particle.io/v1/devices/your-device-ID-goes-here/led?access_token=your-access-token-goes-here"method="POST"><br><buttonclass="button"name="button"type="submit"value="on">Give me candy!</button></form></div></center></body></html>


Comments
Please log in or sign up to comment.