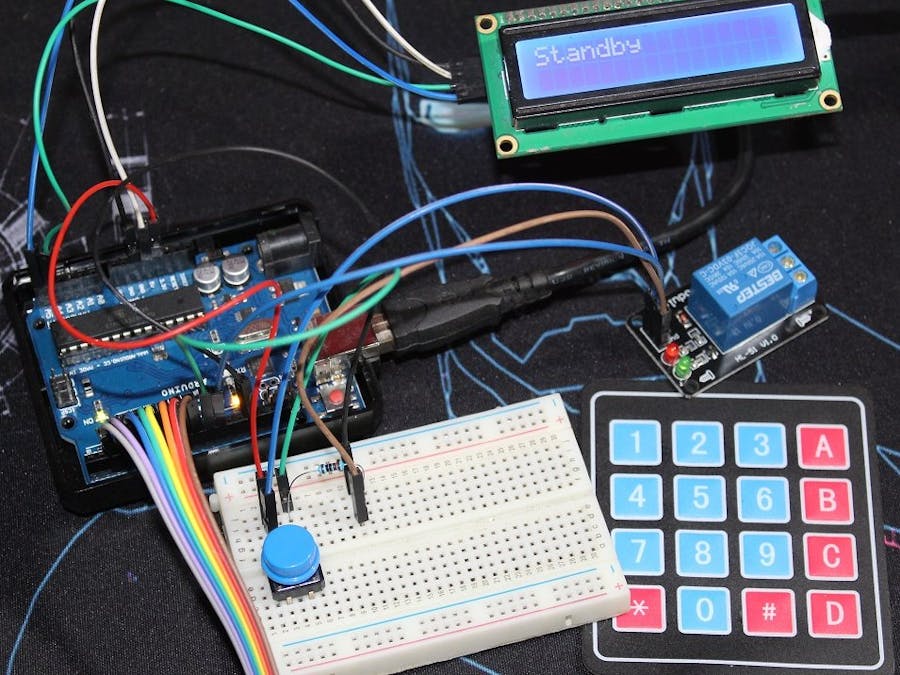
Hi, and welcome to this tutorial (Yep it's old but classic), today I’m making a door lock project based on a Arduino board, keypad, LCD i²c screen, and I’ll use for the lock a solenoid and a relay, you can check my tutorial about the finger print door lock where I used a lock that uses a dc motor, so it depends on your lock system you’ll have to chose a wiring, codes and adapt them.
N.B: For a real project, I don’t recommend using a solenoid at all, but rather hack a lock that can be opened by both electronic and mechanic lock and adapt your project for it.
PartsSo for this project we will need those components, alongside some jump wires, and a power supply of 12V Sorry I didn’t add it here:
The Push Button is meant to open the lock from inside, you can remove it if you want, the resistor is for debounce.
I used 4×4 Keypad you can use 3×4 but you’ll need to modify somethings in the code like for confirmation I use ‘A’ you can change it to ‘*’ or ‘#’.
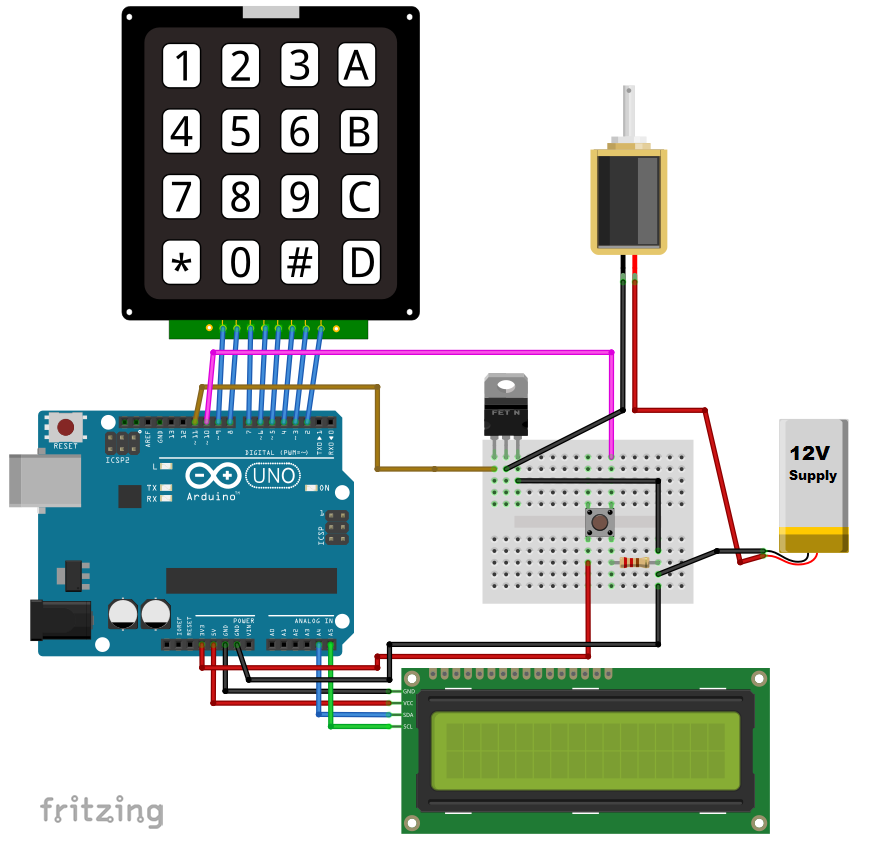
The solenoid is powered by 12V external power supply, and driven by the IRF510N MOSFET transistor.
The Transistor is used as a switch and it’s better to use an N-channel, the IRF510N is pretty popular when used with an Arduino, when you apply a 5V voltage across the Gate and the Source, the transistor becomes like a closed switch between the Drain and the Source, and it doesn’t need any resistor like bipolar ones.
And if there’s no voltage applied the transistor acts like an open switch, and this how we control the solenoid.
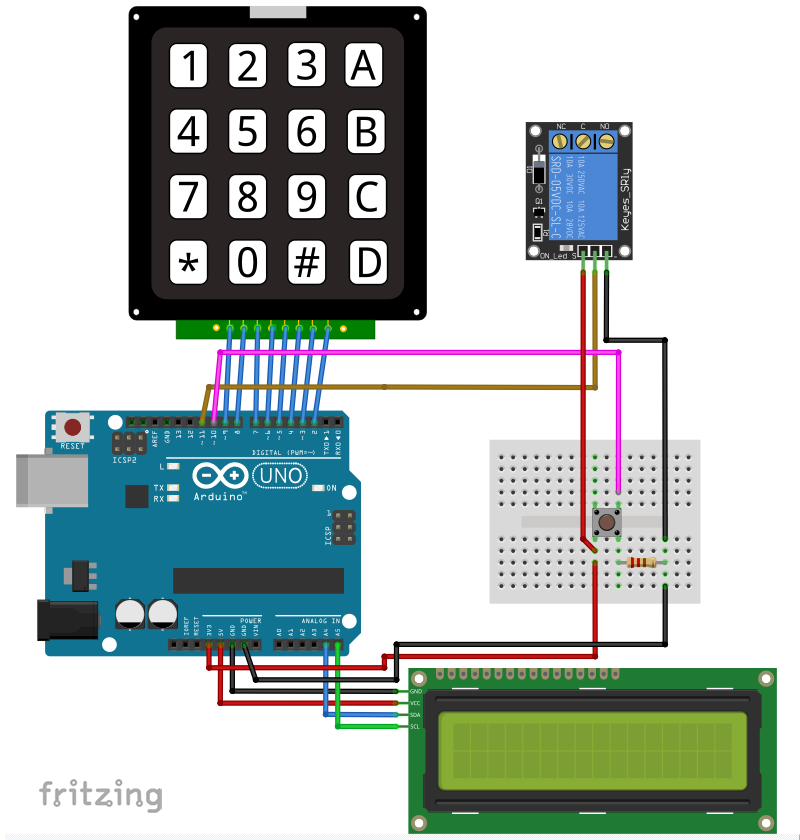
For the other example I’m using a 1 channel relay module, it works with 3.3V, and we control its input like controling the transistor, the only difference is that they are inverted (we’ll see in the code).
Algorithm flowchartTo make things easy to understand here’s the flowchart, it’s not completly detailed but it’s an overview of the code.
N.B: You can use the relay to control any electric lock up to 250VAC, you can use it also to control the Solenoid…
The codes are exactly the same the only thing is that you switch between (LOW and HIGH) to open the lock.
Just remember first time you must upload the code and change the passcode then uncomment some lines (read the code to find them (they’re in setup)) and reupload the code so it can read the passcode from the EEPROM.IT’S DONE ONLY ONCE.
Also you can change the code length, first I made it four digits, you can change it from the default code, as I used in the code the "sizeof(code)" instead of "4". You can't change a 4 digits code to a 6 digits passcode, first change the initial passcode from the code source.
TestYou'll find the test in pictures below, navigate though them
Well that was the test of the project, it’s the same for the solenoid or relay, and the push button opens from the inside if you want or you can remove it.
I hope it’s useful and if you have any problem or question leave a comment.


_ztBMuBhMHo.jpg?auto=compress%2Cformat&w=48&h=48&fit=fill&bg=ffffff)


Comments
Please log in or sign up to comment.