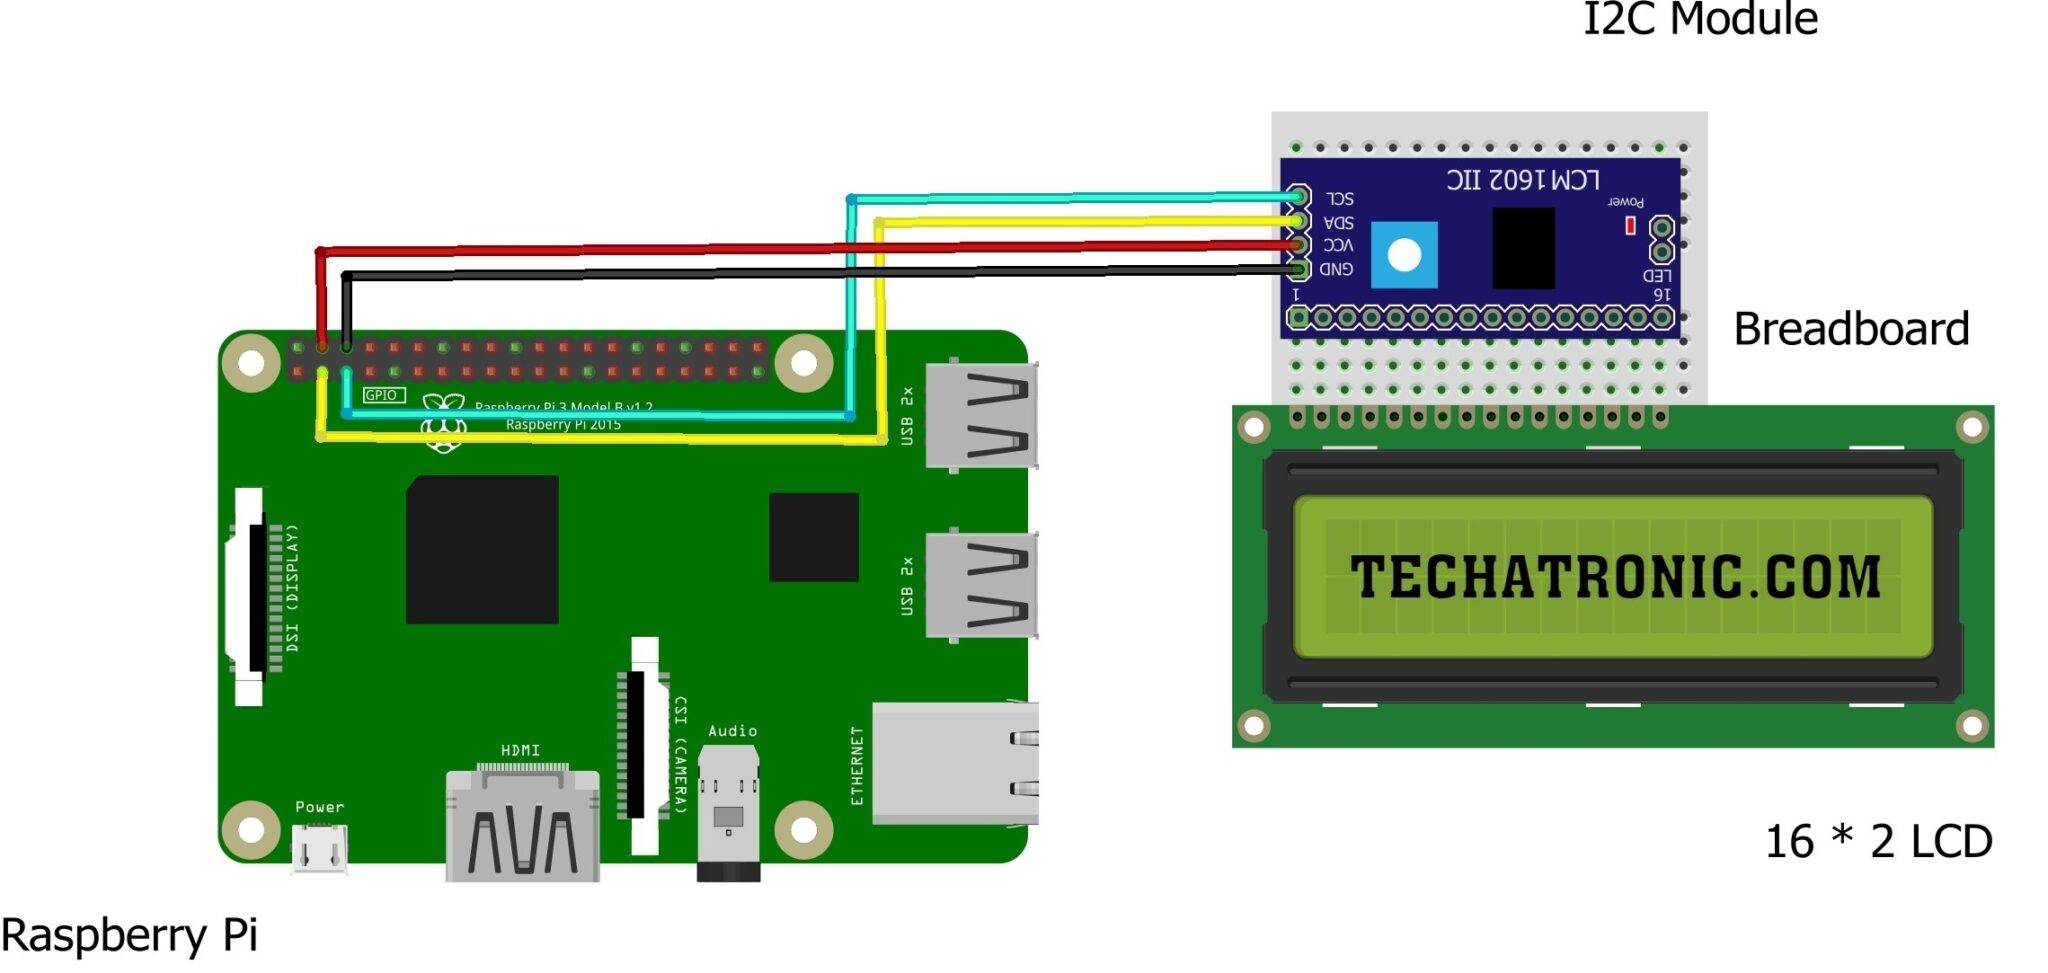
Hey Guys, Today we’re back again with another important tutorial on Raspberry Pi. Today we’ll interface I2C LCD with Raspberry Pi.
The common 16×2 Display usually used with different projects can also be used with Raspberry Pi projects. Also in today’s article,
we’ll discuss various commands we use with the Python Module to make 16×2 display work via the I2C port on Raspberry Pi. So, let’s start today’s discussion. so, you can python too from this pyhton tutorial.
- Raspberry Pi with keyboard and mouse
- 16×2 LCD
- I2C module
- Breadboard
- Jumper Wires I have made my PCB with the PCBWAY which help me to complete my project,
I have made my PCB with the PCBWAY which help me to complete my project
CommandsThe commands mentioned below uses lcd (initialization object) as the prefix before.
So, ignore this while writing your commands.
- lcd.clear() –> Clears the display
- lcd.display_line(“string”, y) –> Display string in the line number mentioned and continues to the next line
- lcd.backlight(state) –> Turns on backlight on or off, write either 0 or 1 in place of state
- lcd.display(“string”, y, x) –> Display the text on the position given in line y and place x


_ztBMuBhMHo.jpg?auto=compress%2Cformat&w=48&h=48&fit=fill&bg=ffffff)


Comments
Please log in or sign up to comment.