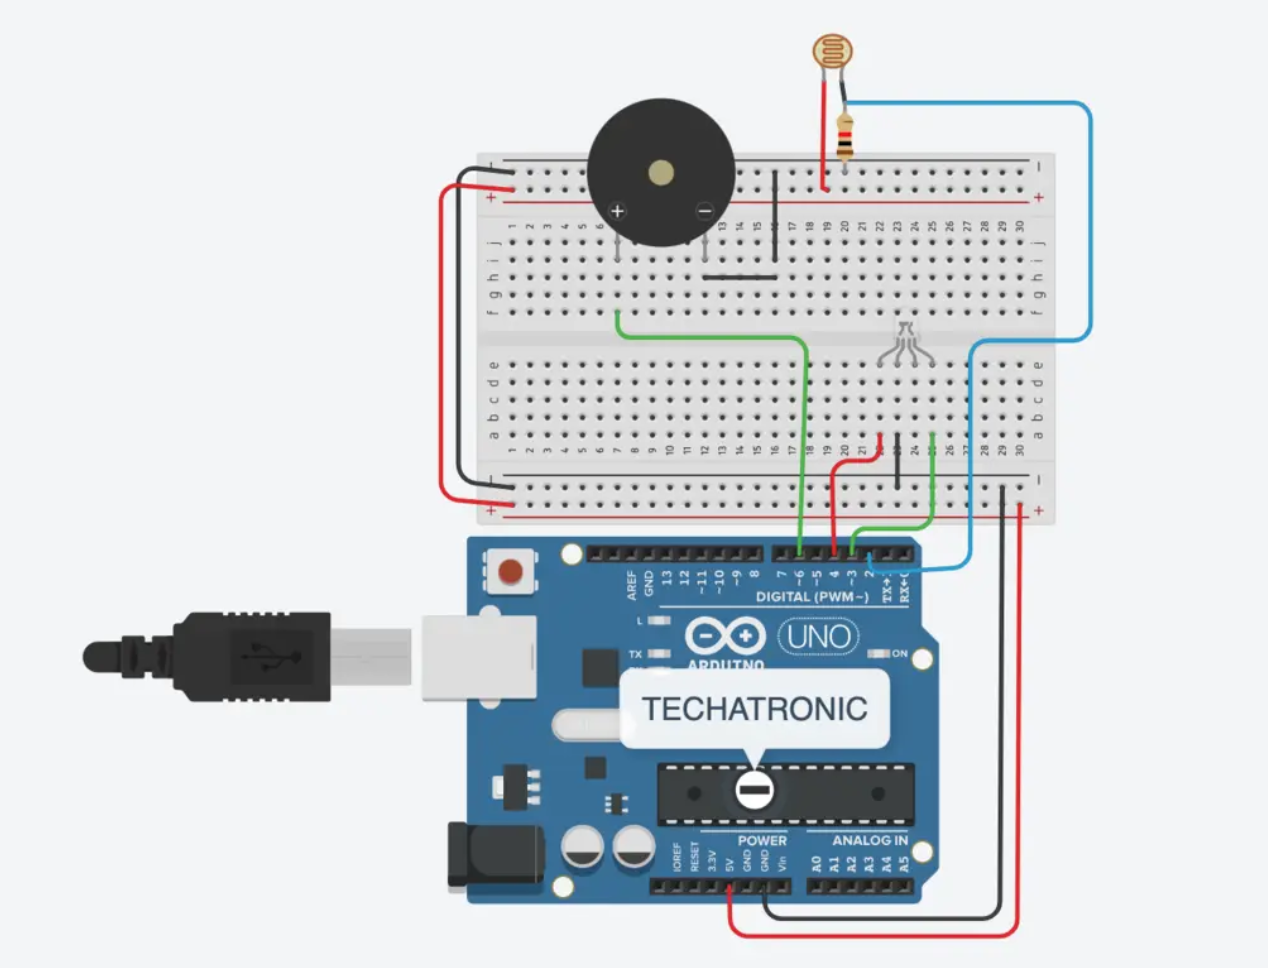
Here is a basic idea of how you can make a laser security alarm using an Arduino and an LDR sensor:
Materials needed:
- Arduino board
- Laser diode
- LDR sensor
- Buzzer
- Breadboard
- Jumper wires
- 220 Ohm resistor
Steps:
- Connect the LDR sensor to the breadboard.
- Connect the 220 Ohm resistor to the LDR sensor and connect it to the ground pin on the Arduino board.
- Connect the buzzer to the breadboard and connect the positive pin to pin 8 on the Arduino board.
- Connect the laser diode to the breadboard and connect the positive pin to pin 2 on the Arduino board.
- Connect the negative pin of the laser diode to the ground pin on the Arduino board.
- Write a code on Arduino IDE.
- Upload the code to the Arduino board.
Code:
scssCopy code
int buzzerPin = 8;
int laserPin = 2;
int ldrPin = A0;

void setup() {
  pinMode(buzzerPin, OUTPUT);
  pinMode(laserPin, OUTPUT);
  pinMode(ldrPin, INPUT);
}

void loop() {
  int ldrValue = analogRead(ldrPin);
  if (ldrValue < 100) {
    digitalWrite(laserPin, HIGH);
    digitalWrite(buzzerPin, HIGH);
    delay(500);
    digitalWrite(laserPin, LOW);
    digitalWrite(buzzerPin, LOW);
    delay(500);
  }
  else {
    digitalWrite(laserPin, LOW);
    digitalWrite(buzzerPin, LOW);
  }
}
This code reads the value of the LDR sensor and checks if it is less than 100. If it is less than 100, then it turns on the laser diode and buzzer for 500 milliseconds and then turns them off for another 500 milliseconds. If the value of the LDR sensor is greater than 100, then it turns off the laser diode and buzzer.
PCBWAY also provided the readymade PCB for this project.
Please note that this is a basic example, and you may need to adjust the values and components depending on your specific needs and the environment in which you plan to use the alarm. Also, please use caution when working with lasers as they can be dangerous if not handled properly.


_ztBMuBhMHo.jpg?auto=compress%2Cformat&w=48&h=48&fit=fill&bg=ffffff)


Comments
Please log in or sign up to comment.