Hey guys, today we are going to learn how to make a light dimmer circuit using an Arduino board. There are two pushbuttons in this circuit, one is for increasing the brightness of the LED and the other one is for decreasing the brightness. So basically you can control the brightness level of any LED by using this project. You can also add a few more LEDs of different colors. For more information regarding this project please visit the original post of this project, also bookmark TEACHTRONIC.COM as all my further projects and tutorials will be pre-uploaded there.
Working of the projectThis is a very useful project as you can increase and decrease the brightness level of any bulb/LED by just pressing a button. This circuit can be installed in hotels, cafes, or in study tables. We are sharing the code and the circuit diagram for this project. Please follow the given instructions carefully. Always use a resistor while working with the LEDs so that the LEDs didn't burn due to high voltage. Before placing the pushbuttons check the common pins with the help of a multimeter.
Components Required- Arduino UNO board
- LED and a 100-ohm resistor
- Two pushbuttons
- USB cable for uploading the code
- Jumper wires and a breadboard
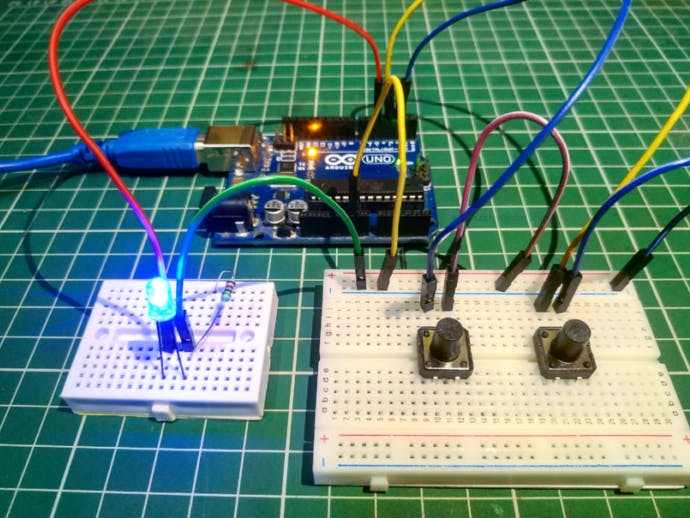
Circuit Diagram for the project
Please make the connections according to the diagrams that we share above.
Code for the projectNOTE: Please upload this code to the Arduino.
int but1=2;
 int but2=3;
 int led = 5;
 int x=0;
 int c;
 void setup(){
  Serial.begin(9600);
  pinMode(5,OUTPUT);
  pinMode(2,INPUT_PULLUP);
  pinMode(3,INPUT_PULLUP);
  //
 }
 void loop(){
  attachInterrupt(digitalPinToInterrupt(but1),increase,LOW);
  attachInterrupt(digitalPinToInterrupt(but2),decrease,LOW);
  delay(1000);
  c=0;
 }
 void increase()
 {
  if(x>-1 && x<255 && c==0){
   c=1;
   x=x+10;
   Serial.println(x);
   analogWrite(5,x);
   return x;
  }
  else if(x>255){
   x=0;
  }
 }
 void decrease(){
  if(x>0 && x<255 && c==0){
   c=1;
   x=x-10;
   Serial.println(x);
   analogWrite(5,x);
   return x;
  }
  else if(x<0){
   x=0;
  }
 }
Thanks for reading.


_ztBMuBhMHo.jpg?auto=compress%2Cformat&w=48&h=48&fit=fill&bg=ffffff)


_3u05Tpwasz.png?auto=compress%2Cformat&w=40&h=40&fit=fillmax&bg=fff&dpr=2)
Comments
Please log in or sign up to comment.