


Hardware components | ||||||
 |
| × | 1 | |||
 |
| × | 1 | |||
Software apps and online services | ||||||
 |
| |||||
This is a simple step from my Wi-Fi Aquarium monitor. The code came from the IDE example: 02: Digital : Button.
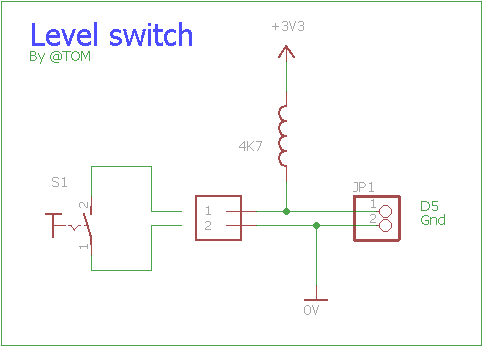
Wiring
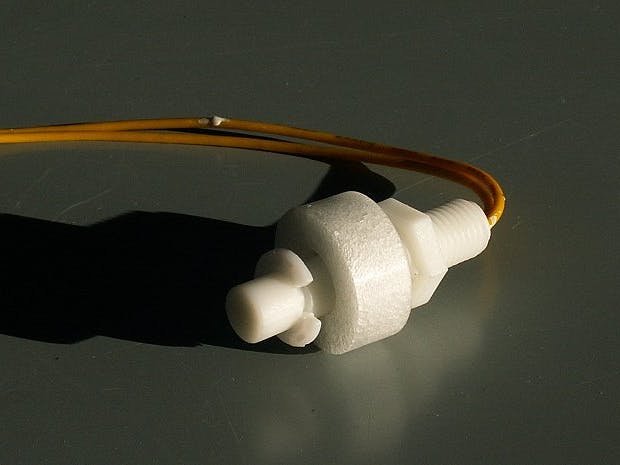
Connect your liquid level switch according to the schematic
Init// Part of INI
// LEVEL sensor part
float level = 0;
const int levelPin = 14; // the number of the pushbutton pin ( D5 )
int buttonState = 0;
Copy part 1 to the IDE
Setup// Part of SETUP
// LEVEL sensor input
pinMode(levelPin, INPUT);
Copy part 2 to the SETUP
Main loop// Part of MAIN LOOP
// Read LEVEL sensor
buttonState = digitalRead(levelPin);
if (buttonState == HIGH) {
// turn level high
level = 250;
}
else {
// turn level low
level = 10;
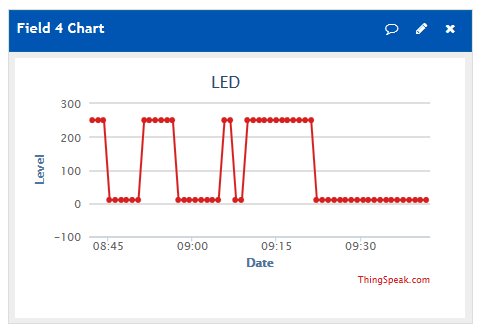
This step actually turns an open switch into a high and a closed switch into a low value. It's just basic stuff so it should work with all kinds of hardware.
IoTThe last step of this instruction is to send the data to Thingspeak. I am using a program that was written by Jeroen Beemster. His site is down but you can find the code in my fifth hackster project. The program did create a problem with the ADA library but i found a solution for it on the internet. ( Go down to credits )
- Add a field 4 to your Thingspeak account
- Copy the last block to your program
Good luck with implementing these steps
Input 14 ( levelPin ) is also called GPIO14
Mount the switch with the wires on top
Before you order this kind of liquid level switch, make sure it's Normally Open (NO) and will close is the lower position.


Comments
Please log in or sign up to comment.