In far galaxy fight space ship fighters needs a companion to detect enemies coming towards them, a tech for them to be a companion called Blind Scanner.
Do it YourselfThe great news is you can create this Blind Scanner by yourself and get it done in no time. But...wait, why is this name? what is it mean? well the scanner detect objects without any visuals, like using camera, it detects the objects blindly by sound waves.
The needed components are, first and foremost Particle's Photon, HR-SC04 Ultrasonic module, Linear voltage regulator 5V (any company), Breadboard, jumper wires and 9v battery (any dc power source).
Concept ExplainedThe concept of this project is simple, we are going to get the ultrasonic data via Photon and send the data to computer(Mac or PC or Linux) for processing. Ultra sonic sensor gives you the data about the distance of the sound waves travel and responding back by hitting obstacles, which gives us distance measurement data. We are going to process the data in centimetres(cm) and send that data to computer in realtime through serial port.
Modern computer doesn't have the option called serial port but embedded systems still using it (ex: Photon) but the good news is we can convert serial to USB. Photon has this feature built-in with ARM Cortex-M3, so we can use USB type-A to micro cable to connect with any computer to send data from Photon to computer. Please make sure you have installed proper drivers for USB-SERIAL according to your Operating System before connecting with Photon.
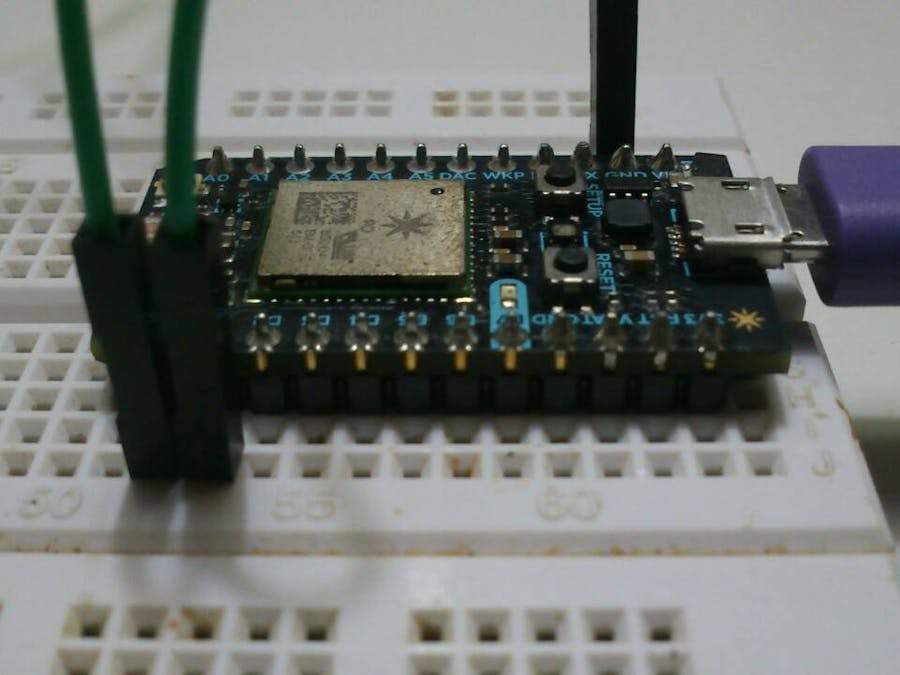
Hardware ConfigurationFirst, place your Photon in your breadboard and configure the Photon as described here.
https://docs.particle.io/guide/getting-started/intro/photon
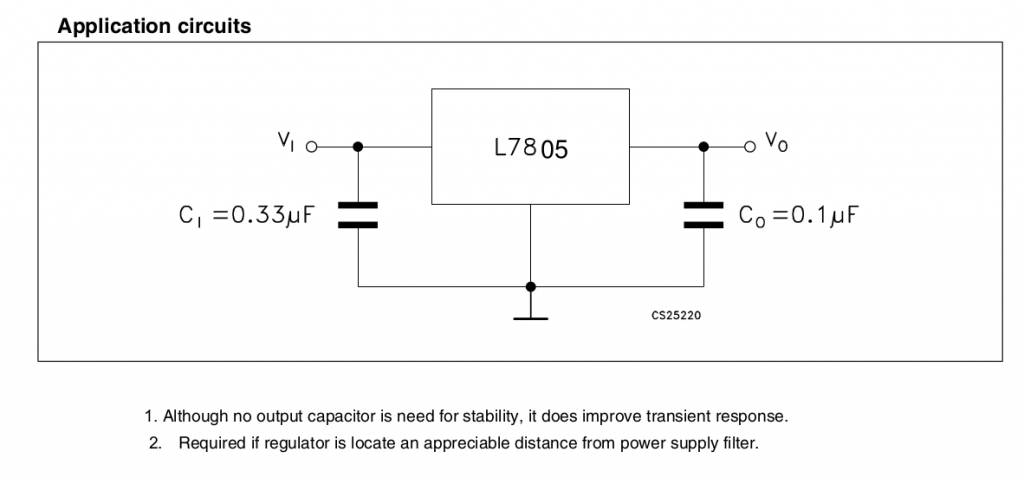
Now you have to create a simple circuit for voltage regulator using the schematics below.
Connect the 9V battery and test you r regulator circuit with DMM(digital Multi Meter), it must be 5V output. This circuit is to power the Ultrasonic sensor as Photon not having the 5V option.
Now we have photon, voltage regulator circuit and ultrasonic sensor... the next thing is connecting all together in one circuit. Ultrasonic sensor has 4 pinout leads called VCC, Trig, Echo and GND it is clearly stated on silk screen of the HR-SC04 module. Connect VCC to Vout of the L7805, connect the GND to ground of the breadboard, the connection between voltage regulator and HR-SC04 is done, we have Trig and Echo pins left on the HR-SC04 module. Connect the Trig pin to D0 of the Photon on the Breadboard and Echo pin to D1, as well connect the GND pin of the Photon to GND of the voltage regulator circuit. We are yet to power the Photon module...but not now there are things still to be done...
Software ConfigurationThe one application we needed most now is Processing from processing.org. It's a open source visual data processing application for science and maths/math. Head over to this link https://processing.org/download/ and download the application according to your Operating System. You can code in C language in Processing to create any graphical interface using data, the processing have the built-in library called processing.serial which handles serial data. This is a cool feature for us to process the sensor data from photon.
Programming TimeNow it's a programming time... use the attached code below for Photon and upload it to the photon, either using desktop or web interface(Both using the same cloud compiler). Open the Processing in your computer and paste code from below for Processing. The background image and font file are attached below. Place the background image file in the Processing application folder and install the font in you computer.


Comments