


Hardware components | ||||||
_ztBMuBhMHo.jpg?auto=compress%2Cformat&w=48&h=48&fit=fill&bg=ffffff) |
| × | 1 | |||
 |
| × | 1 | |||
_wzec989qrF.jpg?auto=compress%2Cformat&w=48&h=48&fit=fill&bg=ffffff) |
| × | 1 | |||
I design & build custom industrial-control products, mainly for the printing/converting industry. Some of these projects would have likely been quicker/better/cheaper overall if I could have leveraged Arduino-compatible products & S/W, but packaging them into something neat, clean, stable and (easily!) reproducible, and be 24VDC-power compatible, has always been a hurdle.
That's where DIN-Uino comes in. I have a particular "DIN mounted" form-factor that I've used for 25yrs+, and many are still operating today (any 87C196KD20 fans out there?)! Clients continue to ask for enhancement and upgrades - all of which of course have to fit into existing spaces and wiring plans.
Can DIN-mounting of Arduino-compatible products be implemented other ways? Definitely YES! There are several existing solutions, However, they didn't offer the flexibility I wanted, nor the form-factor I needed.
DetailsSystem overview:
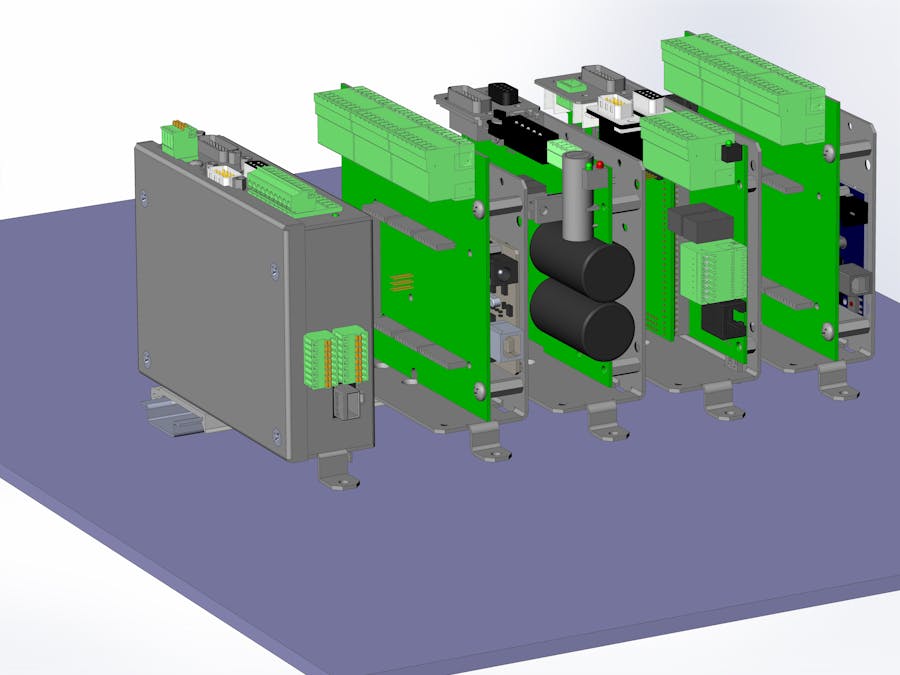
The "DIN-rail system" rendering (pic) shows a range of DIN-mounted products.
As you can see, some of them are my existing industrial-control modules, both enclosed and open-frame.
Next to them you can see an example DIN-Uino module, equipped with a carrier-board (w/Phoenix-style pluggable headers) and an Arduino Mega2560 mounted underneath.
DIN-Uino Carrier-board Overview:
Due to the way the standard headers on Arduinos are arranged, and that most Arduino-shields plug into the TOP of a CPU module... I designed my carrier board to act as an "interposer", so that the CPU mounts underneath it. ALL signals are passed up through M/F headers. You can then stack one or more standard Arduino shields.
The carrier board serves a few purposes:
- On-board +24V to +5V (or 3.3V) voltage regulator. Input terminals = 2-pin Phoenix 3.81mm connector.
- Space for your custom I/O circuitry, which you will likely need between the TTL-GPIO pins on the Arduino and the external 24V industrial-signal world.
- Mounting holes which obviously match up the DIN-Uino mounting plate.
DIN-Uino "Proto1" board:
This version of this carrier board, as shown, is merely a field of 0.1" holes, some power/GND rails, the Arduino shield header area, and of course the 24V/5V(3.3V) voltage regulator.
The Arduino-shield header footprint is compatible with standard "UNO" pinout, and of course the larger MEGA2560 (and similar) extended pinout.
DIN-Uino "Proto2" board (future):
Compatibility with the ST-Microelectronics "Nucleo" boards. Similar to a MEGA2560, but more... and you'll be able to play with a number their Cortex-ARM platforms (180MHz, or even faster?).
For my specific industrial applications, I'm really considering the "Nucleo-F4129ZI" board, a 180MHz Cortex-M4 micro. I'm currently using an NXP LPC1769 (120MHz), but that'll be running out of steam soon for my projects.
*** My first project-follower helped me discover that the Teensy 3.6 also has a 180MHz Cortex-M4 on it... and is a much smaller module overall. Certainly worthy of consideration! ***
Custom DIN-Uino carrier boards:
For higher-volume applications (in my world, 10 units = higher volume), it might make sense to have a custom carrier board that integrates all the application-specific circuitry (opto's, SSR's, etc.) rather than hand-wire each one. I'm sure once I work out my first Nucleo design, I'll be immediately make a custom board - I don't want to hand-wire more than 1 prototype!
DIN-Uino Mounting Plate:
- Base-plate can be used for open-frame project, but it is designed to accept a cover so you can create a fully-enclosed project.
- Intended primarily for projects that use the DIN-Uino carrier board.
- Can also be used with Arduino-compatible hardware alone. In this case, the Arduino "CPU" module would mount directly to the base-plate. There are numerous holes that allow you to mount the "CPU" either face-up or face-down. Use standard M3 (or #4-40) hardware/spacers/etc.
- 1/16" thick aluminum.
- Features a mounting-foot: After clipping your module to a DIN-rail, this foot allows you to firmly affix (and ground!) your module to the mounting plate.
- DIN-rail clip: Metal, spring-loaded. Standard catalog item from Hammond Mfg. This clip does NOT need a tool, just push down swing away from the DIN-rail. Remove the mounting-foot screw first of course - if you're using that feature.
If anyone is interested in the "DIN-Uino" concept, shoot me a message - I'm sure we can work something out.


Comments
Please log in or sign up to comment.