

Hardware components | ||||||
 |
| × | 1 | |||
 |
| × | 1 | |||
| × | 1 | ||||
Software apps and online services | ||||||
 |
| |||||
26-Sep-2017: Initial build is complete, everything works & fits together very nicely indeed! It'll be up on Tindie soon... look for "DIN-Uino" at my store "Uptoolate".
OverviewAs part of my DIN-Uino prototyping & packaging project, this is my second proto-board design for a specific CPU module family. This time - it's for the Teensy 3.6 (and compatible footprints).
Features DIN-Uino Proto4 board, some salient features:- Industrial-compatible 24VDC power input (5V SMPS, 3.3V LDO), via a 2-pin Phoenix 3.81mm header.
- Room at front edge of PCB for a maximum of 48 pluggable screw-terminals (Phoenix 3.81mm pitch).
- You can use single or double-stacked Phoenix-compatible headers, straight or right-angle.
- Uncommitted right-angle pushbutton switch. You can wire it to RESET, or something else.
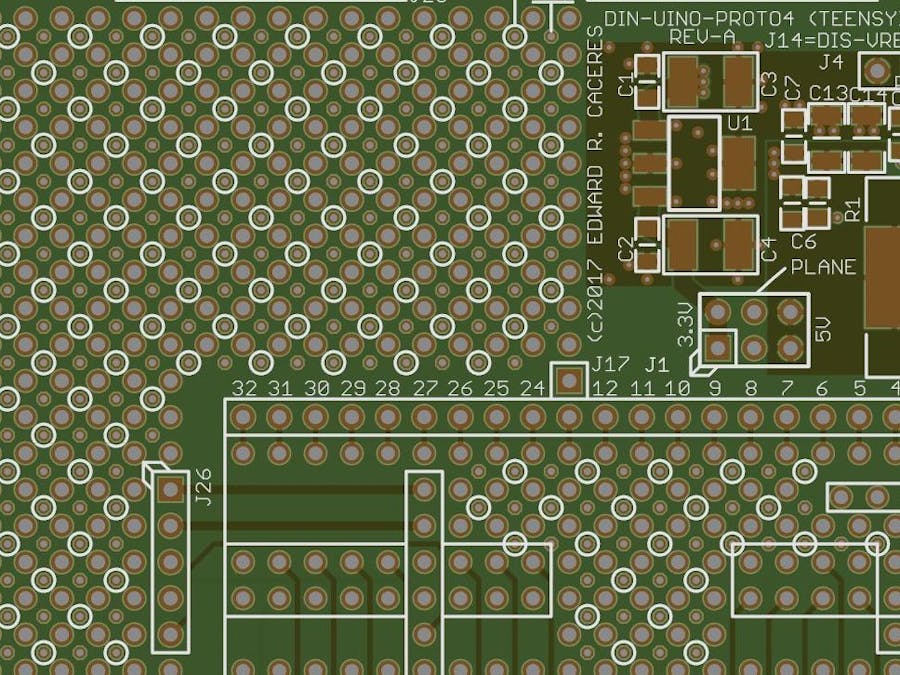
- 4-layer PCB design, with internal GND and POWER planes for power distribution.
- The POWER plane can be connected to 3.3V (default) or 5V (optional).
- Distributed power-vias allow easy access to the internal GND/PWR planes.
- On-board USB-A(host) or USB-B(device) connector, already wired to the Teensy's native 5-pin USB header.
- Teensy module is positioned so the programming-USB port would be externally accessible (if DIN-Uino project is fully enclosed).
- Of course, this DIN-Uino Proto4 board is compatible with the related DIN-Uino mounting hardware.
26-Sep-2017: More progress, and essentially done!
Here's the DIN-Uino Proto4 board, fully populated with all the Teensy 3.6-related headers:
A little closer view of the Teensy 3.6 socket area:
Thanks to some free product samples from Samtec... I've finally worked out the combination of mating headers necessary for the through-hole and SMT-mount headers to have the same mounted-height.
On the Teensy 3.x board:1) All through-hole header strips: Standard size (~0.230" long pin above 0.100" thick insulator). The strip should be inserted on the bottom side then soldered on top.
2) The SMT-mount headers should be Samtec P/N TSM-1xx-01-T-DV (or gold, -G-DV).
On the Proto4 base board:3) All socket-header strips for the Teensy's "standard" header strips: standard socket-strips with an insulator height of ~0.330".
4) All socket-header strip for the Teensy's "SMT-mount" header strips: Samtec P/N SLW-1xx-01-T-D.
With this combination of headers, the mated PCB spacing (between the Teensy and Proto4 board) will be ~0.430". Note that the "xx" fields in the P/N's is for specifying how many pins you want to buy as one unit. The max is 50 pins, which I then break or cut down to size. The "SLW" socket strips do not cut very neatly or easily though - you always end up losing 2 pin positions.
What a rip-offOf course, when I was trying to figure out the right combination of headers/sockets I had initially selected the wrong length header-pin for the Teensy's SMT pads. Argh! I should have done a little math before soldering them on to the SMT pads on the Teensy.
After Samtec sent me the correct parts - the challenge was then to carefully remove the SMT-headers and replace with the new ones. Not easy... I ended up ripping some pads off the Teensy board:
This is not a new problem... I've seen it happen before on lots of other boards too. Headers + SMT = fragile. I've also read elsewhere that this isn't an unusual result with the Teensy. Either from de-soldering, or even just trying to unplug a "fully headerized" Teensy (you have to be realllly careful prying it loose).
I'm sure there is a good technique for de-soldering these headers without damaging the pads - but in the 15 minutes I spent on this task, I didn't figure it out. I can still use this Teensy, just not the SMT I/O pins.
Summary: Everything seems to fit nicely. Next step? A Teensy-blinky project? I really don't have a need for this DIN-uino Proto4 board myself right now, but very soon... I'm sure it will become quite handy.


Comments