As a foodie, I have always longed for some sous vide dishes. However I haven’t got a chance to try it yet. [Sous vide (/suːˈviːd/) comes from French, means "under vacuum", a method of cooking in which food is sealed in airtight then placed in a water bath or in a temperature-controlled steam environment. (from Wikipedia] I have been wondering which French restaurant provides the genuine sous vide dishes. And suddenly it occurred to me “I am working in a maker company, why do I want to buy something instead of making it?” As since I don't know much about engineering, I asked my colleague the engineer Yihui whether it’s feasible to DIY a sous vide device with the open hardware modules here at Seeed Studio. And the answer is yes! Hooray!! Luckily, here at Seeed we have a hackathon every month. And, the theme of this month’s Seeed hackathon is “Christmas”! And how can you forget a big dinner during Christmas! It’s time for hacking & making a sous vide device for foodies!
Step by Step Introduction
First of all, let’s see what are the parts needed for building the sous vide device:
***Electronic Modules
- Seeeduino Lotus *1
- Grove-Relay *1
- Grove-Button *1
- Grove – Rotary Angle Sensor (P) *1
- One Wire Temperature Sensor *1
- Grove - Universal 4 Pin Unbuckled Cable *5
See the pictures below
*** Other Equipment & Tools
- Boiler
- Soldering Iron
- Screwdriver
- Power hub
- Heat sink compounds
Please see the picture below:
We wanted to use a cooker at the first place. However, when we get the following cocker, we realized it’s not easy to control the temperature if we hack this cocker (left in the picture below). Hence, we replaced it with a boiler (right in the picture below).
After getting all the tools and equipment, we hit the road of hacking.
Step 1 Connect Grove Relay with the power hub.
Use a screwdriver to open the power hub, and then solder a power cord to the power hub. Please see the picture below: the red power cord has been soldered to the power hub (see the picture below), and the green circles show the point of soldering. And then put the cover of the power hub back with screws and a screwdriver.
Now, let’s solder the Grove Relay to the red power cord.
Use the insulated rubber tape to cover the Grove Relay for protection from electric shock. Please remember to leave out the Grove Connector, for connecting the Relay to Seeeduino Lotus.
Step 2 Connect the Temperature Sensor to the Boiler
As shown in the middle picture below, connect the sensor area of the One Wire Temperature Sensor to the boiler with heat sink compounds. Use insulated tape to cover it.
Step 3 Connect the modules
Plug the Grove Relay, Grove OLED Display, Grove Rotary Angle Sensor, Grove Buzzer onto the Seeeduino Lotus.
From the picture, you can see 1~4 grove cables and 2 black ables (A&B).
- 1 - connect to Grove OLED Display
- 2 - connect to Grove Relay
- 3 - connect to Grove Buzzer
- 4 - connect to Grove Rotary Sensor
- A - connect to One Wire Temperature Sensor
- B - connect Seeeduino Lotus to the laptop (with a microUSB cable)
Step 4 Program
We use Seeeduino Lotus as the controller, its programming environment is the same as Arduino. If you have any questions about using this board, such as installation etc, please refer to the wiki page of Seeeduino Lotus. And here is the code of this Christmas Sous Vide Feast for your reference.
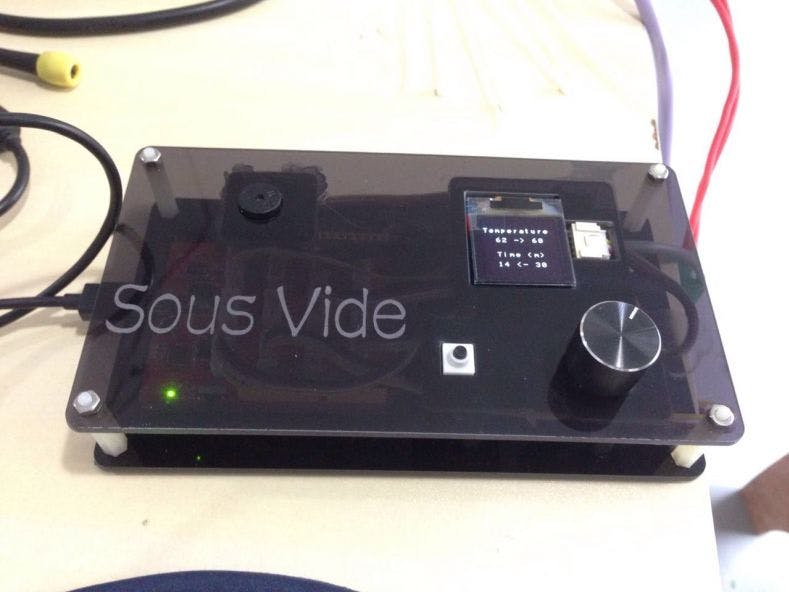
Let's have a look at the final version of our Sous Vide Device:
Step 5 Shop for ingredients and prepare the food.
For this Christmas feast, we'd like to make the following dishes with our newly-developed Sous Vide Device: egg, beef, chicken wing and broccoli. Besides, since the theme is Christmas, we would love to add some festive seasonings (decorations)!
Let go shopping!
And then clean the food and prepare the seasonings:
Step 6 Use Sous Vide to cook the food.
We put the different food into the bags respectively and put it into the boiler for cooking. Please see the temperature and time that we used for cooking different dishes:
- 1. egg (75℃, 15 minutes)
- 2. beef (60℃, 1 hour)
- 3. chicken wig (65℃, 1 hour)
- 4. broccoli (80℃, 30 minutes)
And voila, please have a look at our Christmas feast!
Bon appetite!!!


Comments
Please log in or sign up to comment.