________________
Hi, First off all Please subscribe to my youtube channel.
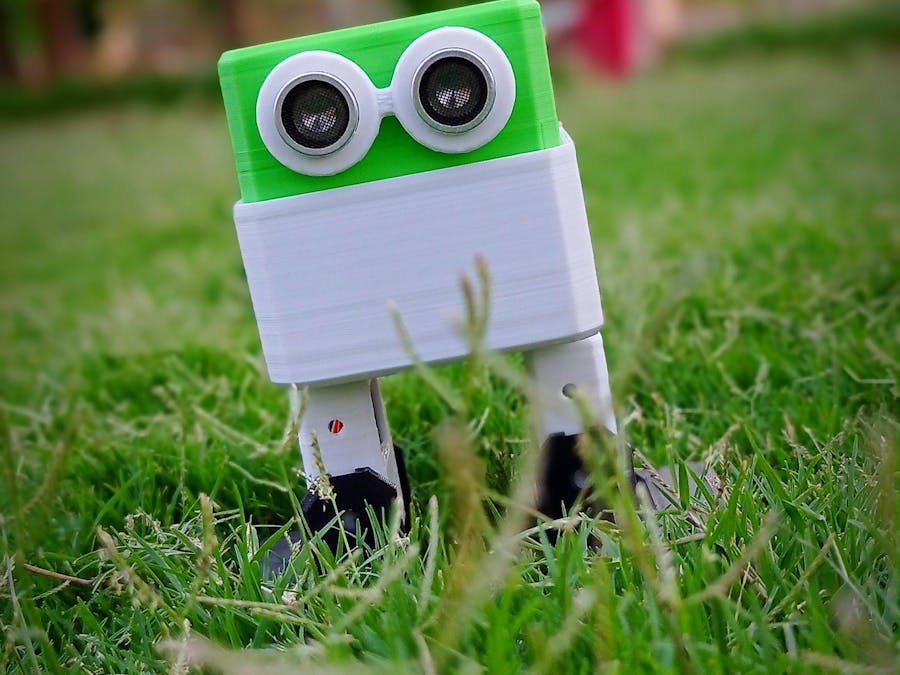
This is the simplest Arduino robot. The name of this Arduino robot is Otto Robot. The beginners can build it with simple steps. All codes and library is given on my github page.
By the way, subscribe to my YouTube channel for more projects like this. I also update my upcoming projects on Instagram.
buy me a coffee! ☕: Donate
Let's begin this cute little arduino project.
________________
Step 1: Requirements- Otto Robot DIY Kit (amazon.com / amazon.in)
- Otto Robot Body Parts (amazon.com / amazon.in)
- Expansion Shield for Nano (amazon.com / amazon.in)
- Arduino Nano (amazon.com / amazon.in)
- Servo SG90 (amazon.com / amazon.in)
- Ultrasonic Sensor (amazon.com / amazon.in)
- DPDT Switch (amazon.com / amazon.in)
- 134N3P Module (amazon.com / amazon.in)
- 3.7V 1000mAh Battery (amazon.com / amazon.in)
- Mount two servo as shown in image.
- Screw it tightly.
- Cut the plastic top comes with servo.
- glue it in side the leg as shown in image.
- Pass servo wire from hole in leg
- Pass the same wire from the bottom part of robot.
- mount legs on leg servo.
- take Expansion shield and insert arduino nano.
- Connect both leg servo at 9th and 10th pin.
- make sure yellow wire facing arduino nano.
- Open servo_pos_set code, you can download it from here.
- Connect your arduino and select correct Board and correct port.
- Upload the code and servo will move at 90 degree.
- Remove legs from servo and insert it in vertical position as shown in image.
Dowload the code :- https://github.com/vishalsoniindia/Arduino_Otto_Ro...
________
Step 7: Screw the Legs- Take a screw driver attach magnet with it so screw can stick with it.
- Hold the leg and screw it.
- Pull the feet servo wire as shown in image.
- Insert feet servo in legs as shown in image.
- Screw the feet servo on leg.
- Connect feet servo at 9th and 10th pin.
- Connect arduino with pc no need to upload code again.
- servo move to 90 degree now mount servo top in vertical position and screw them.
- mount feet, first put feet on servo and with little presser push feet inside.
- Do it with both.
- Remove USB from 134N3P module.
- Connect positive of battery at B+.
- Connect negative of battery at B-.
- Connect wires on Gnd and Vcc.
- Vcc wire go through a switch.
- Remove DC jack from Expansion shield.
- Connect Gnd wire at Gnd of DC jack as shown in image.
- Vcc go through switch and then connect it on Vin pin.
- Test the switch working properly.
- Mount ultrasonic as shown in image.
- Mount expansion shield as shown in image and screw it.
- Fix the 134N3P module at place of dc jack with hot glue as shown in image.
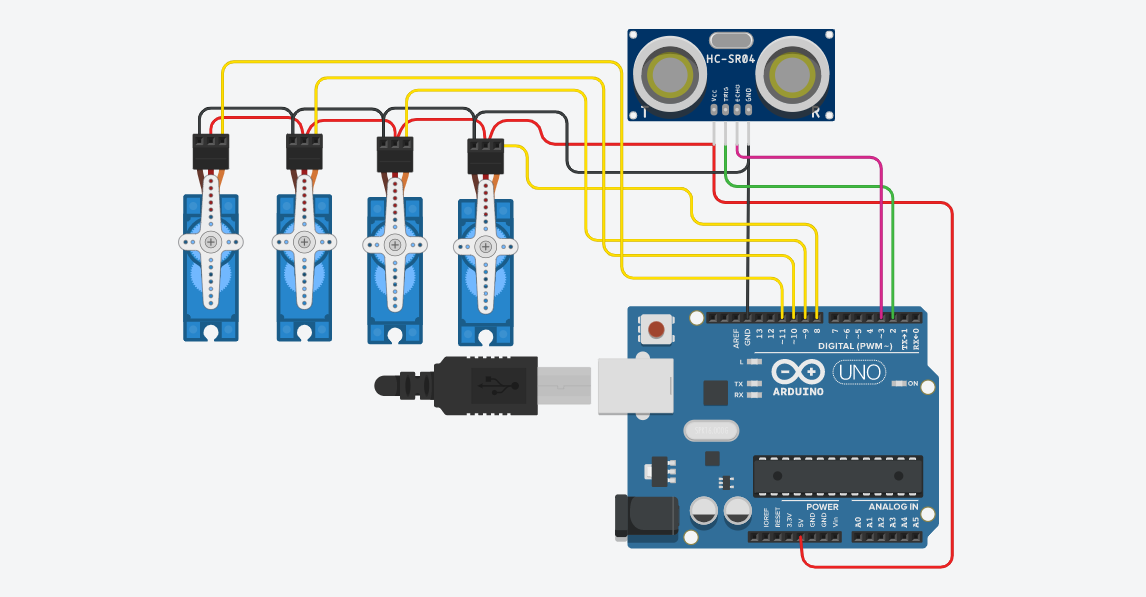
Left Leg servo ---------------> 8th pin
Right Leg servo ---------------> 9th pin
Left Feet servo ---------------> 10th pin
Right Feet servo ---------------> 11th pin
Ultrasonic Connections
Vcc ------------------> +5v
Gnd ------------------> Gnd
Trig -------------------> 2nd Pin
Eco -------------------> 3rd Pin
Step 14: Close the Robot- Glue the switch inside as shown in image.
- Use pen riffle for Switch Cap.
- Insert all things inside robot and close it.
- Open downloaded folder or you can download from link below.
- Go to the Otto_robot_code >> library >>
- Copy Otto_Robot_Lib folder.
- Go to the Documents >> Arduino >> libraries >>
- Paste the folder here.
Download the folder :- https://github.com/vishalsoniindia/Arduino_Otto_Ro...
Step 16: Upload the Code- Come back to the downloaded folder.
- Here You can upload any code, Let's open Otto_object_avoid code.
- Connect robot with PC and make sure the Board and port is correct.
- Put your robot upside down and upload the code.
- your robot start running.
Whooooo.................
Now put hand in the front of robot it will stop go back turn littlie bit and run again.
buy me a coffee! ☕: Donate


Comments
Please log in or sign up to comment.