Did you ever dream about turning lights on and off by clapping your hands? If so, this project is for you!
This project uses a sound sensor to control a NeoPixel LED strip. The lamp plugs into a power outlet and can be turned on/off via 2 consecutive claps or knocks.
A craft wire was used to shape the lamp while a small cardboard box hides the components.
You will need the materials listed in the Components and Supplies section
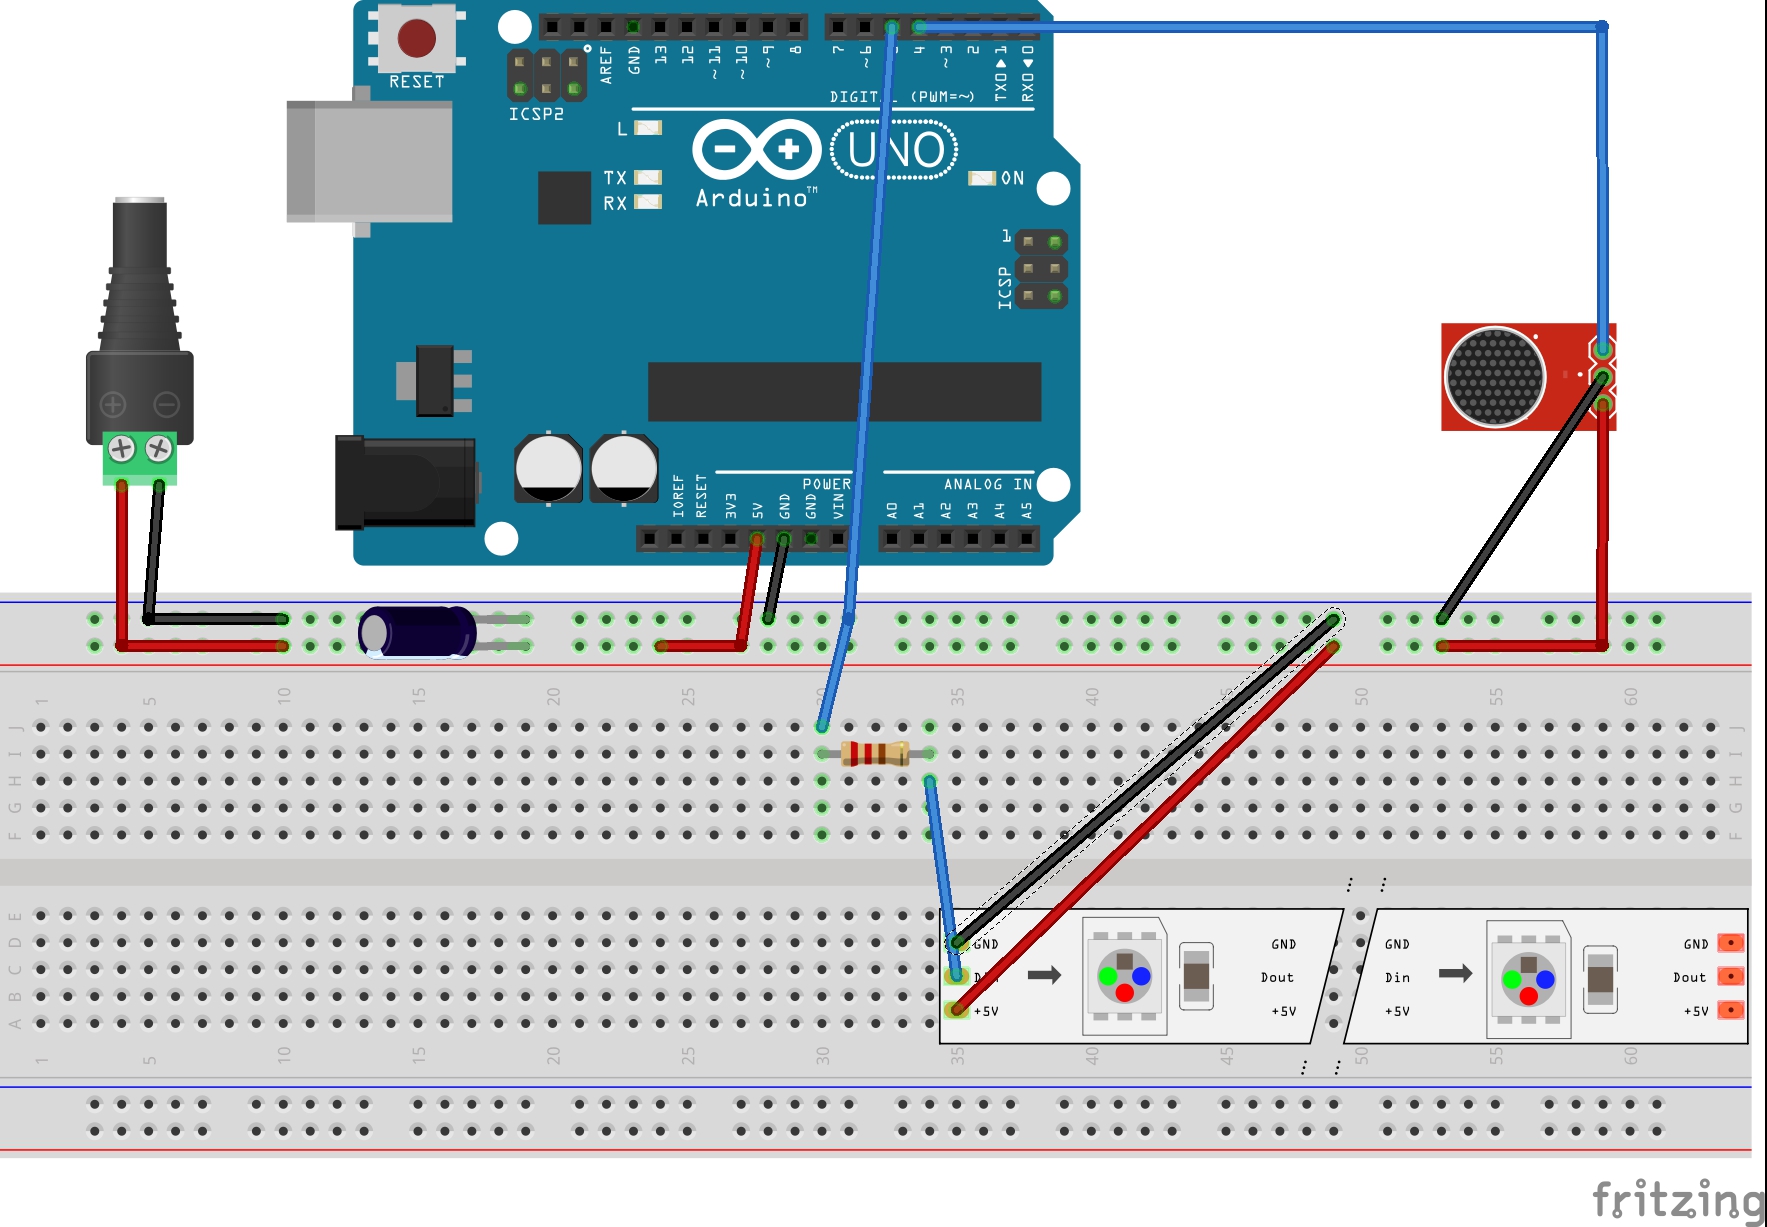
Step 2. Wire The ComponentsThe following diagram shows the completed wiring diagram once the code is uploaded. Do not plug in the Arduino to the computer and the external supply at the same time. When uploading the code to the Arduino, do not connect the red wire that goes to the 5v pin on the Arduino and the black wire that goes to the GND pin on the Arduino.
Be sure to test the sound sensor so that it correctly picks up sounds - there's usually a screw that can be turned.
The external power supply is not pictured. The external power supply should 1) be connected to the Female DC Socket to Screw Terminal Block Adaptor 2) be enough to power all the components (Arduino, LED strip, sound sensor).
1. Open Arduino IDE
2. Navigate to Tools > Manage Libraries...
The Library Manager will open and you will find a list of libraries that are already installed or ready for installation
3. Search for FastLED.
You should see the target version of FastLED (version 3.4.0) listed
4. Click on install and wait for the IDE to install FastLED.
You should now see FastLED available in the Sketch > Include Library menu
Step 4. Upload the Code to ArduinoDownload the code in the section below and upload it to the Arduino.
Step 5. Connect the External Power to ArduinoConnect the red wire that goes to the 5v pin on the Arduino and the black wire that goes to the GND pin on the Arduino as shown in the schematic.


_ztBMuBhMHo.jpg?auto=compress%2Cformat&w=48&h=48&fit=fill&bg=ffffff)


Comments
Please log in or sign up to comment.