


Hardware components | ||||||
 |
| × | 1 | |||
Software apps and online services | ||||||
 |
| |||||
Hand tools and fabrication machines | ||||||
| ||||||
| ||||||
When I started this project I had less than 4 months experience working with an Arduino micro-controller board. What’s more, I really knew nothing about electronics. I could replace a broken electrical socket in the house (and I knew enough to turn the power off before I did it), but I had no idea what a capacitor did or what a resistor was used for or why a diode could emit light.
Then for my birthday my wife bought me an Arduino Starter Kit. In a few days I was surprised to be making real circuits and learning about how these little electronic gadgets work. The amazing thing is not only was I making the projects laid out in the tutorials included in the kit, I was already beginning to think of new projects that I could make using the skills I had learned in just a short time.
It also wasn’t just electronics I was learning, I was also writing ‘C’ code in the Arduino IDE (Integrated Development Environment). Prior to this any computer programming I had accomplished was in Visual Basic, Visual Basic for Applications (VBA), or Commodore BASIC (yes, I am that old). All of this was happening in just a few short weeks after receiving the starter kit.
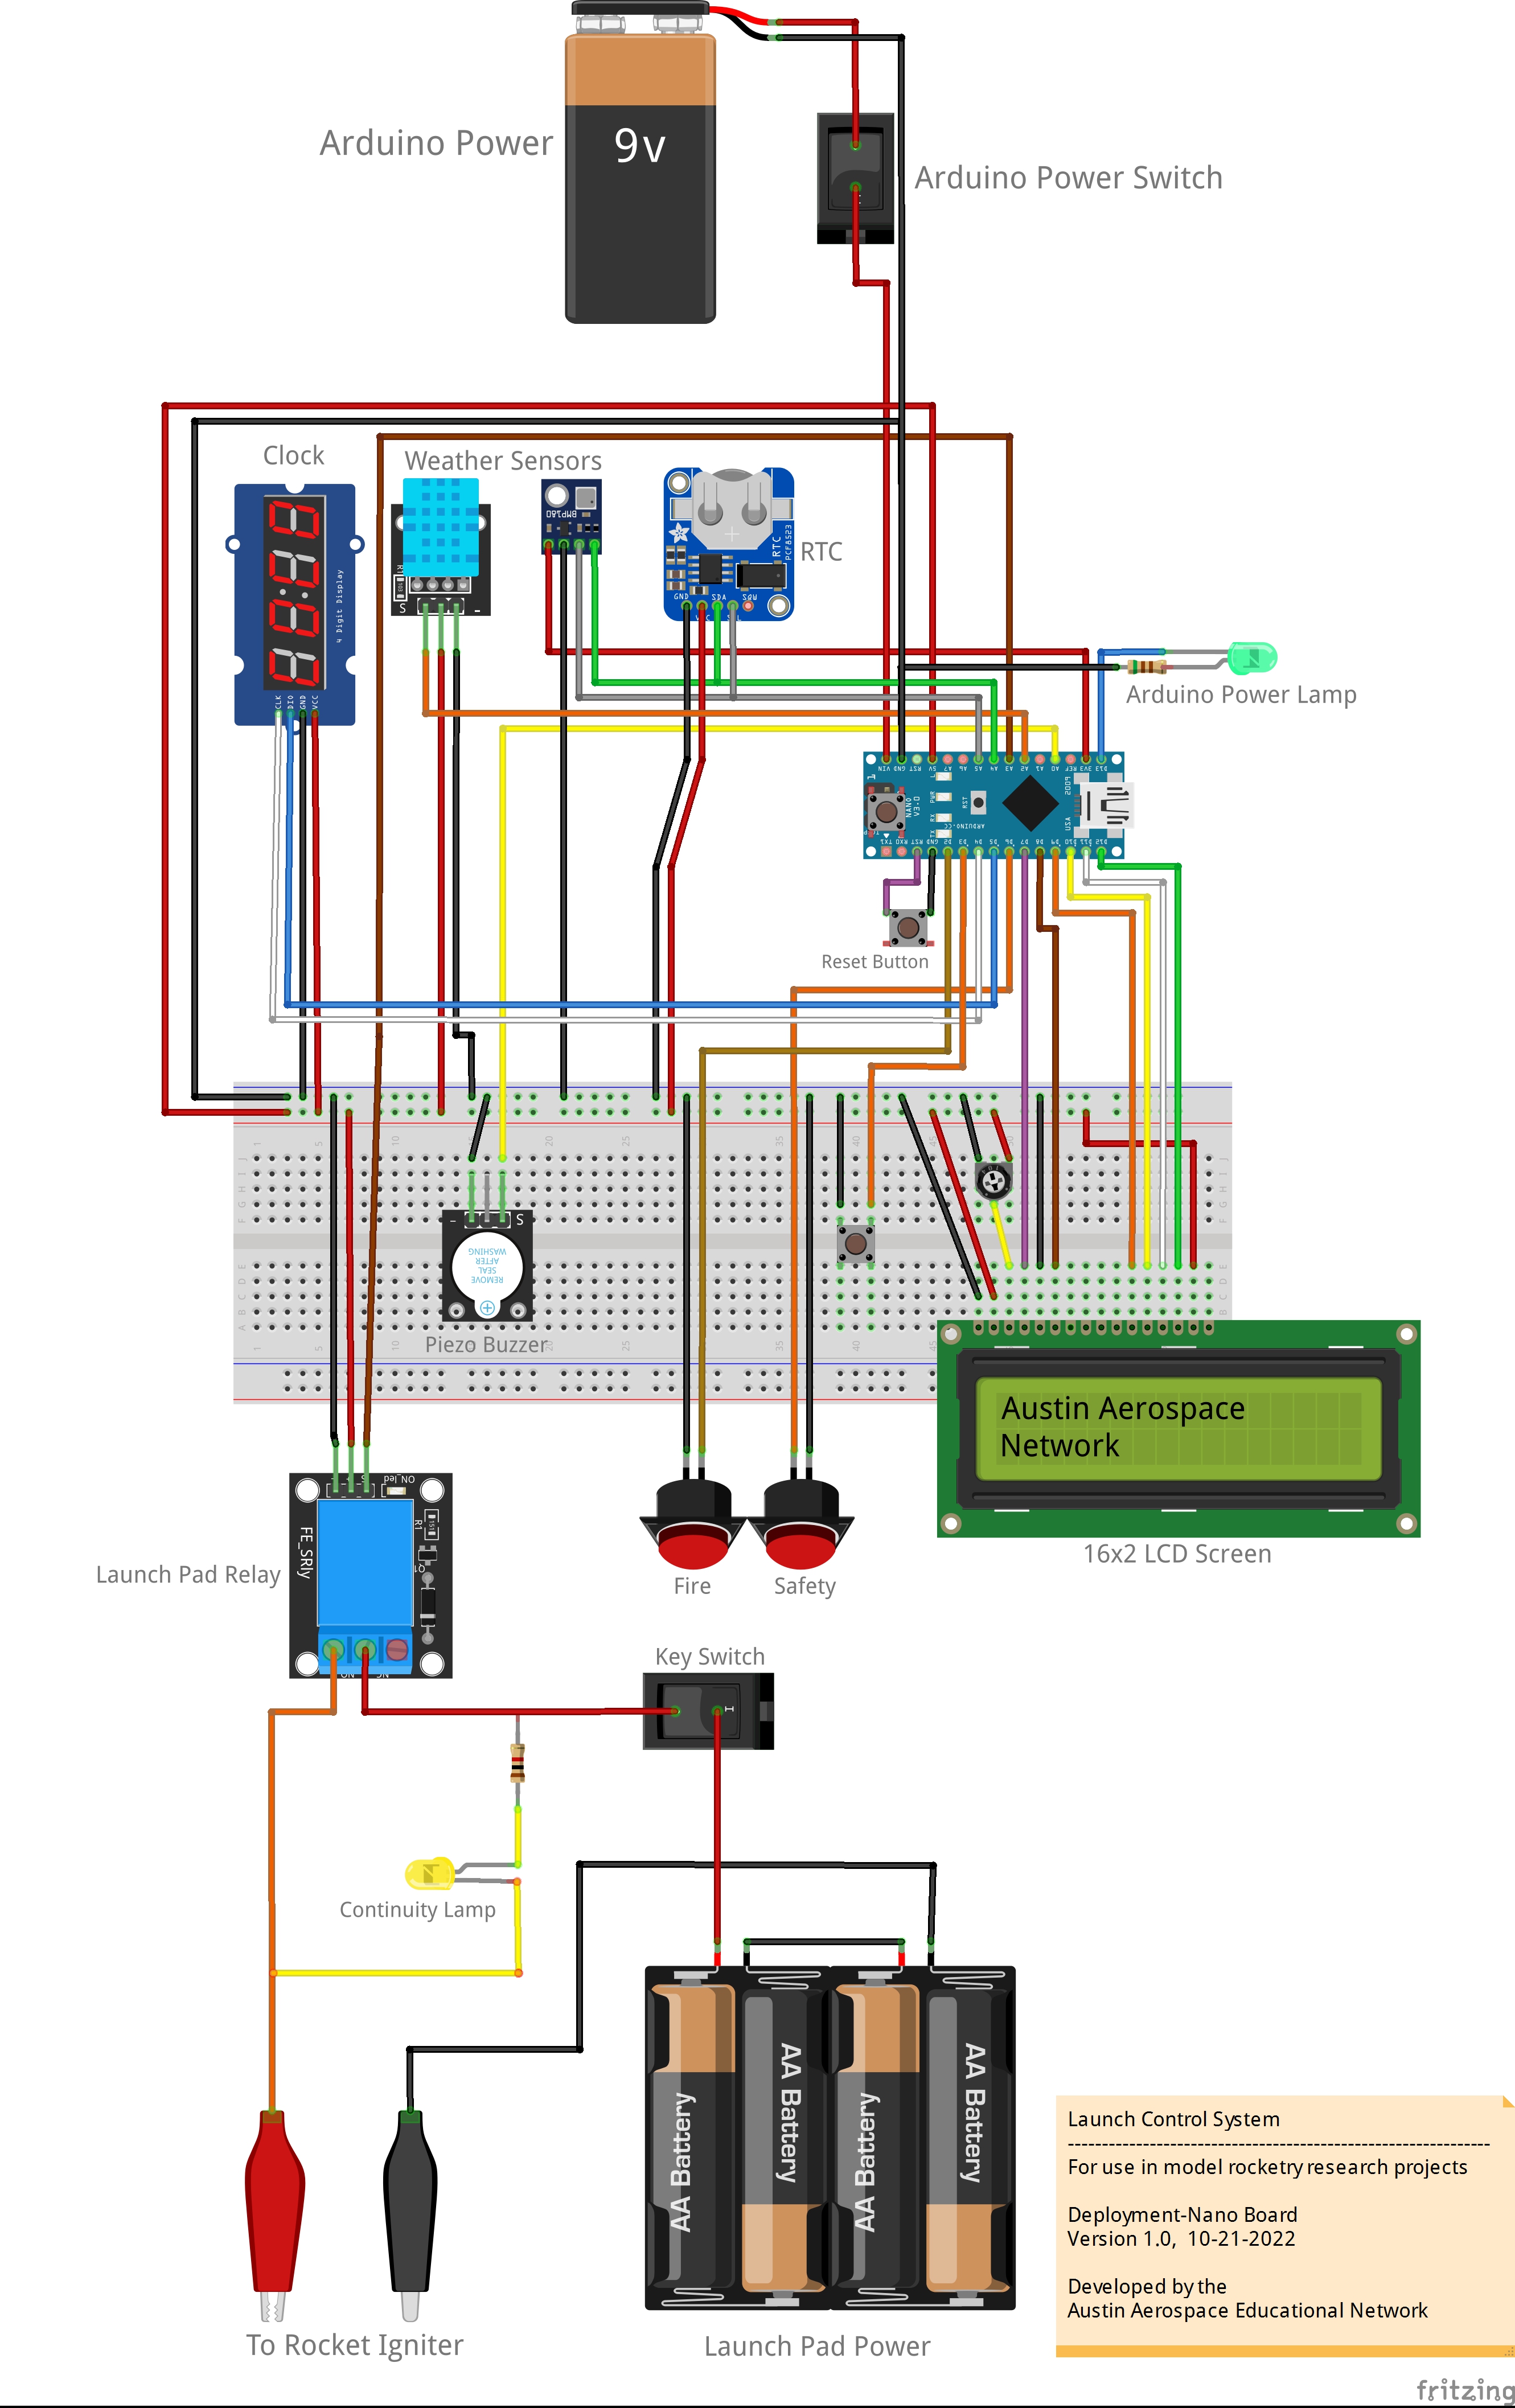
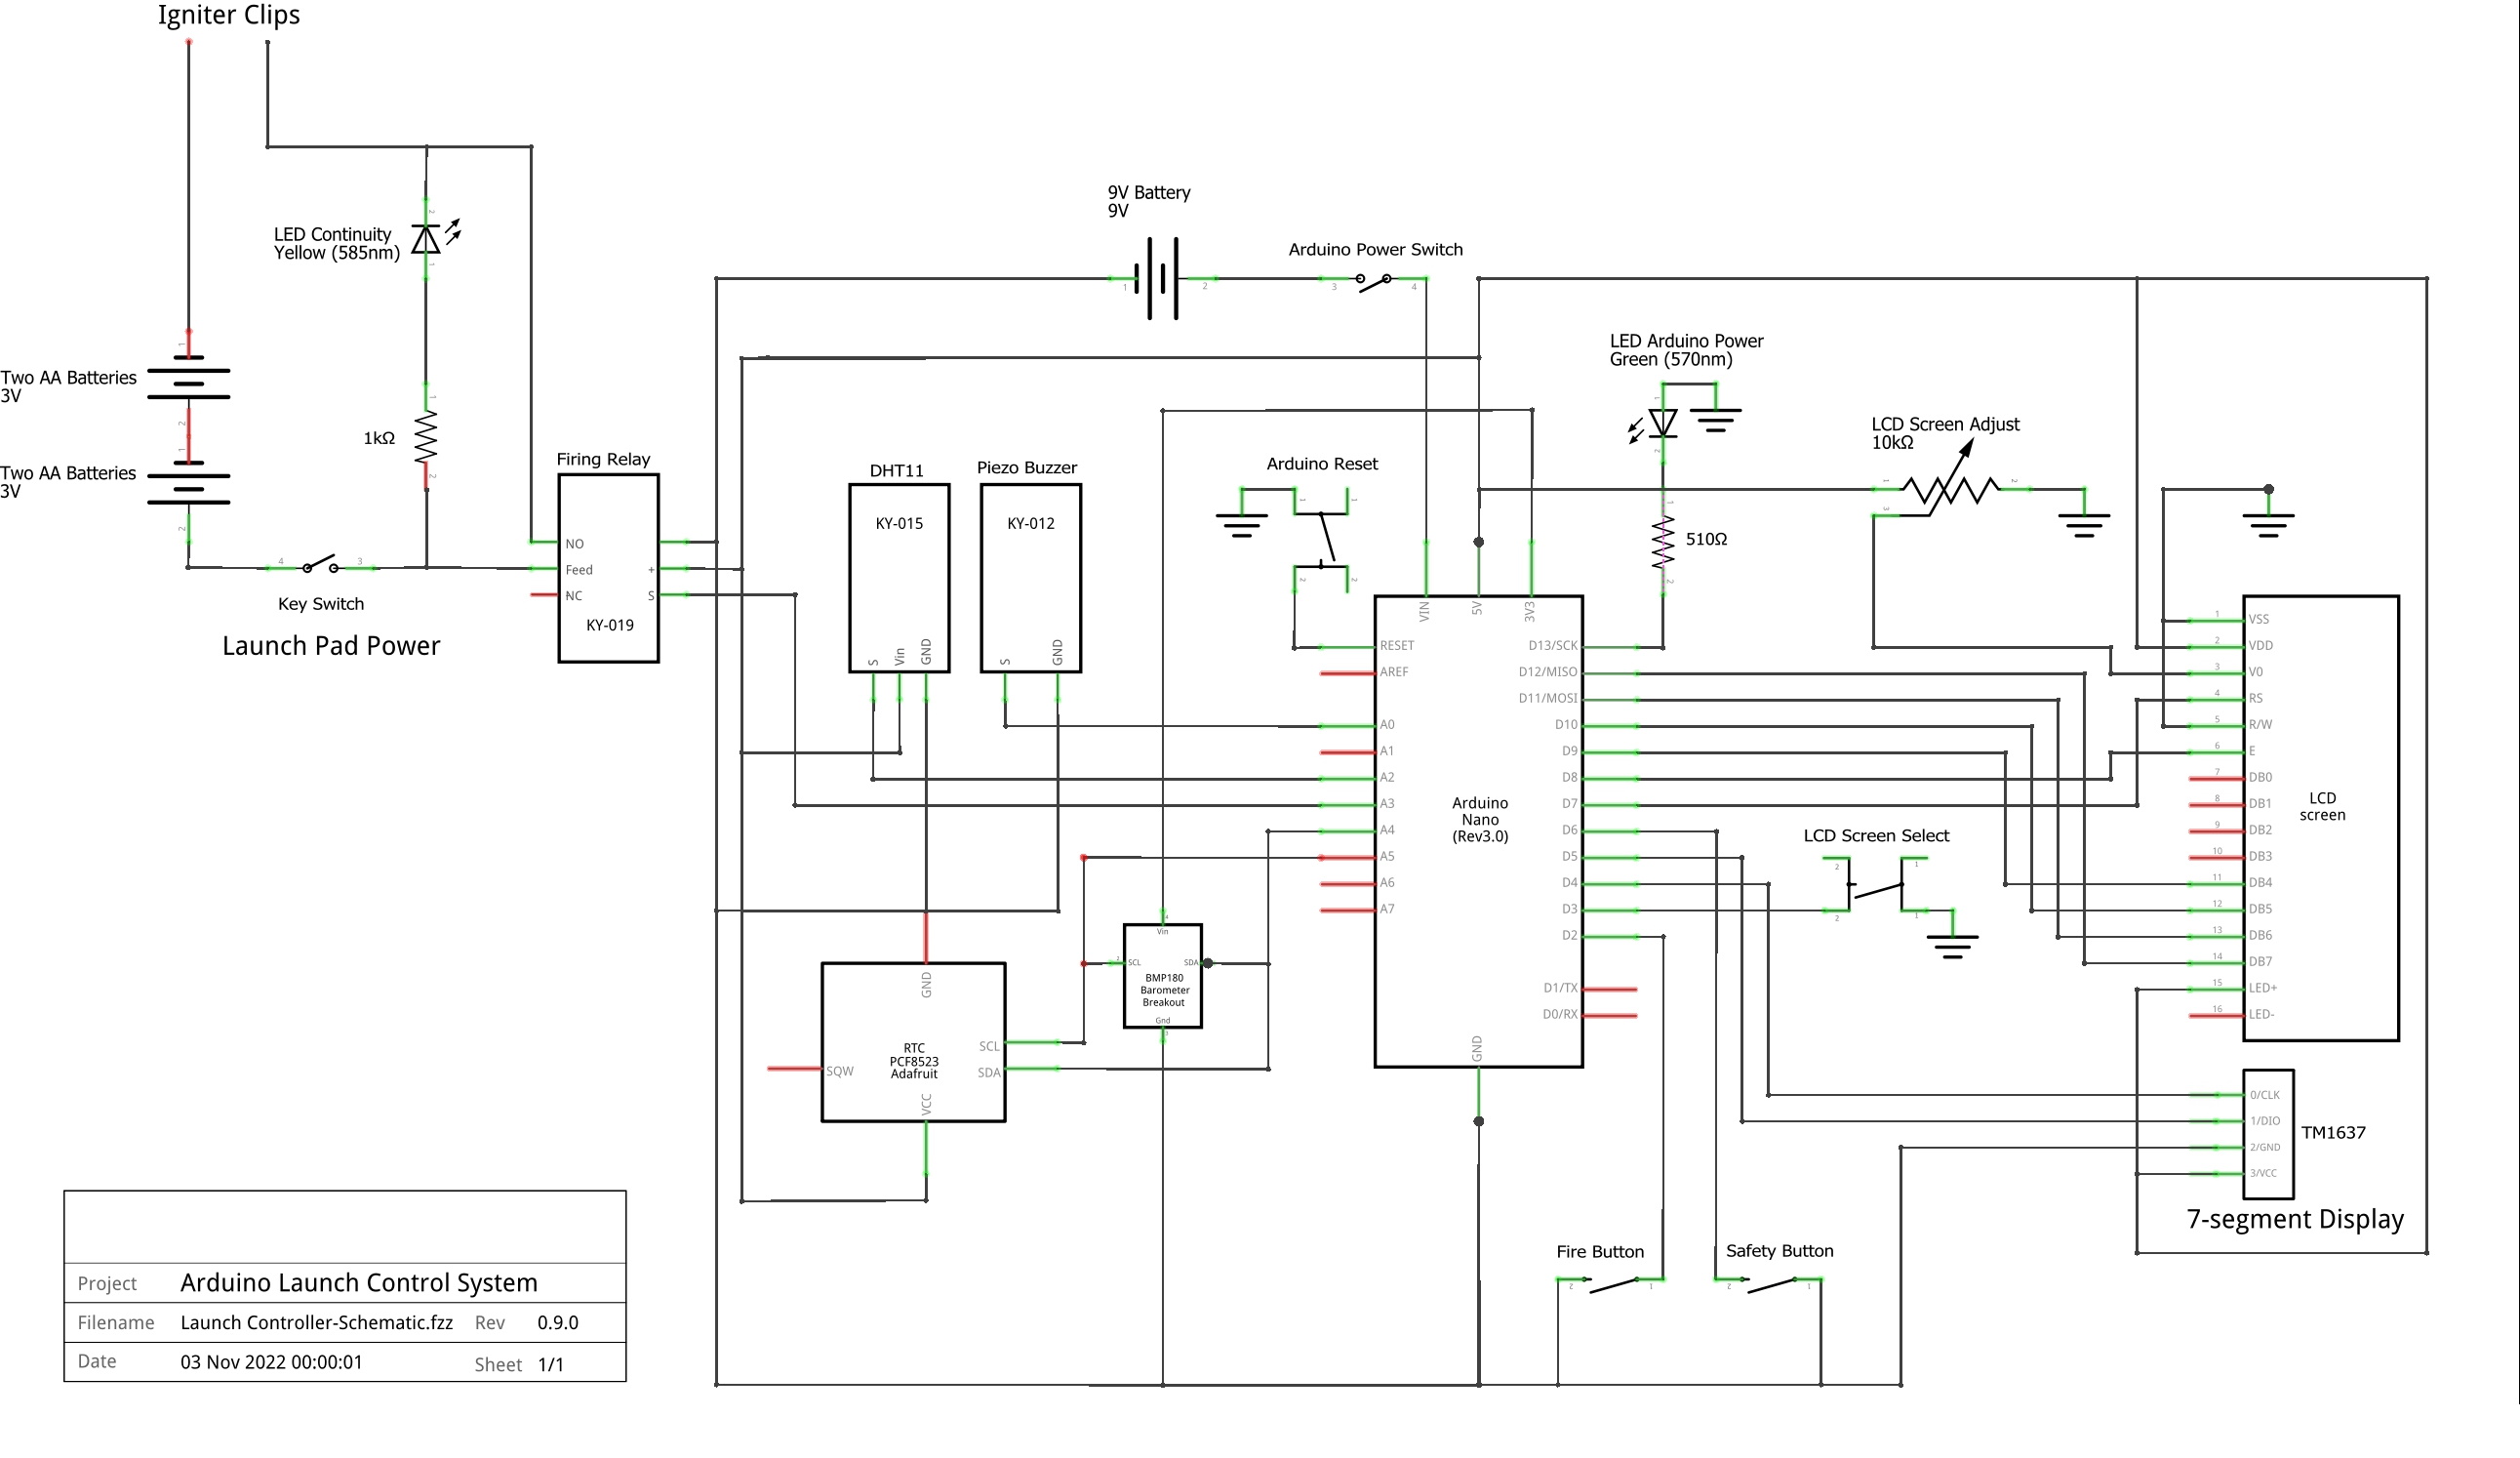
If this wasn’t enough, I was learning about how to document my electronic projects. I always like to document my projects. I find I refer back to them often – especially if I run into similar problems in a new project. This led to learning another new skill – that of schematic drawings. The electronic drawings in this project are created with a program called “fritzing” (https://fritzing.org/). It is an open source program that allows you to create not just schematics, but breadboard illustrations, PCB (Printed Circuit Board) designs and you can attach the Arduino code for the project.
So why did I start this project with this type of introduction? Because there are a lot of you out there that looks at electronics as I did. It’s a magical genie – and in some ways it is – but it is a genie that you can learn to control and make some remarkable things. Plus you will learn more than just electronics along the way.
No doubt there are some of you on this site who have been building electronic projects for years. I would not be surprised if you looked at this project and laughed – seeing everything I did wrong. That’s OK, because I’m just learning. Near the end of the instructions I discuss how the project could be improved, things I would do differently, and more.
For those of you (like me) who are new to electronics or are thinking about trying an electronic project, I want you to feel free to try things and learn as well. You will make mistakes, and sometimes the electronic genie will escape in a whiff of blue smoke. But remember, you will learn more from your mistakes than from your successes.
If you build this project you will no doubt have ideas of your own you may want to incorporate. That’s good! The current design uses nearly all of the available pins in an Arduino Uno and the Nano. But don’t let that deter you.
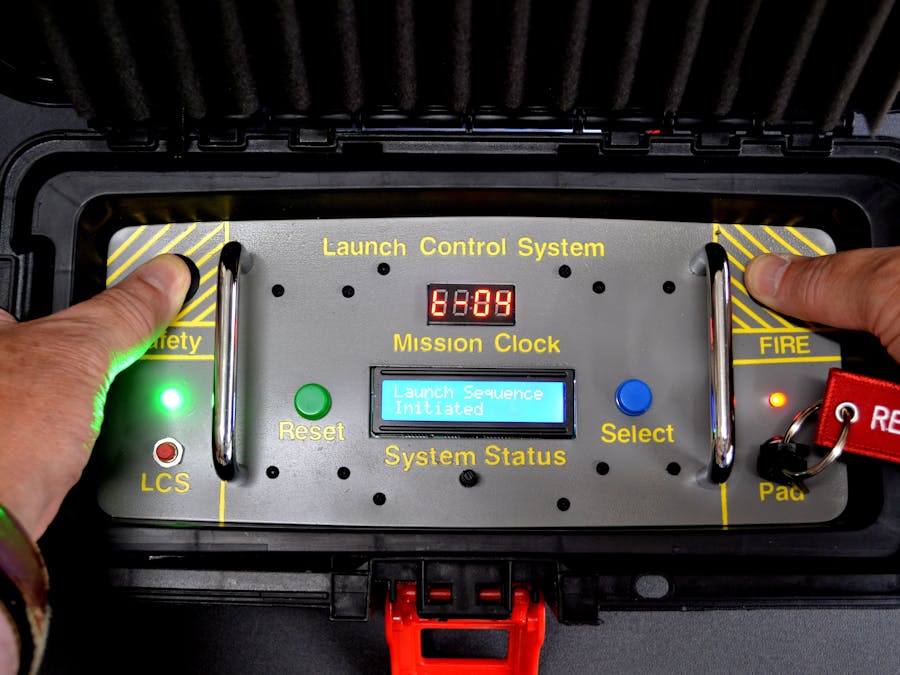
Finally, if I can begin learning electronics at age 61, you can learn it too! Now let’s look at my first project (that is not from a starter kit tutorial), the “Arduino Launch Control System” (LCS).


Comments
Please log in or sign up to comment.