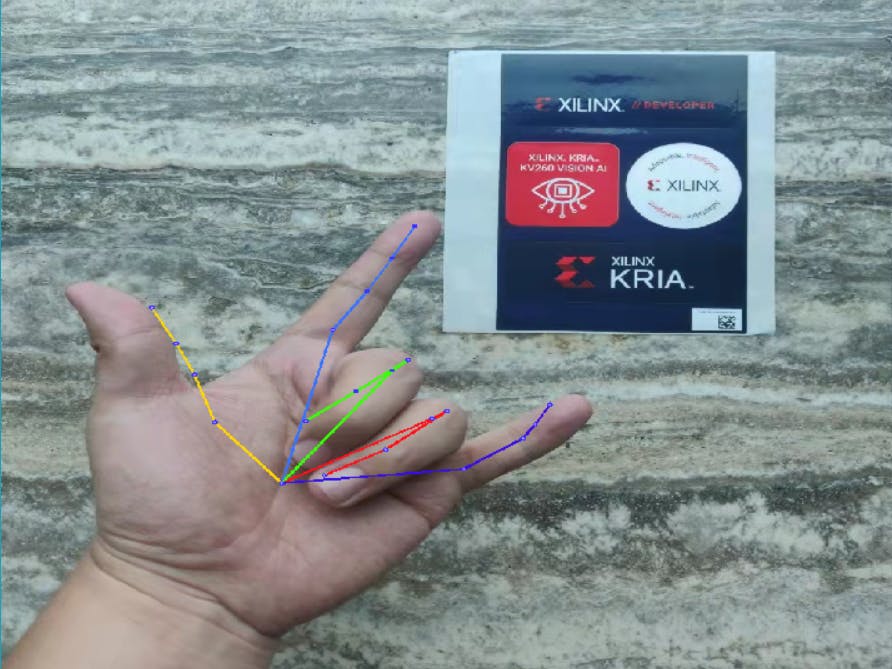
The project uses ResNet50 as the training network, using images of hands that have been labeled with key points as the training set, and Pytorch as the tool for training the model. The model was then quantized, compiled, and deployed in the Xilinx KV260 Vision AI Starter Kit through the Vitis AI tool provided by Xilinx. The program is a test of 21 key points of the hand, and the test images are shown below.
ResNet was proposed in 2015 and won first place in the ImageNet competition classification task because of its "simplicity and practicality", and many methods have since been built on ResNet50 or ResNet101 for detection, segmentation, and recognition. Detection, segmentation, recognition and other fields have been using ResNet.
2 DatasetThe dataset includes web images and the dataset <<Large-scale Multiview 3D Hand Pose Dataset>> to filter some images with low action repetition for production, with 49, 062 samples.
Thanks to the contributors of the "Massive Multi-view 3D Hand Pose Dataset" dataset: Francisco Gomez-Donoso, Sergio Orts-Escolano, and Miguel Cazorla. "Massive Multi-view 3D Hand Pose Dataset". arXiv e-prints 1707.03742, July 2017.
3 TrainingFor model training I used the above publicly available dataset. I implemented the network for ResNet50 via PyTorch and used RTX 3070Ti as GPU gas pedal to get the PyTorch model (.pth file). I prepared 5 photos of my own hands to test the training of the model, and the images are shown below.
The Vitis AI Library is a set of high level libraries and APIs built for efficient execution of AI inference using DPU. It is built on the Vitis AI runtime using the Vitis Runtime Unified API to provide complete support for XRT.
The Vitis AI library provides an easy-to-use and unified interface by encapsulating a number of efficient and high-quality neural networks. The Vitis AI library allows you to focus on developing your own applications rather than the underlying hardware.
Referring to the Vitis AI User Guide (UG1414), we can quickly configure the environment on the host computer as shown below.
The Vitis AI quantifier currently supports TensorFlow (1.x and 2.x), PyTorch and Caffe. vai_q_pytorch needs to be installed since we are using PyTorch. it seems easier to use a Docker container to install it here. Note that we need to enter the vitis-ai-pytorch environment before creating the standalone Conda vai_q_pytorch environment. Use the following command to install.
/opt/vitis_ai/scripts/replace_pytorch.sh new_conda_env_name
We then burned the petalinux firmware to the SD card included in the Xilinx KV260 Vision AI kit (we would like to thank Xilinx for providing the hardware support to the participants. Although the price of a small SD card is very low, it is enough to see that Xilinx is taking the user's point of view into consideration). Make sure to connect the USB data cable, Ethernet cable, DC power cable is not connected first.
Install MobaXterm software on the computer, create a new serial communication task. When inserting the USB data cable the computer will pop up two serial ports, we choose the small COM number as the USB communication interface, select the baud rate as 115200 and establish a connection.
After plugging in the DC power supply, we can observe the petalinux startup process from the serial port interface. After configuring the password, we use the command "sudo addr show" to check the IP address (see below). We establish SSH connection with KV260 through MobaXterm software for later data transfer.
Once configured, we prepare the input files for vai_q_pytorch. The first file is a pre-trained PyTorch model, usually a PTH file. The second is a Python script containing the definition of the floating-point model structure. The third is a subset of the training dataset, containing 100 to 1000 images for quantitative testing. Once the three files are ready, we run the command with "--quant_mode calib" to quantize the model. During the run, the losses and accuracies shown in the log log are skipped. xmodel files for the Vitis AI compiler are in the output directory. /quantize_result. This file can be used for deployment to FPGAs.
6Compile, deploy and run
For PyTorch, the quantizer NNDCT outputs the quantized model directly in XIR format. Please use vai_c_xir to compile it.
vai_c_xir -x /PATH/TO/quantized.xmodel -a /PATH/TO/arch.json -o /OUTPUTPATH -n netname
After that, the model can be deployed to observe the actual detection effect as in Figure 9, enjoy your time!


.png?auto=compress%2Cformat&w=48&h=48&fit=fill&bg=ffffff)


Comments
Please log in or sign up to comment.