


Hardware components | ||||||
 |
| × | 1 | |||
| × | 1 | ||||
 |
| × | 1 | |||
 |
| × | 1 | |||
I was fortunate to be selected as a beta tester for Artik 10 by Samsung during the period of M.A.D (Makers Against Drought), a competition hosted by Samsung in Devpost to solve water crisis in California and be part as a participant for the challenge. You can view my submission, here.
IntroductionIn this article, I would like to take the opportunity to write a tutorial about how to read water flow sensor data in C programming. (I'm still an amateur in C programming, hopefully there will be someone Expert to verify this tutorial!). The original source code for reading this water flow sensor is actually for Arduino, so I took up some time to write it in C programming language. The hardware I used here is Artik 10, an IoT Development Board from Samsung. It is not necessary to have an Artik 10 to proceed with this tutorial. As long as your machine is an embedded Linux board and able to compile C program file, it is okay. To compile the C program file, you need a compiler called "GCC compiler" from GNU. (So make sure, your board have that to proceed in this tutorial) If you are using Artik 10, GCC compiler is built-in, so you need no worries about the compiler.
Who Should Follow this TutorialAny person who wanted to try out the water flow sensor with model part YF-S201C or model YF-S201 with C programming for their embedded devices. If you have try out the water flow sensor with my code, please kindly feedback me with the result, so I can improve it. Thanks!
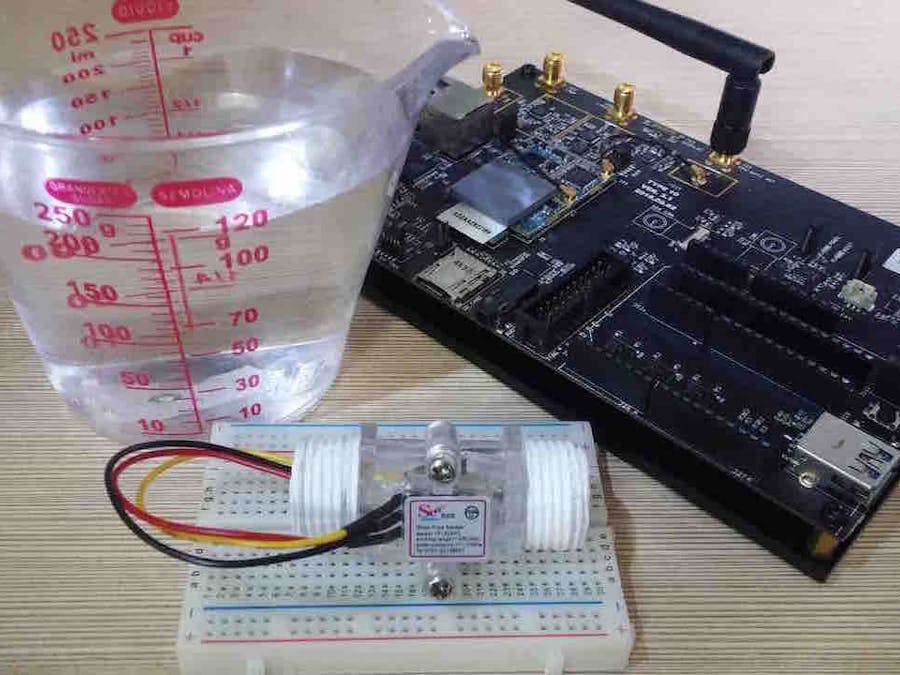
Video DemonstrationHardwares1) First component, you need an embedded Linux device, if you don't, you can find it here. My case for this tutorial, I'm using Artik 10. The Linux version in my Artik 10 board is Fedora release 20 (Heisenbug).
2) Second component is the water flow sensor with model part YF-S201C or model YF-S201 should be working. This tutorial is using the first model (YF-S201C).
It has the specifications as below:
- Min working voltage: DC4.5 5V~24V
- Maximum operating current: 15 mA (DC 5V)
- Working voltage range: DC 5 to 18 V
- Load capacity: ≤ 10 mA (DC 5V)
- Work temperature: ≤ 80 ℃
- Work humidity range: 35%~90%RH (no frost)
- Allowing pressure: pressure 1.75 MPa
- Storage temperature: -25~+80 ° c
- Save humidity: 25%~95%RH
- Flow Range :1~30L / min
- External threads: Approx. 1/2"
- Color: Transparent
- Red Line: Positive(+)
- Yellow Line: Signal output.
- Black Line: Negative(-)
3) Third component (optional) is breadboard, this is to provide convenient for connections.
Water flow sensor is built of plastic valve body, rotor assembly and hall current sensor. When water through the flow rotor assembly, Magnetic rotor will rotate with speed changes as the flow change. Hall current sensor output corresponding pulse signal and feedback to Artik 10. By counting the pulses feedback from the sensor, we calculate the water flow rate with unit in Litre per Hour (L/H). With reference and original Arduino source code from Arvind Sanjeev, in DIY Hacking. In Arduino flow rate sensor, for every litre of liquid passing through it per minute it outputs about 4.5 pulses. Then, in order to get the flow rate with unit litres/minute, you need to further divide the total pulse count obtained by 4.5. In my Artik 10, I calibrate the pulse to 5.0, which give me a much better precision during measurement.
float calibration_factor = 5.0;        // please calibrate this to suit your board
flow_rate = ((1000.0 / (elapsed)) * pulse_count) / calibration_factor;
Then, futher divide the flow rate with 60 and times 1000, you will get the millilitre of water flow. Add up all will give you the total of water that has passed through the sensor in millilitre.
ml = (flow_rate / 60) * 1000;    // millilitre of water
ml_total += ml;                  // total of water flow in millilitre
The source codes is available in this post inside my github repository. The coding is much self-explanatory, I have included comments in the code. Please note that, you need to tells the compiler to link with the pthread library, which purpose for compilation for threads. You can do it as below:
$ gcc -o water_flow main.c water_flow.c interrupt.c
In the execution file, it requires an argument. The argument represent the GPIO pin of your embedded device that connect the signal pin of the water flow sensor.
During execution, you need to follow this command:
$ ./water_flow <GPIO-Pin-to-Water-Flow-Sensor>
Example to execute it with pin 13 for Artik 10:
$ ./water_flow 22
Finally, in the terminal you should be able to see output as below:
Program Started ...
Please press <enter> to exit this program.
Flow rate: 0.000000 L/min; Current Liquid Flowing: 0 ml/sec; Output Liquid Quantity: 0 ml
Flow rate: 0.000000 L/min; Current Liquid Flowing: 0 ml/sec; Output Liquid Quantity: 0 ml
Please note that, you must press "ENTER" to stop this program. Because this will successfully unexport your reference pin for the next execution.
Schematics DiagramBelow is the schematics diagram for Water Flow Sensor to Artik 10:


Comments
Please log in or sign up to comment.