


About: Hello, the author of the project is an Application Engineer of Seeed Studio. It's great to share this project with the Hackster maker community. I hope you like Seeed Studio, a hardware enabler for IoT applications, which provides services that enable IoT developers to quickly prototype... More information about Seeed Studio »
This time we would like to share a new project made with Arduino: A Christmas Remote Control Robot Named 'Danbo'.
In this project we used 2x microcontroller boards that can be used as same as Arduino UNOs:
- one for controlling the servos inside the robot to move the arms, the waist, and the head
- while another one is in the remote controller together with a couple of wireless modules
Add TipAsk QuestionCommentDownload
Step 1: About "Danbo"Danbo (ダンボー) is a fictional cardboard box robot character from Kiyohiko Azuma's manga series Yotsuba&!. In the ADV Manga English translation of the manga the name Cardbo was used, but the name was then changed to Danbo in the latest Yen Press English translation.
In reality, Danbo is merely a person inside of a costume made of cardboard, it's picked up as an Internet meme, and inspired various electronic gadgets.
Add TipAsk QuestionCommentDownload
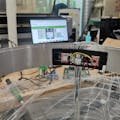
Step 2: Things We Used to Make a Cute Danbo5 More Images
Building a cute lovely Danbo isn't really some kind of rocket science. In fact, anyone can build it, as long as you have seen this instructable XD.
Check the items below to see what we've used to make Danbo:
Hardware:
- Seeeduino V4.2 (Arduino Compatible
- Base Shield
- Grove – Servo * 5
- Wireless communication module
- Seeeduino Lotus (Arduino Compatible)
- Grove – Button(p) * 2
- Grove – Thumb Joystick
- Energy Shield
Structure:
- 3mm wood
- M3 support columns —— many
- M3 flat heat screws —— 64 PCS
- M3 nylon rivets —— 26 PCS
- M2 screws —— 18 PCS
- M2 nuts —— 18 PCS
- M2 self tapping screws —— 5 PCS
- Washed kraft paper
- stapler
- screwdriver
Add TipAsk QuestionCommentDownload
Step 3: First Thing First: Hardware ConnectionAt first, we should connect the electronic modules to each microcontroller:
- To build the Danbo robot, we connect the Grove Servos and wireless communication module to Seeeduino v4.2, please refer to the table. 1
- To build the Remote Controller, we connect Grove modules to the Seeeduino lotus, please refer to the table.2
Add TipAsk QuestionCommentDownload
Step 4: Upload the Arduino Code to "Danbo Robot"Now we can upload the Arduino Code to our Danbo Robot :
1. Download demo code at https://github.com/Lee-Kevin/Danboard/
2. Click “Download zip” button on right side of webpage to download all codes.
3. Decompress the downloaded zip files to“C:\Users\Administrator\Documents\Arduino\” and remove “-master” in decompressed file name.
4. Launch Arduino IDE.
5. Click Sketch>Add file to add Robot.ino file from“C:\Users\Administrator\Documents\Arduino\ Danboard\Robot\”.
6. Click Tools -> Board and select “Arduino/Genuino Uno” and chose the right port, as shown in the picture below.
7. Press CTRL +U to upload codes to your board. Wait a while, there will be saying “Done uploading”.
8. Congratulations, you have already completed the robot side software work.
Add TipAsk QuestionCommentDownload
Step 5: Upload the Arduino Code to ''Remote Controller"Then we upload the Arduino Code to the Remote Controller :
1. Download demo code athttps://github.com/Lee-Kevin/Danboard/
2. Click “Download zip” button on right side of webpage to download all codes.
3. Decompress the downloaded zip files to“C:\Users\Administrator\Documents\Arduino\” and remove “-master” in decompressed file name.
4. Launch Arduino IDE.
5. Click Sketch > Add file to add Controller.ino file from“C:\Users\Administrator\Documents\Arduino\ Danboard\Controller\”.
6. Click Tools -> Board and select “Arduino/Genuino Uno” and chose the right port, as shown in the picture below.
7. Press CTRL +U to upload codes to your board. Wait a while, there will be saying “Done uploading”.
8. Congratulations, you have already completed the controller side software work.
Add TipAsk QuestionCommentDownload
Step 6: Create a 3D ModelIn order to make the skeleton create more easily, we need create a 3D model about Danbo's skeleton.
It would be easier for us to confirm every servo's position and angle of movement in the 3D model.
After creating the 3D model, we need to convert it to 2D for laser cutting.
Add TipAsk QuestionCommentDownload
Step 7: Laser CuttingWe used 3mm(thickness) wood to laser cut the Danbo skeleton.
As for the skin part, we laser cut washed kraft paper.
And the Christmas skin style, we laser cut some white cardboard to build it.
Here we've attached the files for laser cutting, which you can directlt download them to cut a Danbo robot for your own.
Step 8: Servo Installation6 More Images
There are 2 servos on Danbo's neck, 2 servos for the shoulders, and 1 for the waist.
When installing, make sure to start with the boards that are used to fix the servos, and then go with other parts. Align the initial position when installing. Note that the servo is aligned with the initial position.
Add TipAsk QuestionCommentDownload
Step 9: Assemble the Body and Head3 More Images
Fixed the head with support pillars and screws, then fixed neck and head.
Fixed the body with support pillars and screws too, then fixed waist and body.
Now, combine the neck and body with nylon rivets, do the same to the arms and the body.
Take out all the servo's cables from Danbo's back.
Add TipAsk QuestionCommentDownload
Step 10: Fixed Danbo's HeartConnect all of servo's cables to Seeeduino v4.2, then put seeeduino into Danbo's body. Use nylon rivets to fixed them. Put all the cable's inside the body too.
Add TipAsk QuestionCommentDownload
Step 11: Make the Skin of Danbo3 More Images
The laser cutting of the water-washed kraft paper are folded into the appropriate shape, you can use a stapler to fix the water-washed kraft paper. When it's done, dress up Danbo with those papers.
Add TipAsk QuestionCommentDownload
Step 12: Make the Christmas Hat and BeardThe laser cut cardboard, we use red marker make it red and fold it as a hat. Stick the beard to Danbo's face with a sticker, and cut the edge of the beard with scissors
Add TipAsk QuestionCommentDownload
Step 13: Fixed the Remote ControlNow we come to the part of the Remote Control.
Firstly lets fixed the Seeeduino Lotus onto the bottom plate, then put two Grove - Thumb Joystick on each side of it.. Now fixed two buttons on the side plate.
Connect all the parts, including the side boards, the top board and the bottom one with support pillars and screws.
Add TipAsk QuestionCommentDownload
Step 14: Here We Go: a Super Cute Danbo Robot With Remote ControlNow, you just made yourself a super cute Danbo Robot with remote control.
Check the video we've posted to see how fun is it!
Comments
Please log in or sign up to comment.