


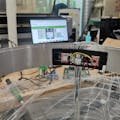
Hardware components | ||||||
 |
| × | 1 | |||
| × | 1 | ||||
| × | 1 | ||||
| × | 1 | ||||
Software apps and online services | ||||||
 |
| |||||
About: Hello, the author of the project is an Application Engineer of Seeed Studio. It's great to share this project with the Hackster maker community. I hope you like Seeed Studio, a hardware enabler for IoT applications, which provides services that enable IoT developers to quickly prototype... More information about Seeed Studio »
When it comes to weather, what comes into your mind, cloudy, thunder, sunny or rainy? However, these words are somewhat abstract. What if you have a chance to make a cloud, which can not only report the weather with words/numbers, but also show you the current whether via vivid light and sounds? Now, we will show you how to make this cloud step by step.
We will use ReSpeaker, the core hardware module, to make it possible for the cloud to perform the mysterious voice interaction. Since ReSpeaker is open-source, makers like you are free to apply it into your creations! For more details, please visit http://respeaker.io/.
PS: ReSpeaker is on Kickstarter crowdfunding, if you want it, can go here predetermined ~Step 1: Materials Preparation
- ReSpeaker, launched by Seeed Studio, is an open-source voice-interaction hardware module. In the near future, we will be able to control household appliances, robots and other machines/tools with voice instead of a remote controller.
- Iron wires with the diameter of 1.2mm – to build the frame of the cloud
- Cotton for decoration
- 5v output portable power bank
Add TipAsk QuestionCommentDownload
Step 2: Setup 7688Since ReSpeaker is powered by the MT7688 Wi-Fi module and ATMEGA32U4 processor, its software runs on MT7688 and Arduino Leonardo(32U4) respectively. The two chips communicate via UART and SPI.
Setup 7688
Connect 7688 to computer with a Micro USB cable. If the USB device cannot be recognized, please click here to download the driver.
Connect 7688:Baud rate:57600 Software:We’d recommend putty for Windows, and screen for Linux and Mac.
screen /dev/xxx 57600Connect 7688 to the Internet
Switch AP mode into 7688 station mode and run the following command.
vi /etc/config/wirelessChange configuration files as the followings.(image 1)
Option disabled ‘0’<br>option ssid ‘your ssid’
option key ‘your key’
Run the following command
> uci commitMake sure your ReSpeaker has already connected to the network.(image 2)
ping seeed.ccAdd TipAsk QuestionCommentDownload
Step 3: Download Arduino Code1. Download the Arduino code from GitHub
2. Open the Arduino IDE and open the arduino code file
3. Click Tools -> Board and select "Arduino Leonardo" and select the correct port, as shown below
Click Upload to upload the code to the Arduino. If you see the following results, you’ve successfully downloaded the code to ATMEGA 32U4.(image1, 2)
Add TipAsk QuestionCommentDownload
Step 4: Download MT768 CodeOpen a software terminal; insert the SD card into ReSpeaker card slot. And then run the following command:
root@mylinkit:/# cd /Media/SD-P1<br>root@mylinkit:/tmp/run/mountd/mmcblk0p1#When navigate to Media/SD-P1, the system will automatically mount SD card to/tmp/run/mountd/mmcblk0p1, run git clone command here to download the code to the SD card:
git clone https://github.com/jerryyip/Smart_Decorative_CloudAdd TipAsk QuestionCommentDownload
Step 5: Change the CodeYou can change it as you wish, such as thunder sound, the rain sound, etc. You should put audio file into audio folder in advance and add the content in the red box below into the code.(image 1)
In this application, we get the data from OpenWeatherMap.org, where you can get your own appID. And if you need to switch to another city, modify the info in the following red box(image 2)
Add TipAsk QuestionCommentDownload
Step 6: Set Up Auto-runCreate an autorun file in the current SD card to run the programs in the SD card automatically.
vi autorunAnd add the following code in this file
#!/bin/sh<br>
amixer sset Capture 90%

cd /tmp/run/mountd/mmcblk0p1/Smart_Decorative_Cloud
python demo.py &> /dev/console &
After restarting, you can wake up the device with the keyword “ReSpeaker”. When you hear "Hi" in response from ReSpeaker, you can ask her about the weather.
Add TipAsk QuestionCommentDownload
Step 7: Build Frame for the Cloud With the WireTwist six wires with pliers to fasten one end together.(image 1, 2)
If you finish the previous step, the wire will look like this and do the same work with the other end.And then you need to modify it & make it similar to a lantern frame.(image 3)
Now we have the frame for the cloud!
Add TipAsk QuestionCommentDownload
Step 8: Make the CloudUse a glue gun to stick the cotton to the wire.(image 1)
Tie up the top with a fish line, which will be used to hang the cloud to the rooftop. Please remember to hide the ReSpeaker module and the power within the cloud.(image2)
Add TipAsk QuestionCommentDownload
Step 9: DoneVoila! Now we have an interactive cloud, which can interact with you through sounds. Welcome to try and add some other interesting features as you like. You can make a cloud that can blow winds or a cloud that pours rains etc. The sky is not the limit! Don't forget to share your cool projects with us!


Comments
Please log in or sign up to comment.