About: Hello, the author of the project is an Application Engineer of Seeed Studio. It's great to share this project with the Hackster maker community. I hope you like Seeed Studio, a hardware enabler for IoT applications, which provides services that enable IoT developers to quickly prototype... More information about Seeed Studio »
Treat or.... Explode !
Every year at about this time, we always come up with various awesome ideas of the Halloween costume to celebrate the night on 31st October.
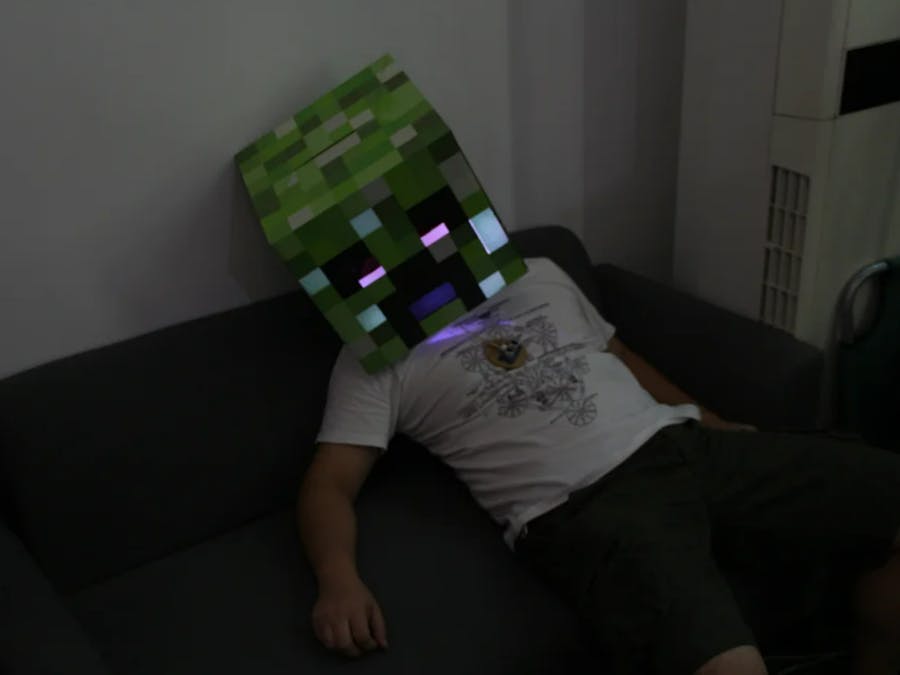
This year, as a huge fan of Minecraft, I decided to turn myself into a 'treat-or-explode' creeper, chasing people on the street and asking for candies.
Add TipAsk QuestionCommentDownload
Step 1: Prepare the PartsI firstly got a creeper mask from Amazon:
https://www.amazon.com/JINX-20064071-Minecraft-Cre...
To create an exploding effect with the creeper head mask, I think of using some flashing LEDs to achieve that:
The LED status - the flashing frequency and color, will change while I am getting closer to the person in front of me, starting from a soft white to slow repetitive flashing red and then fast repetitive flashing red.
The electronics I used are as follows:
- Seeeduino Lotus
- Grove - Ultrasonic Ranger
- Digital RGB LED Flexi-Strip
- Power Bank for power supply
I also used some tools to help make this custome:
- Nicking tool / Burin / Graver
- 3M Tape
- Double sided Tape
- Ruler
Add TipAsk QuestionCommentDownload
Step 2: Hardware ConnectionThe hardware connections are illustrated in the image above.
Connect the Grove Module to Seeeduino Lotus:
- Grove - Ultrasonic Ranger --- to --- D2
- LED Strip --- to --- D6
Add TipAsk QuestionCommentDownload
Step 3: Upload the CodeDownload the attachment Arduino code and upload to your Seeeduino Lotus.
The color and frequency of the Led Strip is controlled by Grove - Ultrasonic Ranger, which will detect the distance between me and the person in front of me.
There are 3 kinds of modes for the Led Strip:
- For a distance longer than 170CM, the LED is soft white light and blink slowly.
- For a distance between 170CM and 70CM, the LED Strip is white light and blink quickly.
- For a distance between shorter than 70CM, the LED Strip turns red and blink very fast.
Add TipAsk QuestionCommentDownload
Step 4: Make the LED LayerAs the entire mask is directly put on the head, if we set the LEDs on the internal surface, the light will be blocked by the head, so we need to create a LED layer in front of the face.
Firstly we take out the head support inside, cut and remove the fore part to create a free space for placing the LED layer. Then find a cardboard as the LED layer, cut it into proper size so it can fit in the space we just created. We also need to cut two holes for the eyes. Then stick the serveral interconnected LED strips onto the cardboard, make sure they are not too close with each other.
Add TipAsk QuestionCommentDownload
Step 5: Modify the Mask2 More Images
Now to make a authentic exploding LED effect, we need to modify the mask by cutting a few neat square holes with the help of ruler. Be noticed that the holes are not cut casually, make sure each hole is corresponding to a LED strip on the LED layer.
Then print a few colored paper to fix the holes. The light will transmit through those paper and present very nice exploding LED effect.
Add TipAsk QuestionCommentDownload
Step 6: Assemble the PartsSet the LED layer along with the modified head support inside the mask as shown in the image above.
Place the hardware inside the mask.
Add TipAsk QuestionCommentDownload
Step 7: Now You're an Exploding CreeperPut it on and now you've became a live Minecraft creeper that is about the explode.


Comments
Please log in or sign up to comment.