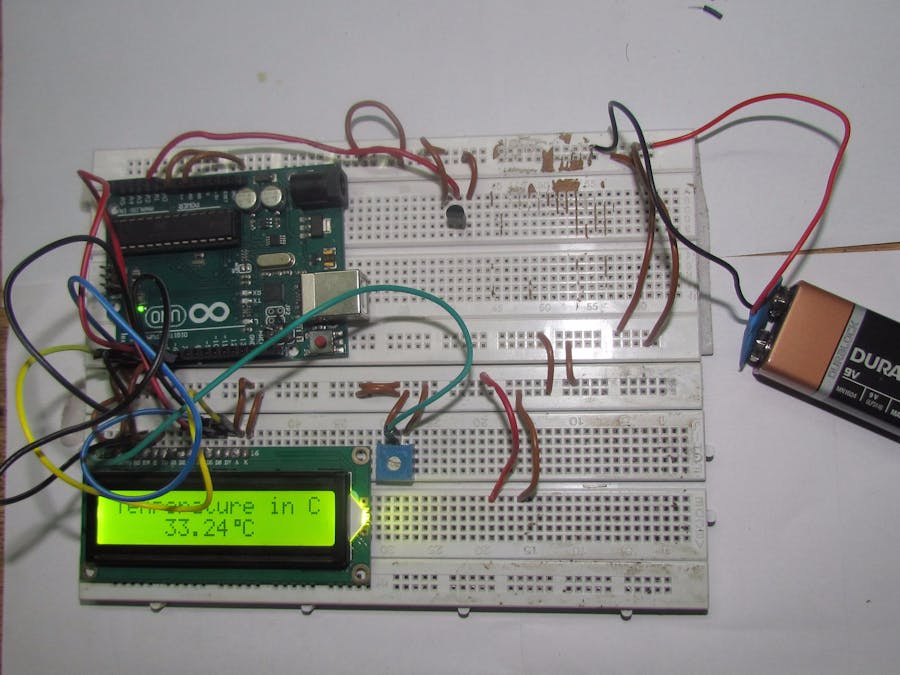
The project is a temperature sensor made with an Arduino UNO and LM35 sensor and a few other components. The main aim of the project is to detect the temperature of the surroundings and display it on the LCD.
The working of the project starts with the LM35 sensor that senses the change in temperature of the surrounding, and uses that temperature difference to produce a voltage signal which is processed by the Arduino to give a digital output displaying the temperature of the given surrounding.
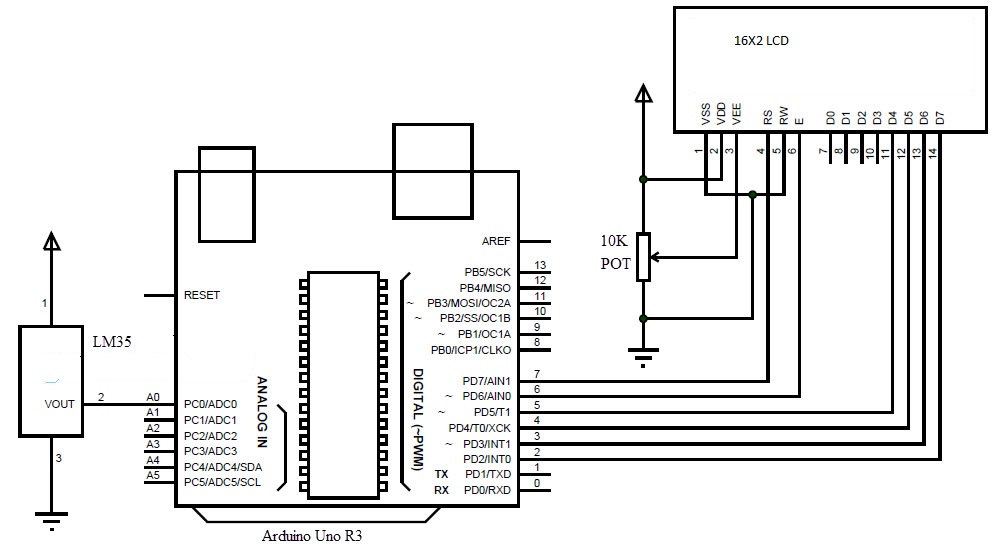
ConnectionsThe connections to be made are given below:
- Connect LCD PIN 1 to Ground and PIN 2 to Supply respectively.
- Connect LCD PIN 3 to the 10K Potentiometer and connect rest of the terminals to the ground.
- Connect LCD PIN 15 to Ground and PIN 16 to Supply respectively.
- Connect LCD PINS D4,D5,D6 and D7 to PINS 5 - 2 of the Arduino.
- Connect LCD PIN 4(RS) to PIN 7 of the Arduino.
- Connect LCD PIN 5(RW) to Ground.
- Connect LCD PIN 6(E) to PIN 6 of the Arduino.
- Attach the LM35 to the Bread Board.
- Take the output of the LM35 i.e. PIN 2 of the LM35 and connect it to the Analog Input Ao of the Arduino.
- The Rest of the Connections made are to connect the Two Breadboards together.


_ztBMuBhMHo.jpg?auto=compress%2Cformat&w=48&h=48&fit=fill&bg=ffffff)


Comments
Please log in or sign up to comment.