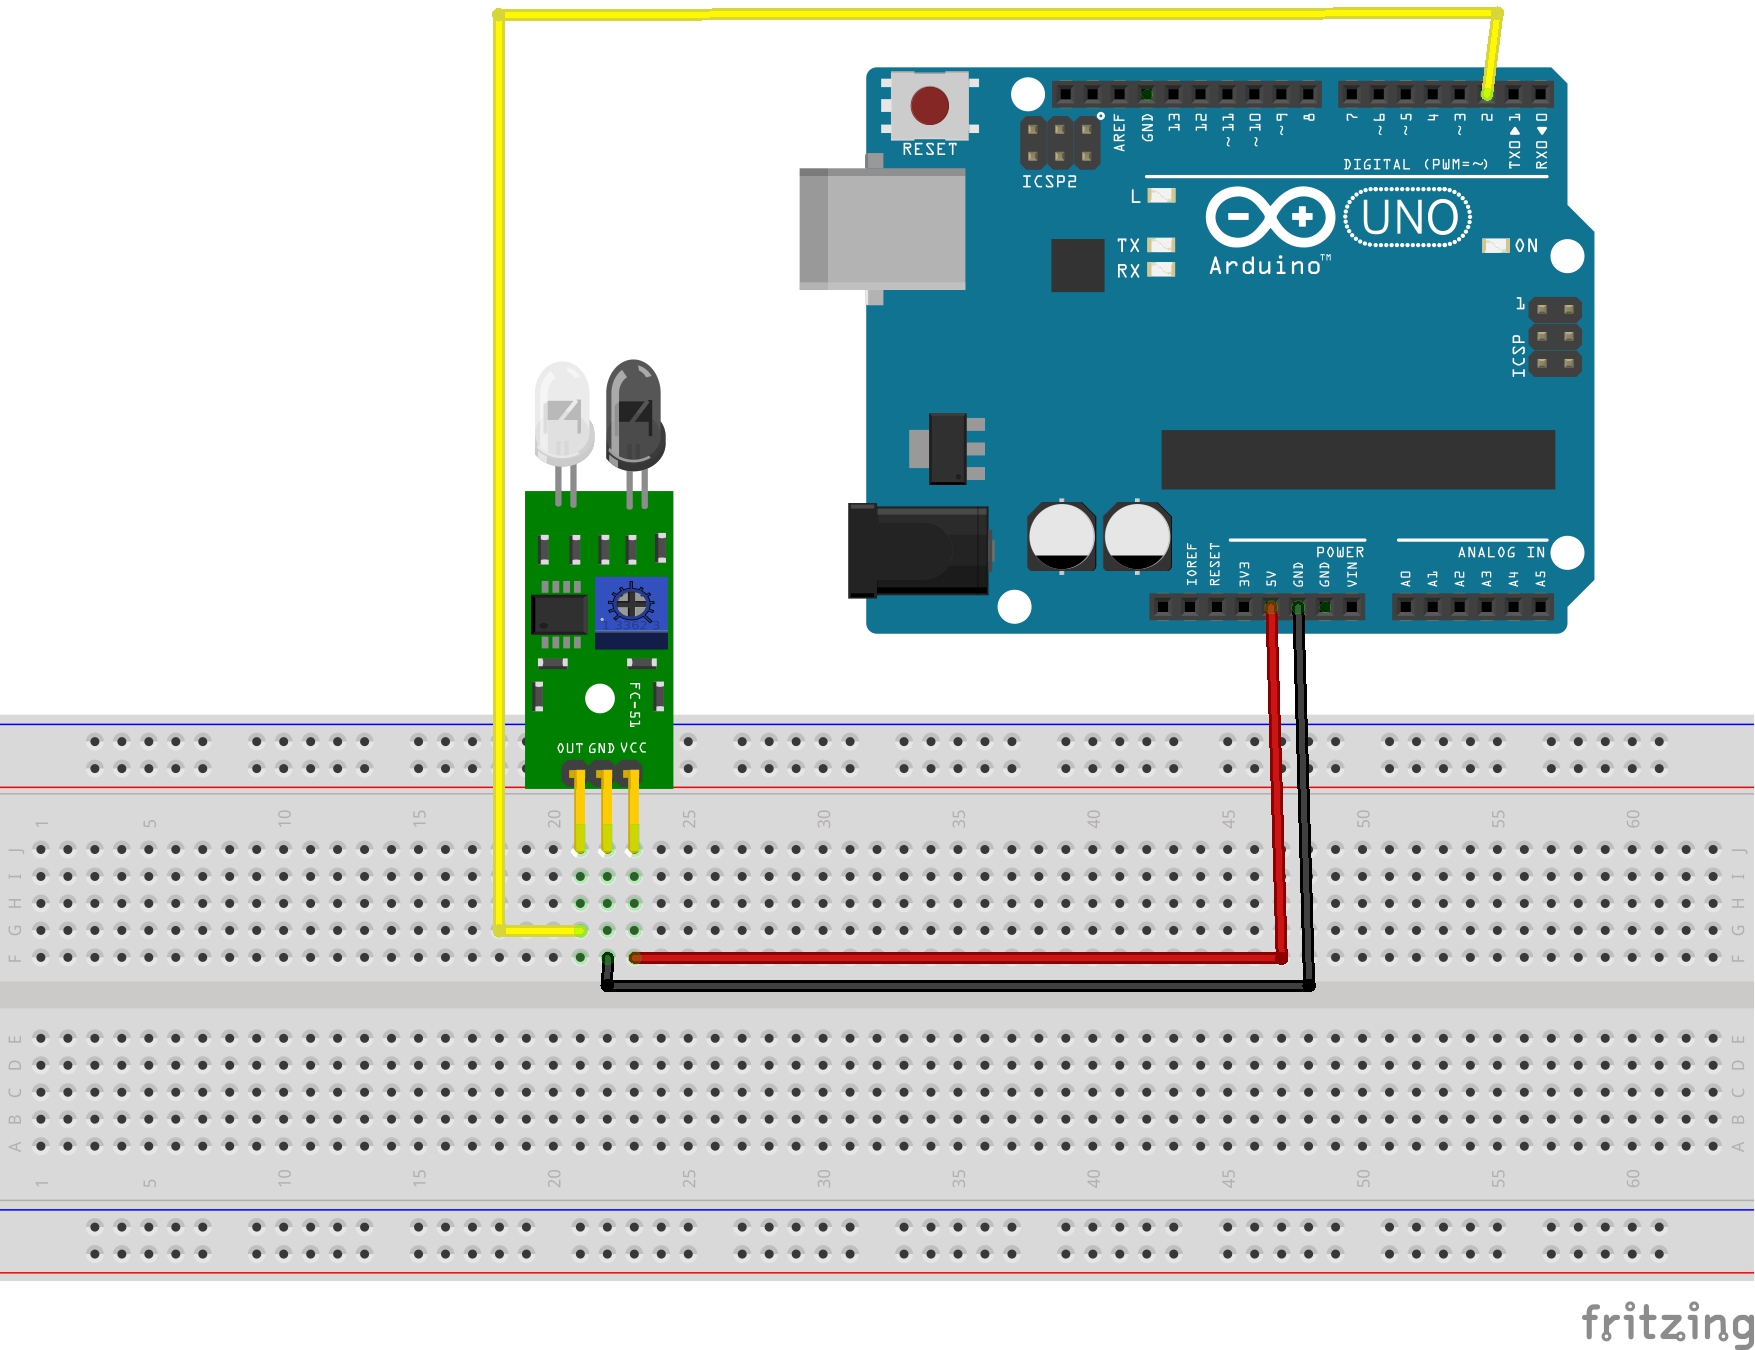
The IR sensor module consists mainly of the IR Transmitter and Receiver.
IR LED emits light, in the range of Infrared frequency.
IR light is invisible to us as its wavelength (700nm – 1mm) is much higher than the visible light range.
a led that emits invisible infrared light.
IR receiver:A device that detects emitted light in the invisible infrared range.
When it receives a reflected IR light, it means there is an obstacle in front of the IR module.
Distance adjust:A potentiometer used to adjust the range of detection ( the distance between the object ant the IR module ).
Pins:VCC: to +5V power supply ( or the Arduino UNO board ).
GND: to the ground of the power supply ( or the Arduino UNO board ).
OUT: to any digital pin (pin 2 in this tutorial) of the Arduino UNO board.
Connection diagram:#define IRpin 2
#define ledPin 13
void setup() {
// put your setup code here, to run once:
pinMode(IRpin,INPUT);
pinMode(ledPin,OUTPUT);
}
void loop() {
// put your main code here, to run repeatedly:
int IRread = digitalRead(IRpin);
digitalWrite(ledPin,LOW);
if(IRread == 0){
 digitalWrite(ledPin,HIGH);
}
}
#define IRpin 2
Assign pin 2 as "IRpin" (the pin of the IR module).
#define ledPin 13
Assign pin 13 as "ledPin" (to control the led on the Arduino board ).
pinMode(IRpin,INPUT);
Set the mode of pin "IRpin" as INPUT.
pinMode(ledPin,OUTPUT);
Set the mode of pin "ledPin" as OUTPUT.
int IRread = digitalRead(IRpin);
Read "IRpin" and assign it's value to the integer "IRread"
digitalWrite(ledPin,LOW);
Turn off the led on the start of each cycle.
if(IRread == 0){
digitalWrite(ledPin,HIGH);
}
if "IRread" is 0, that means there is an obstacle in front of the module, give an alarm by turning on the led (the IR module used for this example sets OUT pin to LOW when it detects an obstacle)
The result:when you put an obstacle in front of the IR module, the led of pin 13 on the Arduino board will turn on.


_ztBMuBhMHo.jpg?auto=compress%2Cformat&w=48&h=48&fit=fill&bg=ffffff)


Comments
Please log in or sign up to comment.