AC8XU
Published © GPL3+

Straight Key Morse Code Oscillator

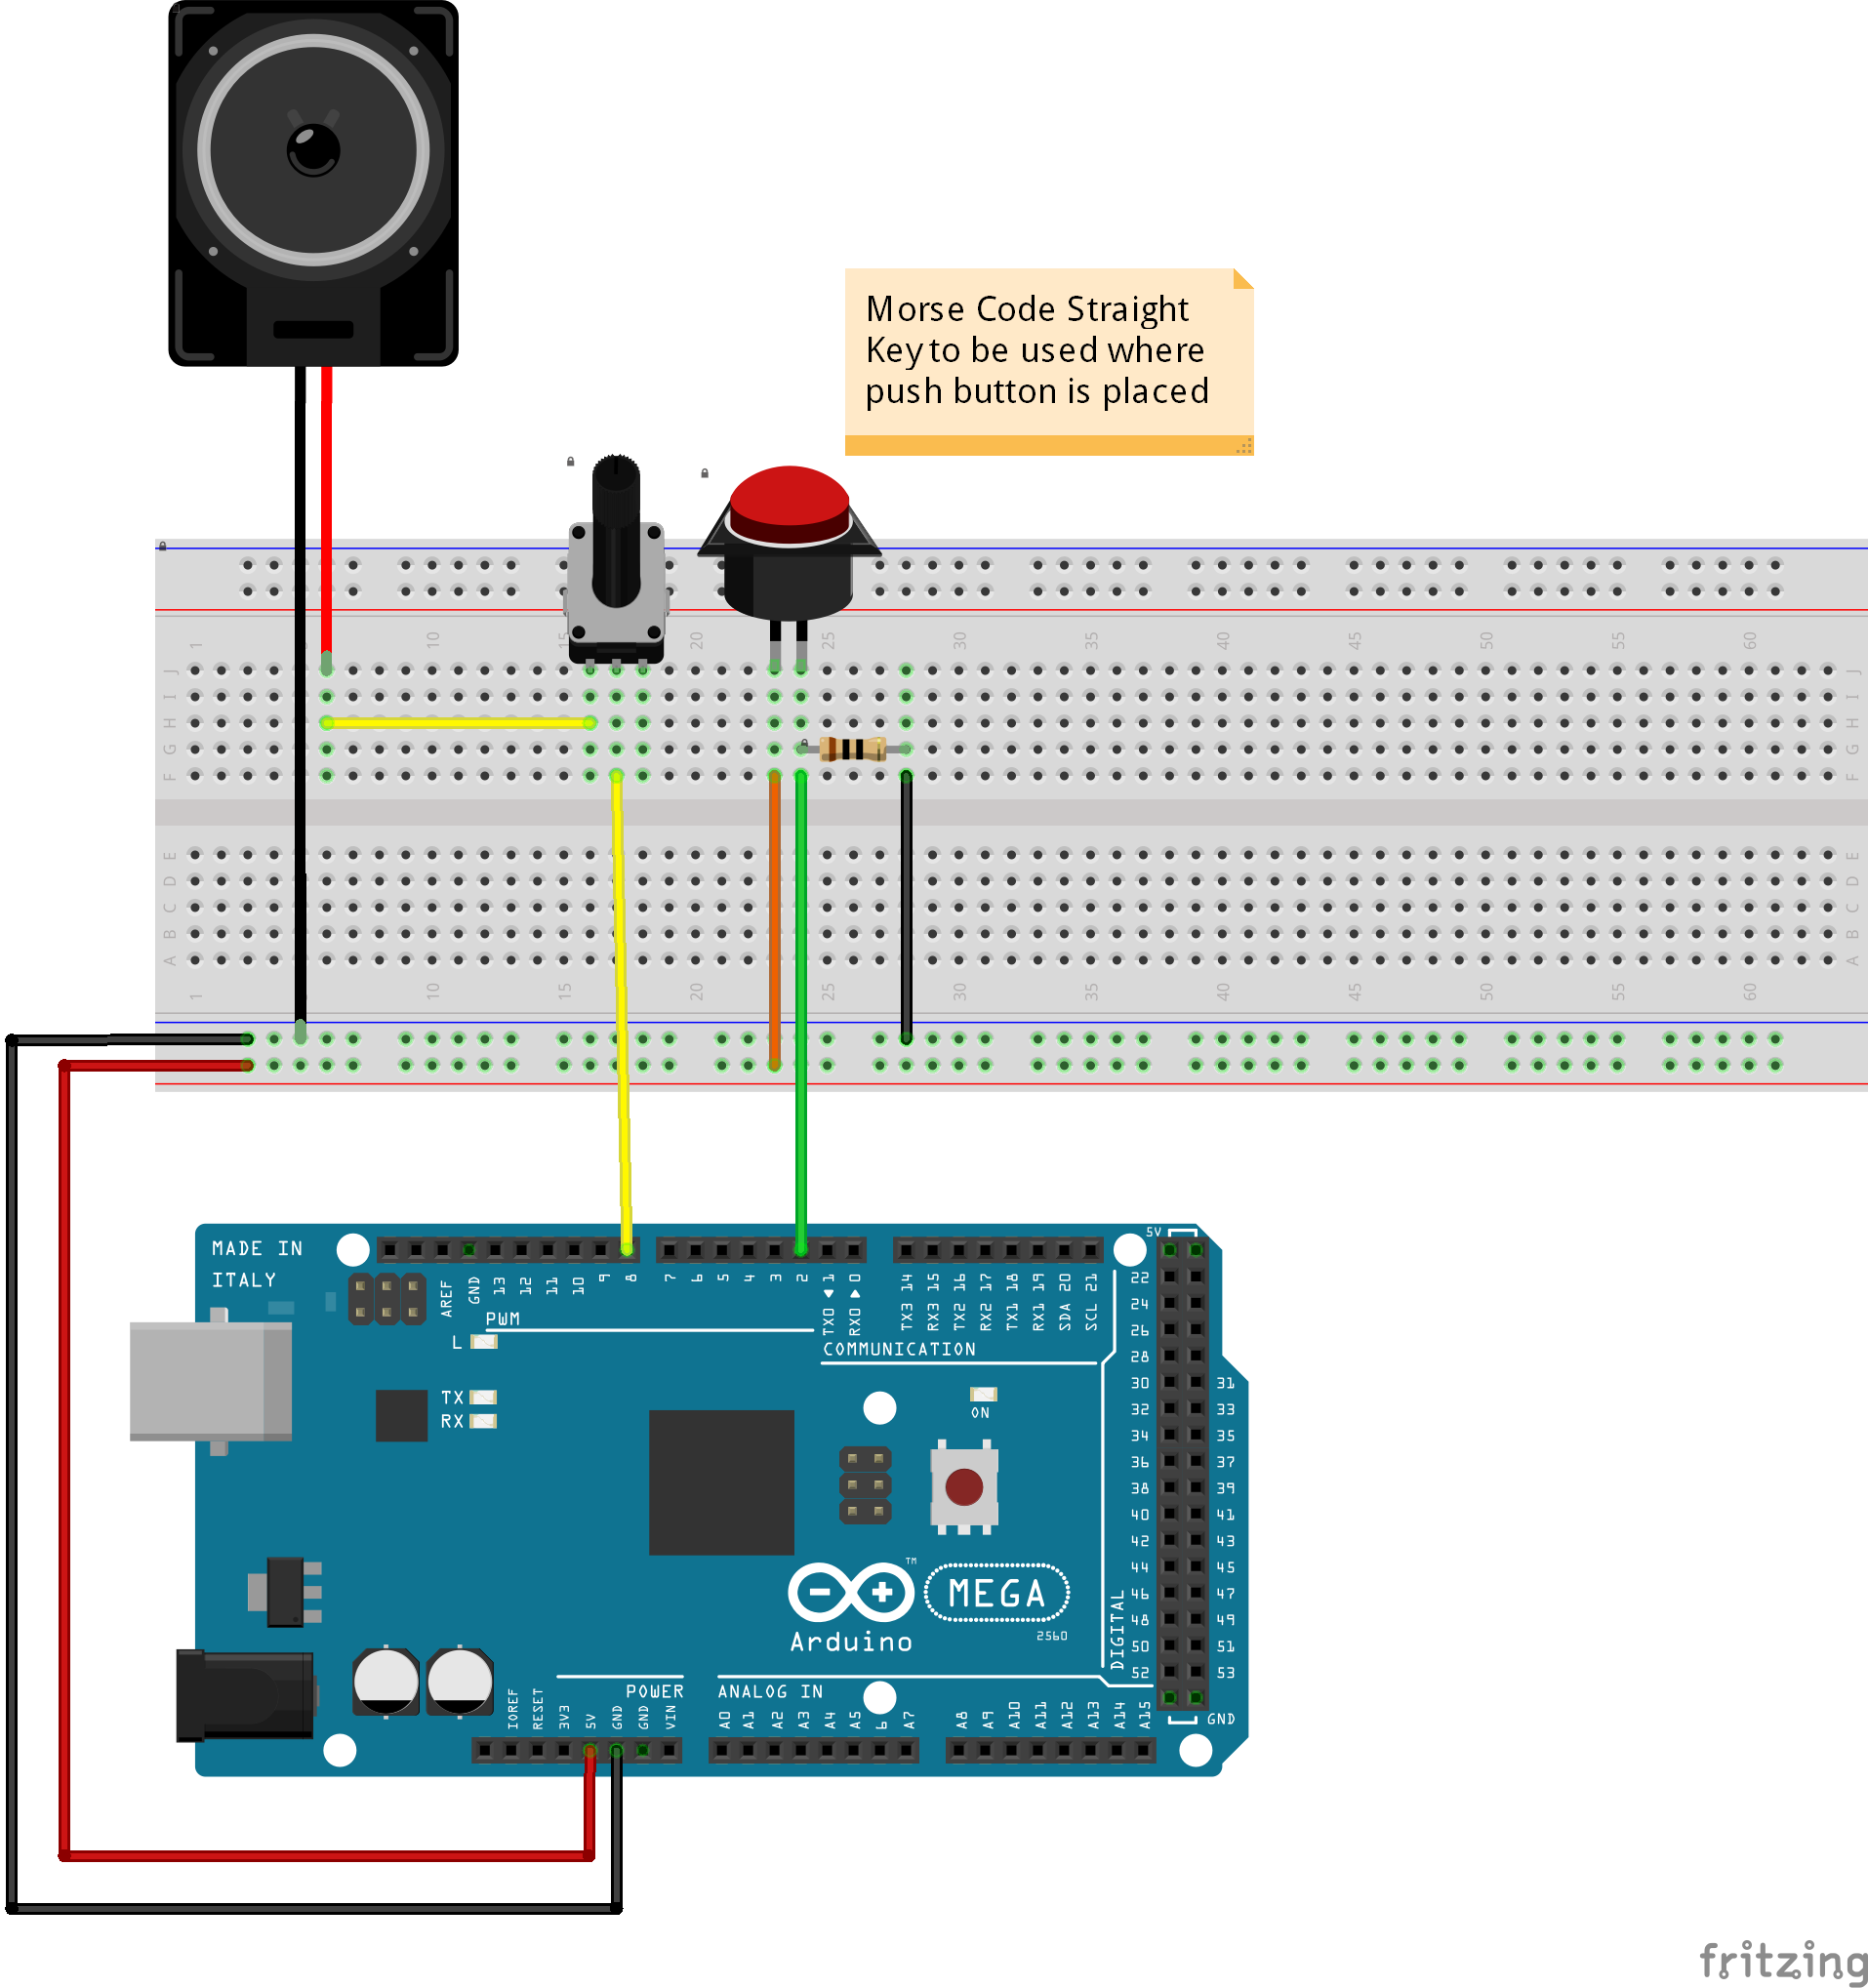
Simple circuit for building a Morse code practice oscillator. Push button is used in place of a straight key used in amateur radio.

BeginnerFull instructions provided7,721
Straight Key Morse Code Oscillator

Things used in this project

Hardware components

Arduino Mega 2560
Arduino Mega 2560
×1
Resistor 10k ohm
Resistor 10k ohm
×1
Rotary potentiometer (generic)
×1
Speaker: 3W, 4 ohms
Speaker: 3W, 4 ohms
×1
Breadboard (generic)
×1
Jumper Wires
×1

Story

Read more

Schematics

Straight Key Oscillator

Code

Straight Key Oscillator.fzz.ino

Arduino
Code practice oscillator for use in amateur radio
/*
 This circuit is for a Straight Key Code Practice Oscillator. 
  
  Straight Key (using pushbutton in place of a straight key in this Sketch)

  Sends tone to speaker connected to digital pin 8,
  when pressing the Straight Key (pushbutton) attached to pin 2.

  The circuit:
  - Speaker - from pin 8 through potentiometer to speaker to ground 
  - Straight Key (pushbutton) attached to pin 2 from +5V
  - 10K resistor attached to pin 2 from ground

  created 2018
  by Jon Garber AC8XU

  This example code is in the public domain.

 */

// constants won't change. They're used here to set pin numbers:
const int buttonPin = 2;     // the number of the pushbutton pin
int audio8 = 8;      // output audio on pin 8
int note = 800;      // music note/pitch

// variables will change:
int buttonState = 0;         // variable for reading the pushbutton status

void setup() {
  // initialize the pushbutton pin as an input:
  pinMode(buttonPin, INPUT);

}

void loop() {
  // read the state of the pushbutton value:
  buttonState = digitalRead(buttonPin);

  // check if the pushbutton is pressed. If it is, the buttonState is HIGH:
  if (buttonState == HIGH) {
    // turn Speaker on:
    tone(audio8, note);
  } else {
    // turn Speaker off:
    noTone(audio8);
  }
}

Credits

AC8XU

AC8XU

1 project • 1 follower

Comments