This project is about automotive engines and how with a bit of elbow grease and a lot of passion you can use an arduino to protect its vital components. An old engine usually does not have a built-in rev-limiter and if you drive it hard enough bad things can happen! Especially an old project car with sentimental value needs to be protected!
The implementation of the electronically controlled and programmable rev-limiter is pretty simple, cheapest than anything aftermarket you can possibly find and lastly it is a very robust design.
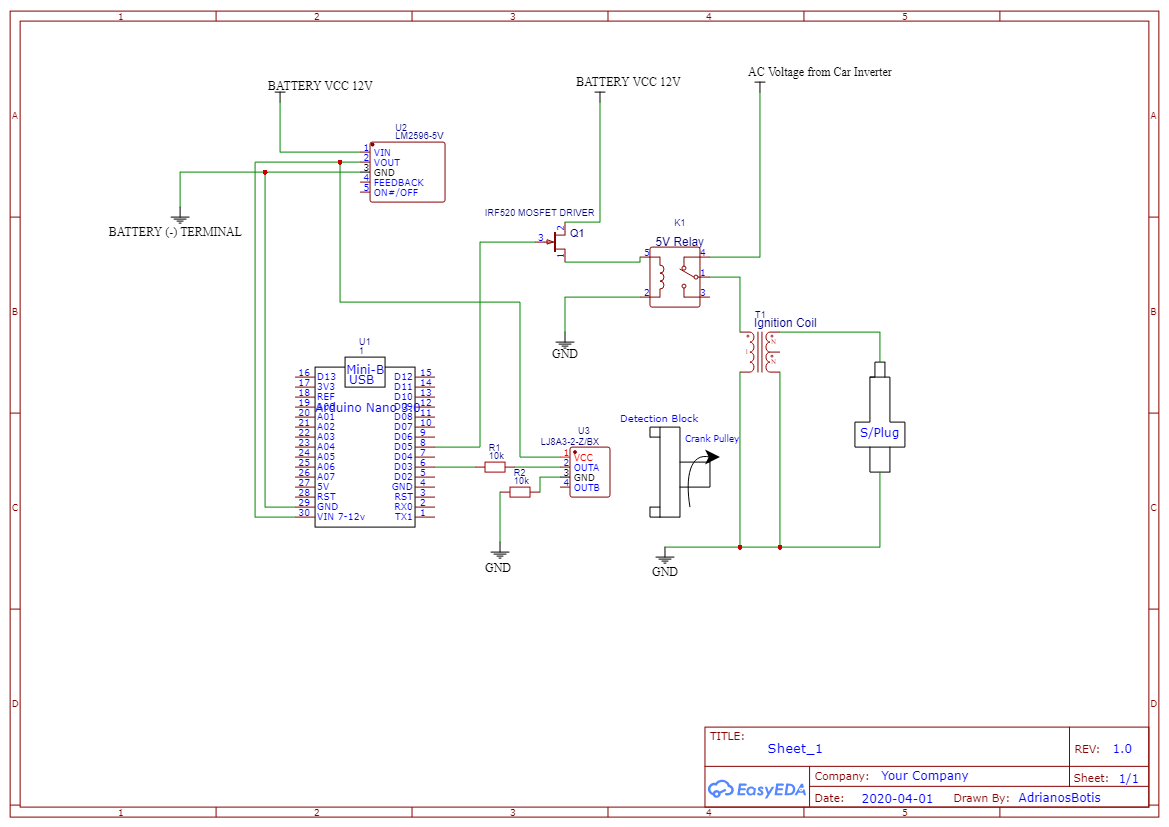
The project uses an inductive sensor that measures the rotational speed of the engine. The data from the sensor are fed to the Arduino Nano and if the rotational speed threshold is exceeded the pin that controls the Mosfet becomes 'HIGH' which turns off the relay thus stopping the engine. When the RPMs drop back below the preset threshold the relay is turned on and the cycle repeats.
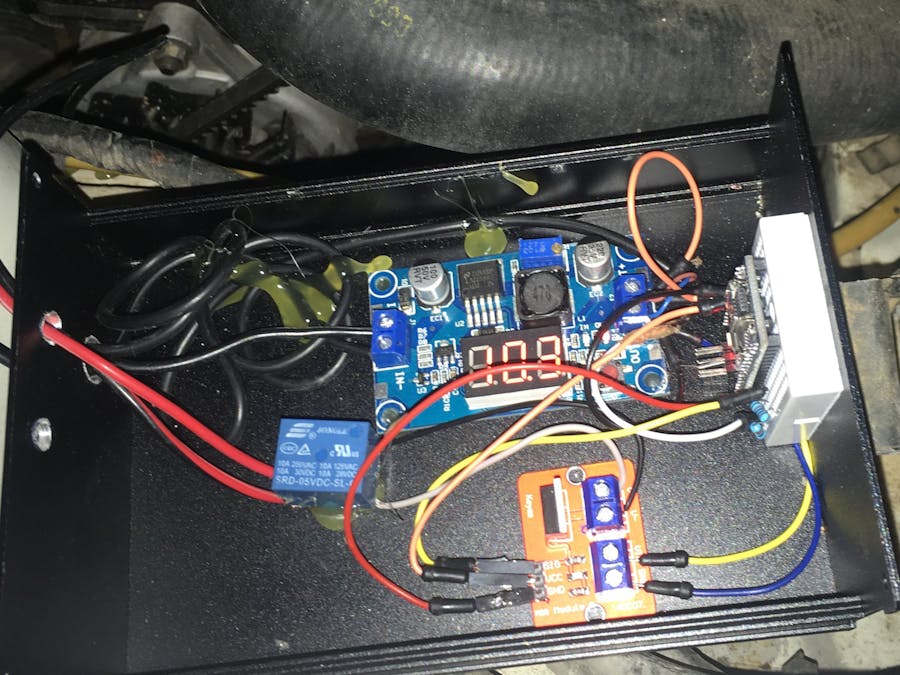
Electronics BoxIt is recommended that the electronics are enclosed in an aluminum box for protection. All the electrical connections can be obtained from the included schematic. The electrical components are widely spaced in order to make troubleshooting easier. The arduino nano is fitted on a breadboard that enables a quick removal for programming or replacing it. The operating voltage of the system (voltage regulator output) should be between 6-12V! In the following pictures you can see the layout of the electronics.
An important detail for the wiring is that the relay should be connected on its Normally Closed pins. This will ensure that the engine will be able to function properly even if the arduino is turned of or malfunctions!
RPM SensorThe tricky part of the project is the placement of the two bolts that act as triggers to the inductive proximity sensor. They must be placed in a rotating pulley (preferably the crankshaft pulley) and 180 degrees apart. The installation should look like below.
The distance between the sensor and the bolts should be less than 3mm so that the sensor will change its state. The mounting bracket can be made from anything you want as long as it is strong and placed in the correct position!!
End ResultAfter the installation of the electronics and after you have uploaded the code to the arduino you have to set desired RPM threshold!! Then you can enjoy the rev-limiter!! I took the liberty to remove a portion of the exhaust and created some awesome FLAMES!!


Comments
Please log in or sign up to comment.