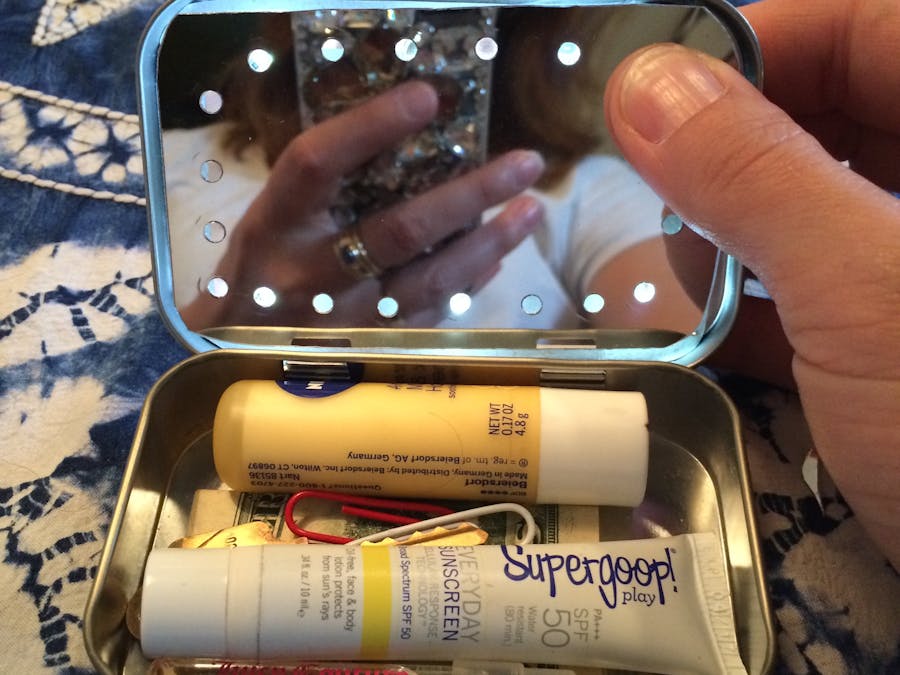
Have an Altoids tin on hand and don't know what to do with it? Create a cool light-up compact with a mirror and simulated track lighting, and fill your tin with all the necessities of life, or at least those that will fit.
To complete this project, you need:
- scissors
- mirrored cardboard (I found some at Joann's)
- conductive copper tape
- 4-6 Chibitronics LED stickers
- Altoids tin (empty and clean)
- scrap cardboard
- two glue dots
- scrap foam
- coin battery
- a little scotch tape
- paper punch
Pro tip for Joann's: when you're at the store, open up the joann.com web page on your phone and get a coupon for 50% off one item. It's almost always there.
Step 1: Cut the templates
Take a piece of scrap paper (I used my Joann's receipt!) and press it into the lid of the Altoids tin. Cut this out to be your template. Cut a the mirrored cardboard into the same shape. Cut the cardboard into this shape as well, but leave a little tab that you can fold on the top right hand corner, as per the picture:
Step 2: Create the parallel circuit and stick down the sticker LEDs.
Using a foot-long piece of copper tape, cut it carefully in half length wise so that you have two narrow pieces of copper in the same length. Tape them down in a parallel circuit in the shape you see below. Press the tape flat with your fingernail. Make the folds very neat and flat, don't tear or cut the tape. On the tab, cut a few extra pieces of foil to make the tabbed copper area a little bigger to have more contact with the battery. Cut into the cardboard a bit between the end of the copper strips and the tab.
Place the stickers with the negative tips touching the inner copper tape, and the positive ends of the stickers touching the outer tape. Make sure everything is pressed down firmly. You can add four or six LEDs in this pattern, or even more if everything goes well.
Step 3: Add the battery
The battery needs to touch its smooth side to the outer tape, and the rough side will be covered by the top tab, to form a switch when pressed. Place a coin battery at the top corner where the tab is. Use a little tape to tape the top of the battery to the back of the cardboard. The rough side will face up when you flip the battery over and cover it with the tab.
Step 4: Create the mirror and track lighting
With a strong paper punch, punch several holes around the edge of the mirrored cardboard. Leave a space on the top where the battery is, as that's where the user needs to press the switch we just made to turn the lights on.
Note, make sure to remove the plastic covering of the mirrored cardboard and it will be much shinier!
Place a glue dot onto the cardboard in the middle and place a 1-inch square piece of foam onto it. Place another glue dot on top of the foam and place the mirrored cardboard on the foam. This gives a little space for the battery and the LEDs.
Now, if you press the top of the tin where you placed your battery, you can see the lights shining through the holes in your mirror, creating the illusion of track lighting!
Fill your tin with everything you need to survive the urban jungle. Everyone needs safety pins, paper clips, sunscreen, a little hand sanitizer, and maybe a breath mint. What will you add to your kit?


Comments
Please log in or sign up to comment.