By introducing the Assistive Guidance belt, my intend to revolutionize this scenario. This innovative belt combines the power of sonar, gyroscopes, and other tracking sensors to offer dynamic, real-time navigational support. As the swimmer progresses, the belt processes data from these sensors, allowing the device to determine the optimal course and provide immediate feedback. Through auditory cues transmitted via haptic vibrations, the swimmer receives continuous orientation information from Haptic Vibration Sensor. This eliminates the requirement for a second person to guide them and promotes an independent swimming experience. The Assistive Guidance belt goes beyond mere collision avoidance; it empowers visually impaired individuals to swim confidently in a straight line while being aware of their surroundings at all times.This belt also comes with emergency features Like Airbag Deployment,Laser light to attract guards during emergency etc
Lets Dive In..
Step:-1 : Gather All ThingsCollect all neccesary Components and required services for the build
My Initial Designs
From Paint to Cardboard
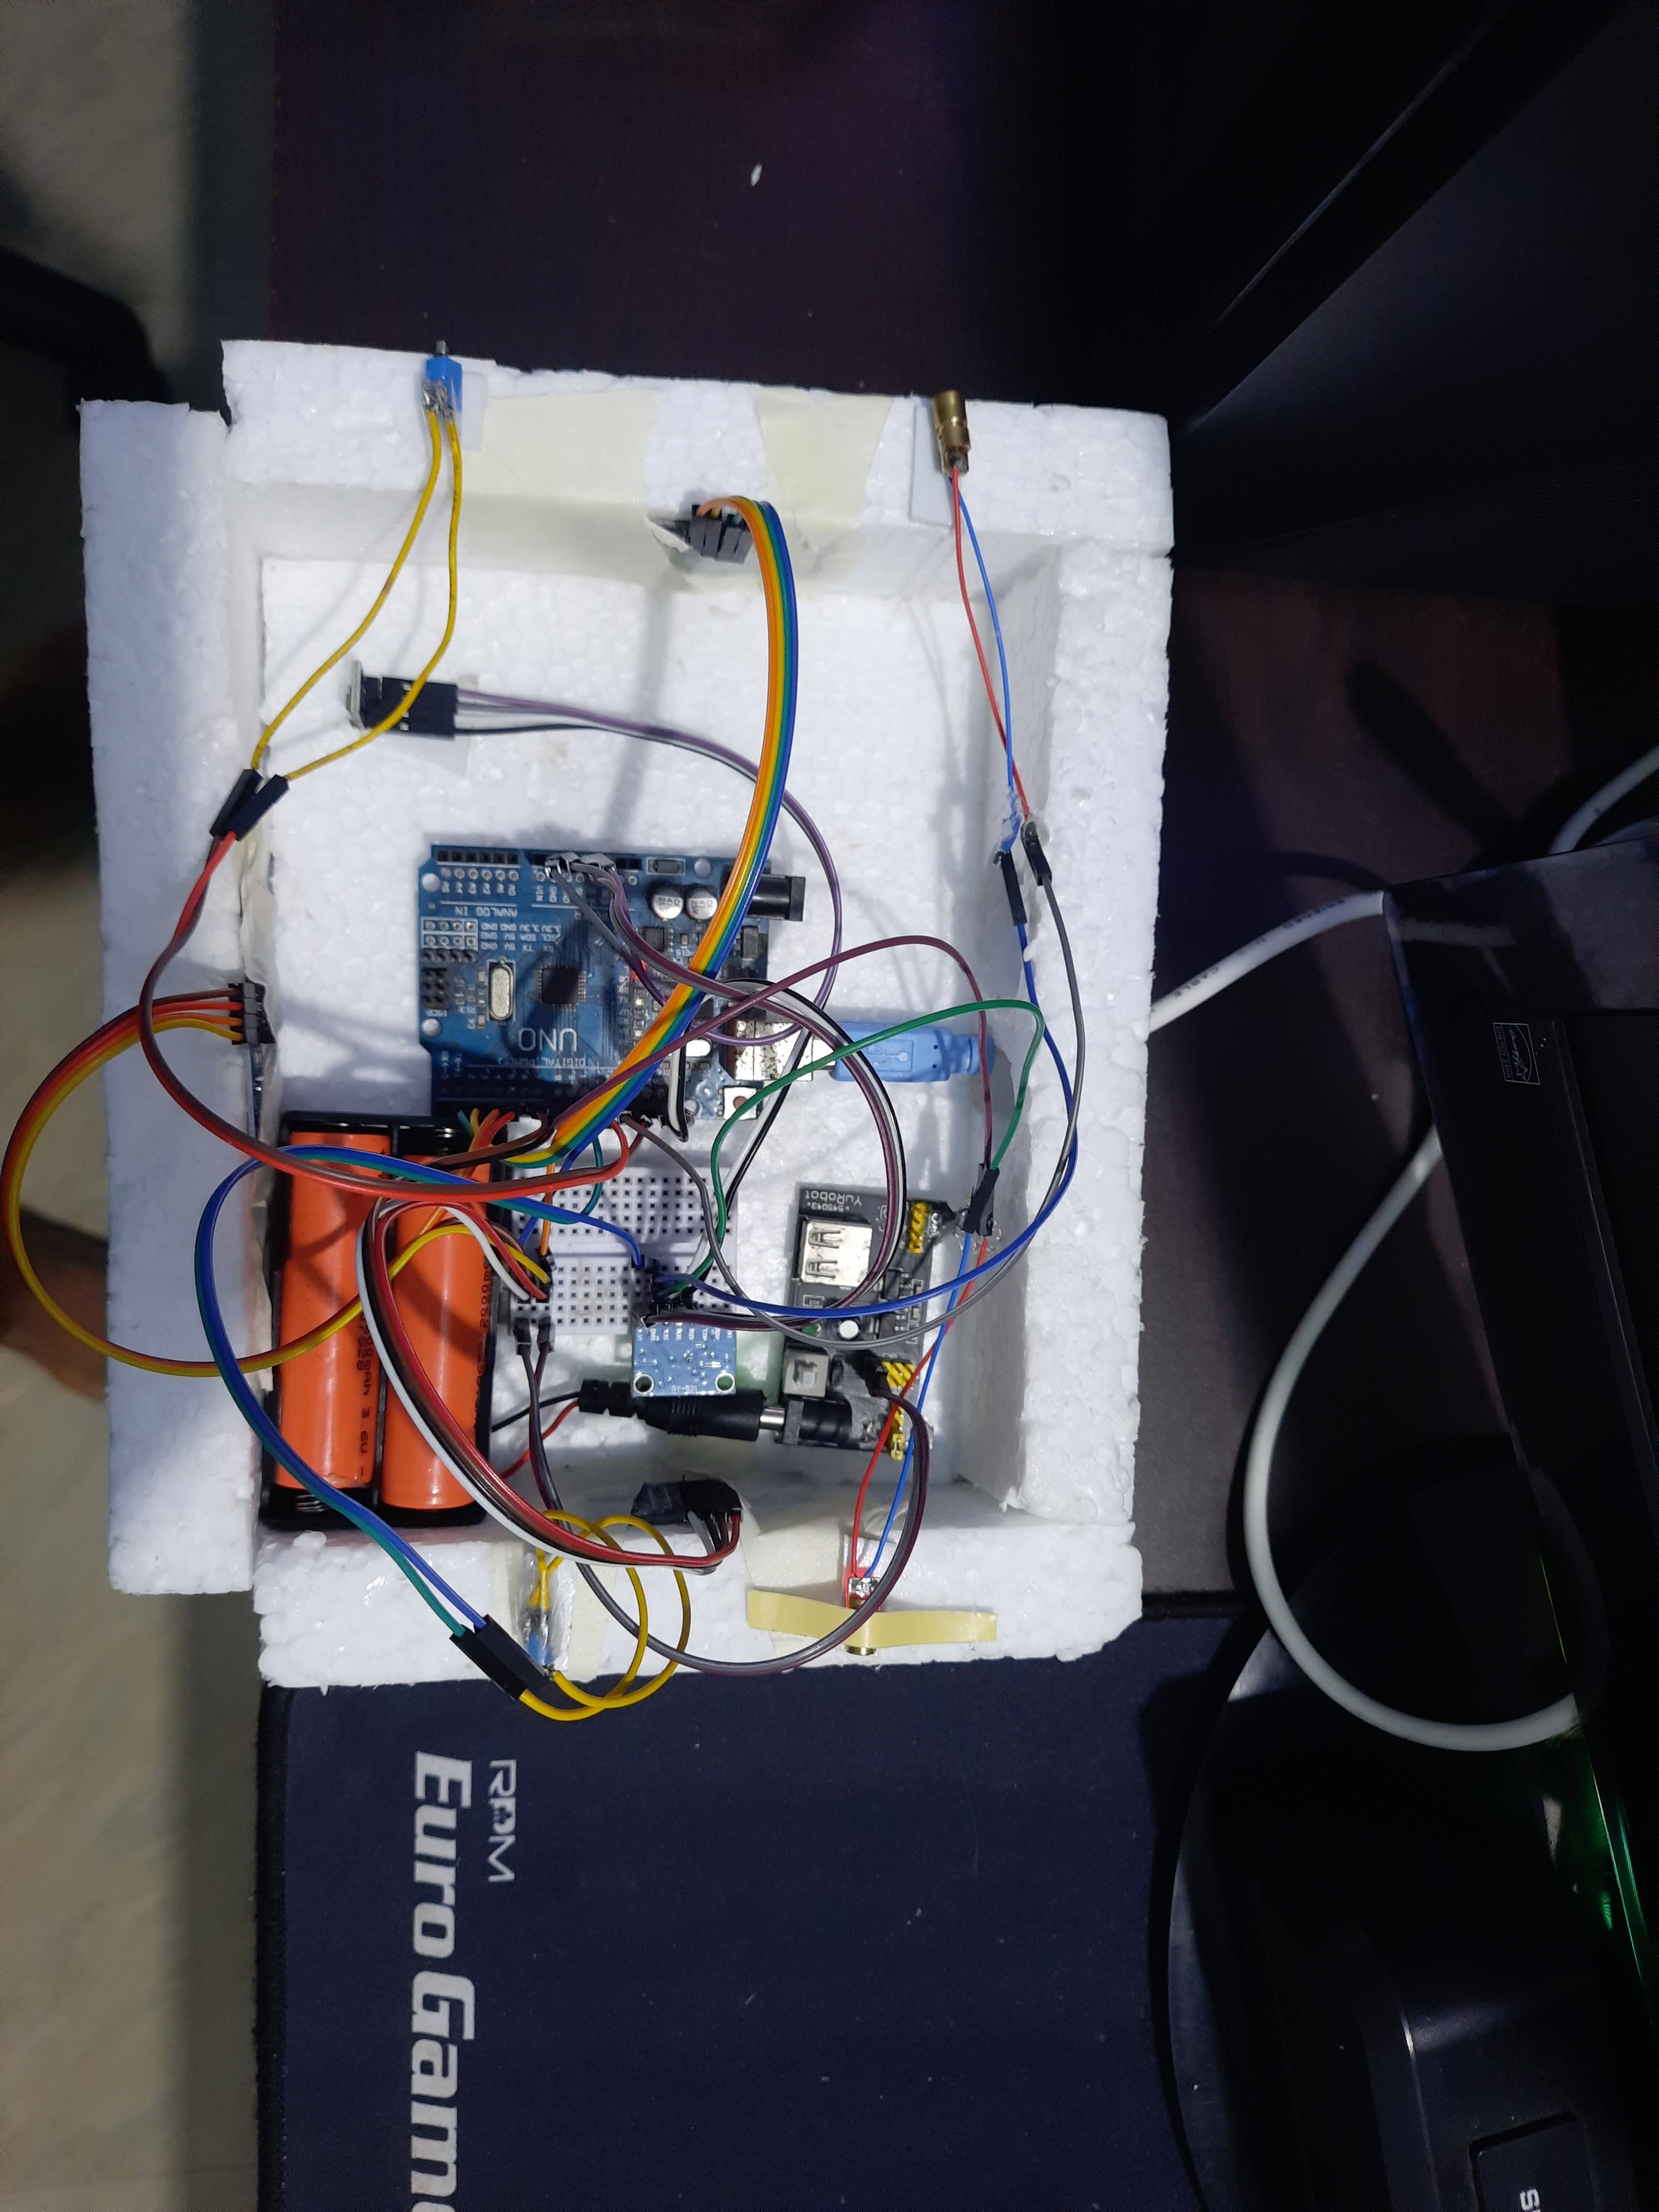
i initialliy orderd 3D printing for the project but the printed parts didnt arrive on time. so i used thermocool,stick man for reference and some paint for the body.
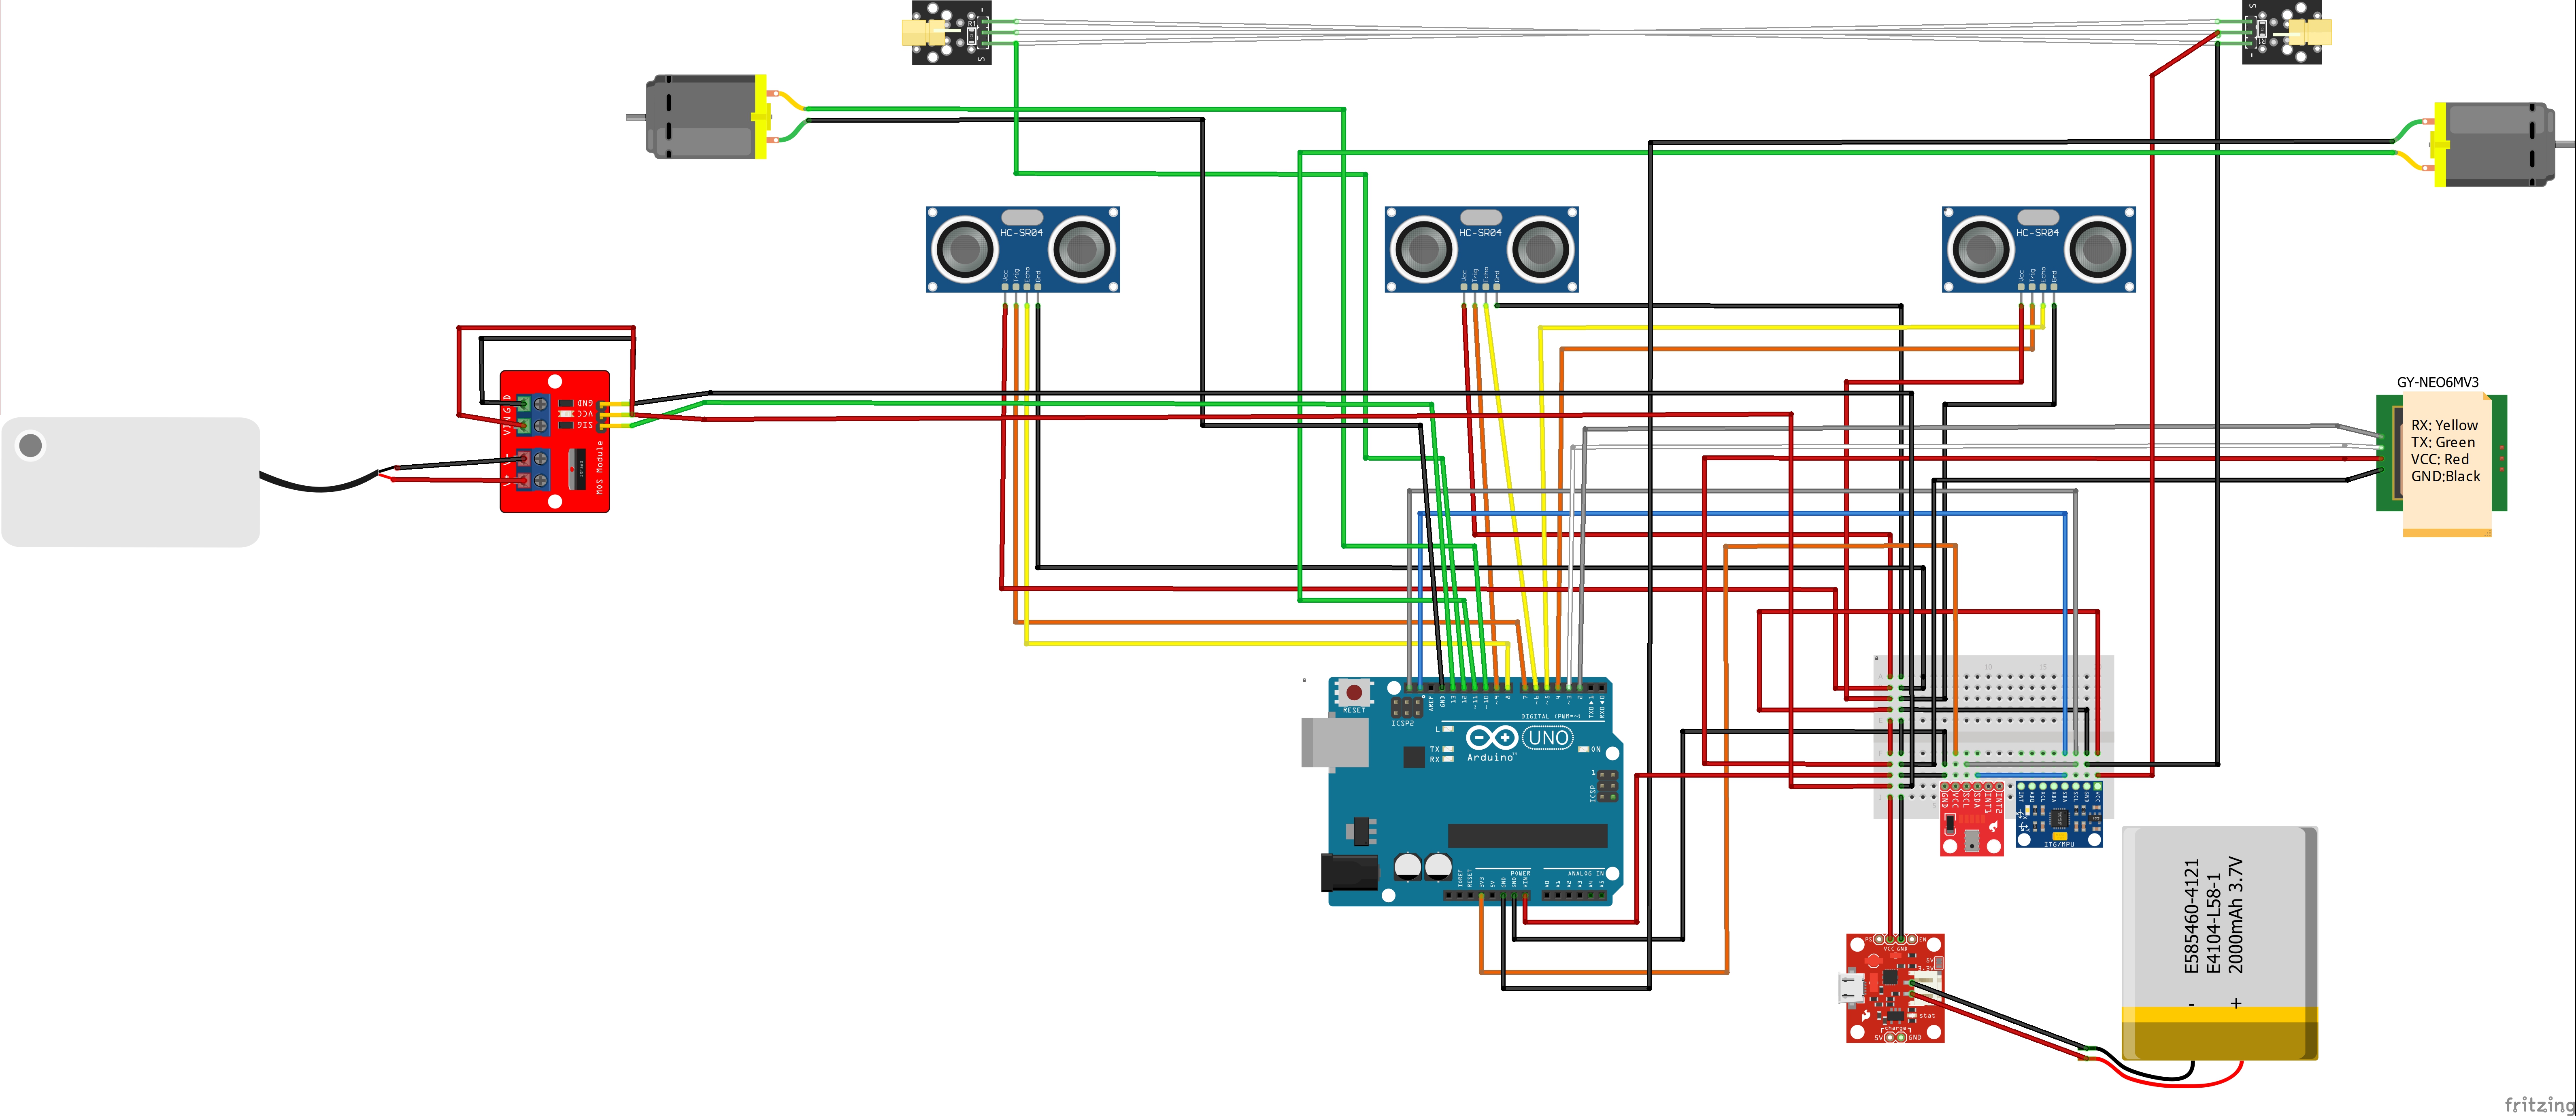
Step:-2 : Time to AssembleConnect and assemble the components according to the Schematic.
Connection Description:-
/*
Ultrasonic Sensor
trigpin1 9 orange sensor front ul
echopin2 5 red sensor front ul
trigpin2 4 yellow right sensor ul
echopin1 6 green right sensor ul
trigpin3 7 brown left sensor ul
echopin3 8 black left sensor ul
all ul sensor 5v and gnd to breadboard power supply (light red as 5v and grey as gnd)
breadboard powersupply is powerd by 2x18650 battery delivering 8v at peak
GPS
gps rx 2 grey
gps tx 3 white
gps 5v violet to breadboard xtended 5v
gps gnd black to breadboard xtended GND
pressure sensor
SCL white to arduino A5
SDA black to arduino A4
VIN violet to arduino 3.3v female pin general
GND grey to arduino gnd female pin general
Gyroscope Sensor on Breadboard
SCL white to SCL pin on arduino female pin
SDA black to SDA pin on arduino female pin
5V Violet pin to arduino 5v female pin general
GND Grey pin to arduino gnd female pin general
Rescue Laser X2
5v on extended DigitalPIN 12 on arduino female to breadboard
GND on extended Common GND on arduino female to breadboard
Pressure Motor
Motor Right
Digital Pin 11
GND on extended Common GND on arduino female to breadboard
Motor Left
Digital Pin 10
GND on extended Common GND on arduino female to breadboard
Leftover Pins
0,1,13,GND,5V,A0,A1,A2,A3
*/
Dont Forget to change com port serial baud rate on arduino ide (in my case COM 5 and 115200 boad rate)
after setting up all connection and assembling the components into a surface or box its time to caliberate gyroscope
Step:-3 CalibrationMake sure:-
Gyroscope is on level surface
Gyroscope alignment is correct
Gyroscope is all wired up double check SCL and SDA connection
if all checks are a go then its time to upload gyroscope caliberation code to arduino (code uploaded on https://github.com/Akshay6766/Guiding_Waves_Full-Code) (file name :-Gyroscope_Caliberation.ino)
Remember dont toch are move your gyro while calibrating. It may take few minutes for caliberation to complete
when callibration is complete,you will receive your offset values in serial monitor plug in the new offset value to the calliberation code offsets and run the calliberation again,repeat this process untill you get reference values as close to zero which will be displayed in serial monitor.
Once your caliberation is complete copy the offset values to your primary code sketch and replace old values
(in my case offsets were
accelgyro.setXAccelOffset(1816);
accelgyro.setYAccelOffset(1134);
accelgyro.setZAccelOffset(4736);
accelgyro.setXGyroOffset(60);
accelgyro.setYGyroOffset(71);
accelgyro.setZGyroOffset(19);
offsets may vary according to your gyroscope model and sensor alignment
)
once you plug in your offset values to your primary sketch and its time to upload the code to arduino.
Step 4:- Upload Primary CodeUpload your code to arduino
make sure your Serial monitor baud rate is same as your sketch baud rate
(in my case Serial Baud Rate:-115200 )
Step 5:-TestingAfter Uploading check your Serial monitor showing initialisation of all sensors and all values are displayed
Testing Features:-
- Tilt Right :-Serial Monitor will display Gyro angle to Right and Left vibration motor turns on indicating to turn left to level off.
- Tilt Left :-Serial Monitor will display Gyro angle to left and right vibration motor turns on indicating to turn right to level off.
- Rollover:- when swimmer wearing this device rolls over,roll over alert is send and either left or right vibration motor will vibrates to correct the position.
when any obstacles detected on ultrasonic sensor :-
- when obstacle detected on Front sensor:- Obstacle detection alert and vibration motor alert to turn left or right to clear off obstacle.
- when obstacle detected on Left sensor:- Obstacle detection alert and vibration motor alert to turn right to clear off obstacle.
- when obstacle detected on Right sensor:- Obstacle detection alert and vibration motor alert to turn left to clear off obstacle.
- when obstacle detected on Left and Right Sensor:- Obstacle detection alert and vibration motor alert indicating narrow passage.
- when obstacle detected on Front sensor and Left sensor:- Obstacle detection alert and vibration motor alert to right to clear off obstacle.
- when obstacle detected on Front Sensor: and Right Sensor- Obstacle detection alert and vibration motor alert to turn left to clear off obstacle.
- when obstacle detected on all 3 Sensors:- Obstacle detection alert and vibration motor alert to move backward until clear of obstacle,
Drowning Alert
When pressure sensor and gyroscope detects change in pressure and angle and when the value pass over threshold it signals mini airpump to blow of the airbag and laser lights will be initiated for alerting nearby swimmers and gaurd the inflated airbag will be make the blind person to stay afloat and gives chance to swim to safety with assistance of guiding waves device. also the current gps location can be send to rescue team and nearby friend for quick rescue
Future Modification
This Device can be further beefed up by
- changing Size of the Device can significantly reduce by using SMD components and LiPo batteries.
- Adding Magnetic Charging.
- Waterproofing by using waterproof sensors and casing.
- Adding Mobile monitoring facility Using M5STICK NB-IoT SIM 7020 Module.(Entire Device function can be viewed from a web or mobile app.)
Complete Project Data Including Code,schematics,Images and videos :-https://github.com/Akshay6766/Guiding_Waves_Full-Code


_ztBMuBhMHo.jpg?auto=compress%2Cformat&w=48&h=48&fit=fill&bg=ffffff)


Comments
Please log in or sign up to comment.