Everyone who comes across IoT projects has been through or seen projects related to Home Automation. The idea of controlling home appliances from a distance without the physical presence is pretty interesting. But, is that all we look for? Does that make us Tony Stark?
Ugh, not with an interface that looks boring. That's not Stark, AT. ALL.
With great abilities comes great design. Tony knew about that, and that's how he had a nice Iron Man suit, instead of an old piece of metal. Or Iron whatever.
With me, you'll learn how you can make absolutely AMAZING projects with a nice GUI. I am not talking about an application, I am talking about Webpages. With can later be converted to Hybrid/Web Apps.
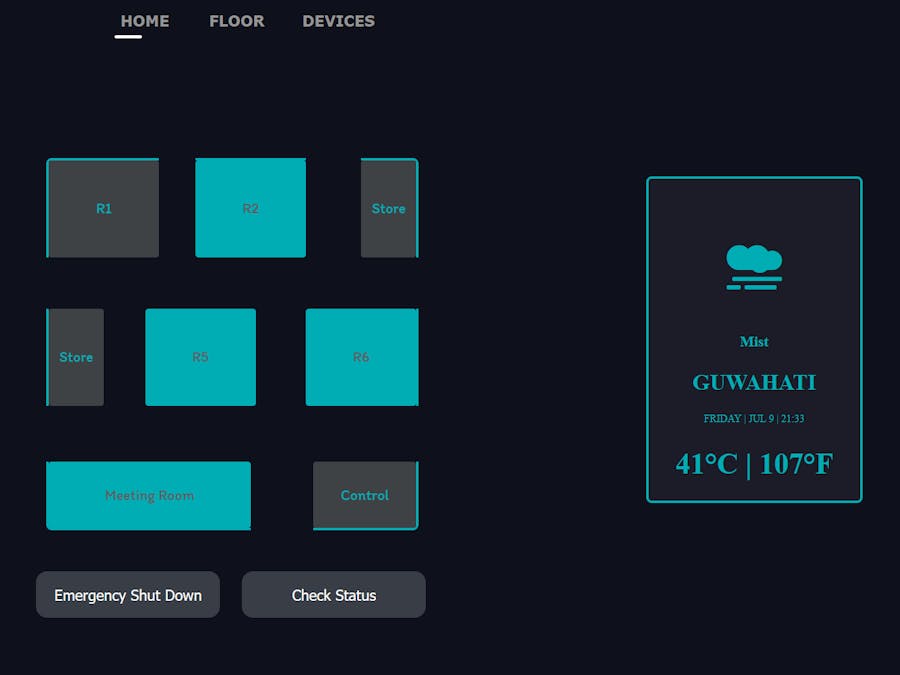
I have done a similar project and made a GREAT version of Home Automation, And I named it Floor Monitoring System.
What you see is just 1 Floor. Imagine, you giving a product something like this to a CEO or TechTechnicianinician. And he can control that rooms, their appliances, choose which floor he wants to control. Now, this is what I call a GOOD Home Automation Project.
I am definitely proud of upgrading the old versions of dull projects like these -
Web Applications have a great scope as they can be instantly upgraded, unlike Apps that need to be upgraded occasionally and the users need to manually download updated versions. There are private servers that can be set up so that only particular IP addresses are allowed, including the login security.
CONCEPTI have created a simple web page where the buttons are connected with an API URL's get HTTP method. So that, when the buttons are activated, the specific API URL is called. In this way, controlling the Appliances are much easier.
You might have a question, why Bolt IoT? There are so many other platforms available that do this job.
I'll let you decide that once you get yourself the Bolt Module. Every process and the functions are so easier than other applications, you won't even have to code much for this. The cloud has got inbuilt scripts that let me visualize my data, although the Home Automation Project you're watching is completely manual.
I have made 2 versions of this project, one that is private and can only be accessed by me, on my website. The other one is the public URL provided to you, with which you can control your appliances using your API key and DEVICE ID.
The next big question, HOW TO BUILD THAT ?!!
-Get yourself a BOLT wifi module.
The module comes with the hardware kit with a basic purchase with a course of Online Training on IoT and Machine Learning. I recommend buying the product and start building self-made projects. Set up the module and connect it to your wifi connection.
-Setup the module with Wifi
Download the BOLT app from the app store and follow the steps accordingly to set up the module to connect with your wifi connection. In case of issues, follow - In case of issues follow - How to Setup Bolt IoT
- What is my Device ID?
Visit Bolt Cloud, where you'll see your DEVICE ID if you have connected your Bolt Device with the Bolt Cloud.
- What is my API Key?
Visit Bolt Cloud API once the Bolt module is set up. There you'll see your API key, It's like an Authentication Token that is unique to your account.
At this point, multiple Bolt Devices can be connected with one account (one API Key)
STEP - 2 ( Understanding How API controls the Pins )In general, API responses are in JSON (JavaScript Object Notation) format, which is much easier to be read by humans as well as by programming languages. During web services from an IoT cloud, we generally make API requests with HTTP methods i.e. GET, POST, etc so that the API URL can be accessed within a program.
In general, API responses are in JSON (JavaScript Object Notation) format, which is much easier to be read by humans as well as by programming languages. During web services from an IoT cloud, we generally make API requests with HTTP methods i.e. GET, POST, etc so that the API URL can be accessed within a program.
If you have any doubt regarding API services, read my post here.
- How to use API services from Bolt IoT?In the documentation, all the existing HTTP APIs are present. You can access the API URLs with your API keys and DEVICE ID only.
A sample of a digitalWrite function to control a GPIO pin of the Bolt Module -
cloud.boltiot.com/remote/b71b13c6-cab1-XXXX-aa4e-XXXXXXXXX/digitalWrite?pin=0&state=LOW&deviceName=BOLT802XXXX
Here,https://cloud.boltiot.com/remote/ - is known as the base URL
b71b13c6-cab1-XXXX-aa4e-XXXXXXXXX - is the API-key (unique to every Bolt account - similar to a table in a restaurant, and the only way the service will reach to you, instead of some other table)
digitalWrite?pin=0&state=LOW - is the service we are requesting to the cloud. Asking the pin 0 to be set digitally LOW (Let’s say we ordered fried rice)
deviceName=BOLT802XXXX - is the DEVICE-ID (it acts like the user in a table - which person to serve with fried rice)
STEP - 3 ( Making a Web Interface with HTML, CSS & JS)This part shouldn't take long, as the script is already present in the Github Repo I have attached in the Code Section.
There are 3 main parts (DIV elements) in the interface -
1. Device Credentials(id = "buttons") Here, the user gives input to the webpage. The inputs are the device credentials, i.e. API KEY and DEVICE ID. This part is necessary, to set up a connection with the particular device we are looking for to connect with.
2. Room Buttons ( id = "Floor" )Here, each button is linked to the 2 APIs. One that turns ON (digital HIGH) and the other one that turns OFF (digital LOW). The button gets toggled between APIs that need to function.
3. Weather Data ( id = "Weather" )Here, the weather is extracted using an API from https://openweathermap.org/ and used the data to reflect on the box. However, even though the API also has a JSON key for Temperature and Humidity, we'll be using our own sensor to log the data of the room.
Sample site - https://akshayansinha.netlify.app/safebox/homeautomation/
Video DemonstrationWorkshop on the Project (Detailed Explanation)Learn to build Custom Dashboards to control Bolt Products - Workshop


Comments
Please log in or sign up to comment.