The VHS cassette was a popular video recording medium for decades but is rarely used today. When I needed a simple composite video player/recorder for a recent project, I decided to see if I could build my own that fit inside the space of a VHS cassette. Using a Raspberry Pi and a handful of parts, I was able to make it work.
Since the device was housed in a VHS cassette, I wanted it to evoke the feel of 1980s VCRs. I used a set of buttons for the various transport controls (play, stop, fast forward...) and added an orange-ish alphanumeric LED display. Having the left reel in the cassette rotate when playing a video added a nostalgic feel to the player.
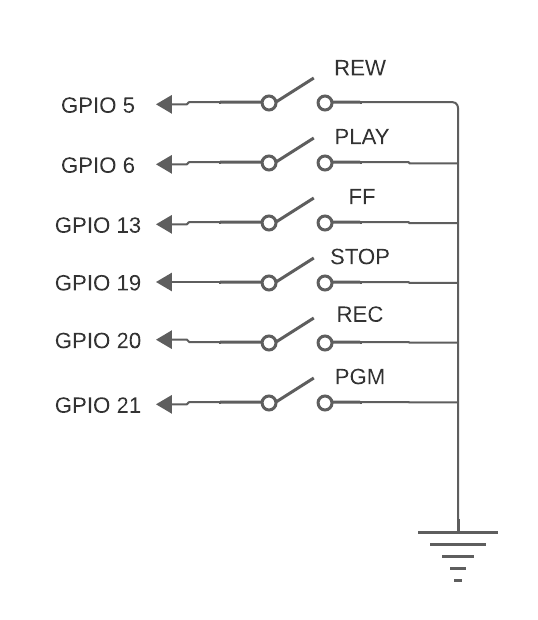
AssemblyThe block diagram and schematic below give you a pretty good idea of how all the parts should be connected together.
Although having the rotating reel is a nice touch, it does add a bit of complexity. Since the Pi cannot drive a motor directly, a separate motor driver is required. It also makes arranging the items in the cassette more challenging, as the rotating reel takes up a lot of space! Note the connections below for the motor driver board:
There are likely many ways to arrange the parts inside a VHS cassette. I had to carve out all of the ridges and tabs in the cassette to fit everything together. It's pretty easy to drill holes in the cassette shell to mount the Pi, proto board, and RCA jacks. The image below shows my layout:
Here are some points to note for construction:
- Use a slim ribbon cable rather than "jumper jerky" to save vertical space when connecting to the GPIO pins.
- I simply used double-sided tape to secure the reel to the top of the motor spindle.
- The linked github repo has an stl file to print a bracket for holding the RCA jack assemblies in place.
- The linked github repo has an stl file to print a bracket for holding the motor in place.
- You should remove the plastic housing from the capture stick, as well as disconnect the pico blade connector holding the RCA plugs.
- You can get your own pico blade connectors (such as this) to connect the capture stick to your RCA jacks.
- Use electrical tape to cover areas that might touch when re-assembling the cassette to prevent shorts.
This project uses the balena platform to easily run containers on the Raspberry Pi. Simply sign up for a free account and then hit the "deploy" button in the linked Github repo that will provide you with an image file you can burn to a microSD card. Then boot the Pi with that card inserted. If everything is wired up correctly, you should see "VCR" on the LED display and you should see vintage 1980s camcorder footage when hitting the play button.
How it worksThe video playback and recording uses a headless (no UI) version of VLC. A Python script handles reading the control buttons, updating the display and controlling the motor. The same script also uses a VLC Python module to control VLC. The audio container takes care of routing audio on the Raspberry Pi by running a Pulse audio server.


Comments
Please log in or sign up to comment.