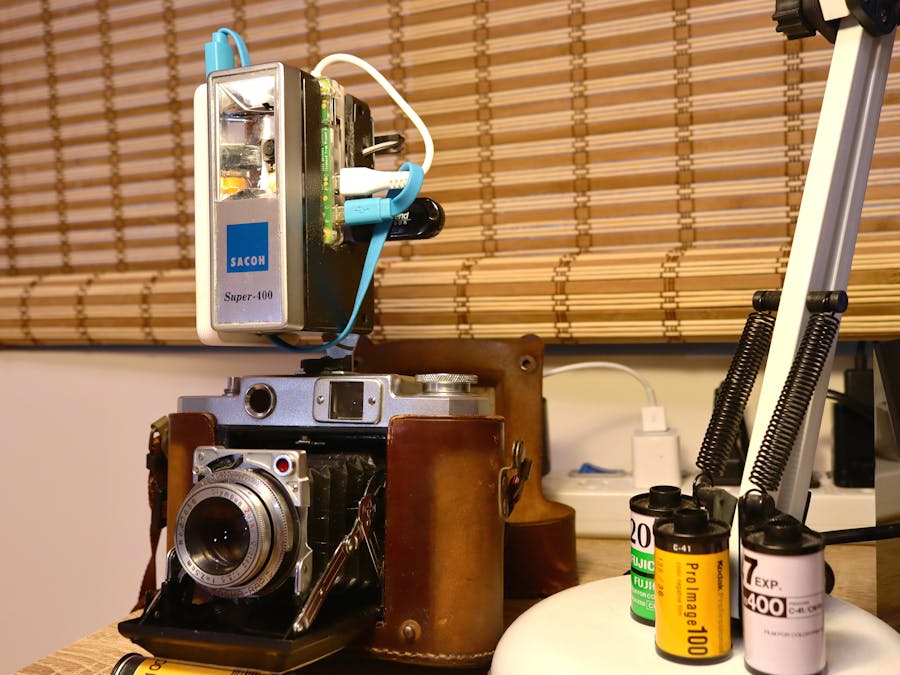
This is my first project on Raspberry Pi, not really a tutorial. I've seen some other projects using vintage camera/plastic toy camera bodies (for example here, here, here, here, here and here). I always wanted to make something similar.
However, as a film photography hobbyist, I dislike the idea that having to partially destroy an old film camera, even for those mass-produced cheap models. So I bought a broken Japanese camera flash unit (probably made in 1970s or 80s) in a second-hand camera store. Although, at the time I bought it, I had absolutely no idea how to proceed.
So I went home, disassemble the flash, ripped out all the circuit boards and capacitor, then started to figure out how to put the Pi Zero inside.
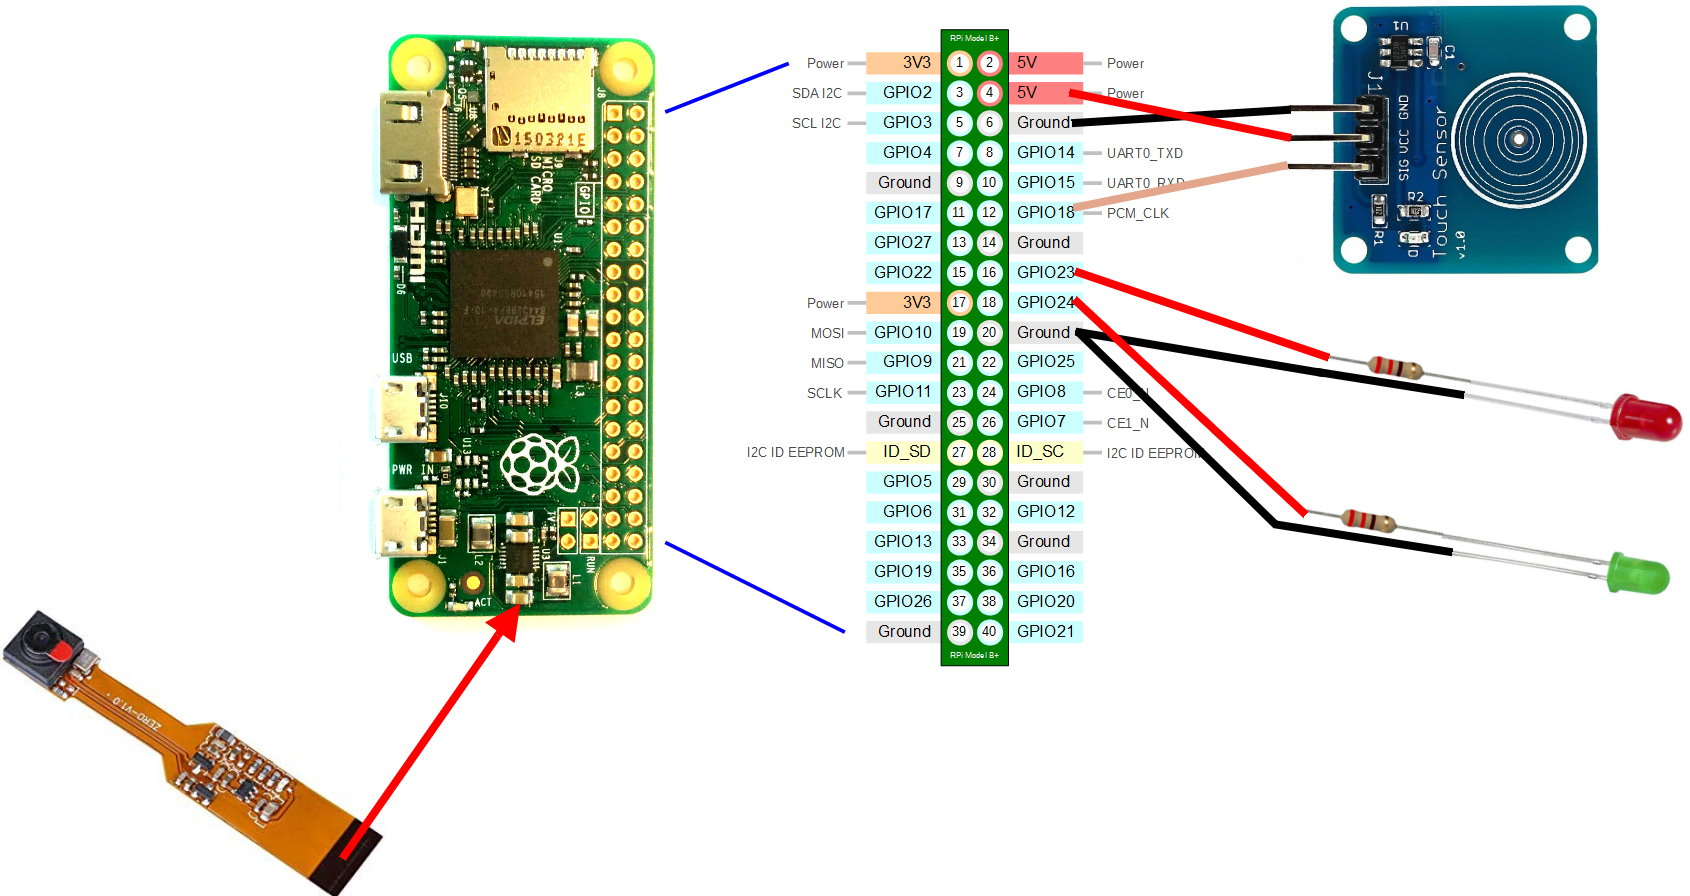
In the end I cut an ugly big hole on one side, put in the Pi Zero along with the USB OTG hub, so that I can still access the Pi Zero directly or on my PC. I kept the protective case on it. (The Pi Zero couldn't fit without the case anyway.) A cut-in-half breadboard was inserted behind the USB OTG hub with two LEDs and its resistors on it.
A small power bank glued outside the flash provides power for whole system. I couldn't find smaller power source in my area.
When the user presses the touch pad, the device would capture a 12-second video. The two LEDs indicates the recording/standby status. The H.264 video generated by PiCamera library on the system disk would then be converted into user-friendly MP4 file by MP4box. If the user's USB stick is present, the MP4 would be output onto the USB drive. If not, it would be also output to the system disk.
So basically this is like a action camera which can be installed on camera hot shoes (or cold shoes of earlier film cameras). After using it, the user simply unplugs the power and remove USB stick to copy all the files.
The Pi Zero runs on Raspbian Buster. After initial testing in GUI environment (using the built-in Thonny), I set it to boot up in terminal mode to save power and speed things up. The Pi Zero in GUI mode is simply too slow and too hot to be practical. The HDMI port and SSH is still enabled in case I need further adjustments.
The 5-megapixel Pi Zero mini camera module I used is rather simple; it can only record video at 30 fps and cannot go above 720p on Pi Zero (not enough memory).
I also created a service to automatically run the script on boot. However it didn't really run, until I added "sudo systemctl start myscript.py" in.bashrc to force it run. I can auto-run the script directly via.bashrc, but the LEDs would not light up or out as intended - still don't know why. I used a USB stick auto-mount method as well.
One of the existing problem is that the last generated MP4 file may be empty (0 byte size) unless you wait long enough (like several minutes at least). A workaround is to shoot another video to make sure the previous one be ok. Also, due to file system differences, Windows may tell you the USB stick is corrupted (which is not) after you plugged it in.
In the photos I added a Wifi adapter, because silly me, I accidently scratched and damaged Pi Zero's WiFi antenna while assembling the protective case. WiFi is only needed to update accurate system time (which would be shown in the video). Without WiFi it would be last updated system time.
In the field test I've also found that the green LED is way too dark to be seen under sunlight.
In the following video I enhanced the color of the footages, since they didn't look particularly good on bigger screen. You get for what you pay for.


Comments
Please log in or sign up to comment.