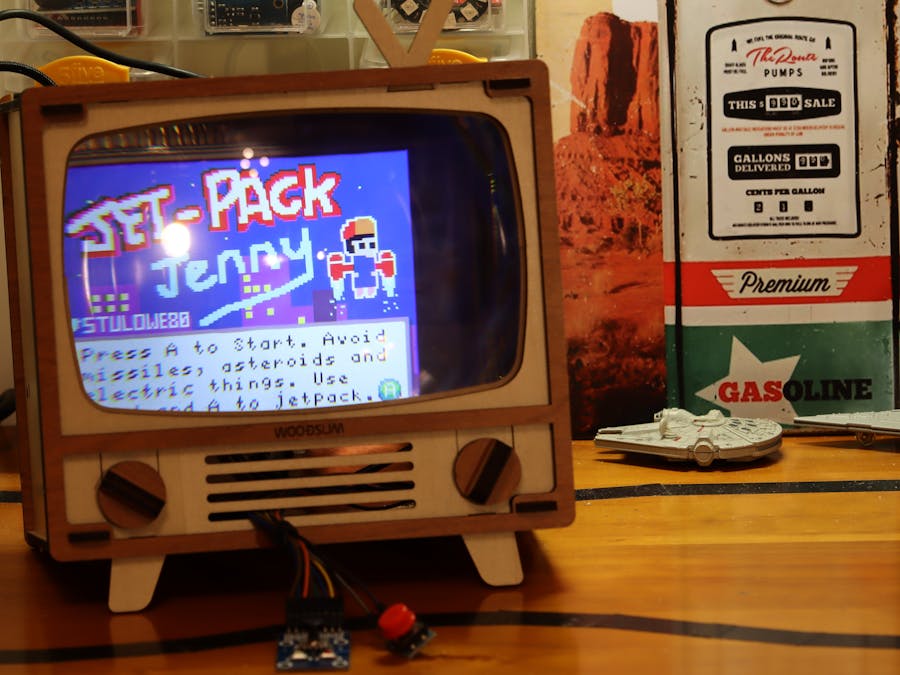
Microsoft's MakeCode Arcade is an online blocky-style game-designing IDE, which is a close relative to MakeCode for micro:bit. The games you wrote in Arcade can be run on some hardwares - most of them are specifically designed for Arcade - but you can easily make your own arcade machine with custom controls on a Raspberry Pi Zero (with or without W(iFi)).
(On the Arcade site where are at least three examples: Cardboard Control Panel, IKEA FLISAT table and MakeCode Arcade Wooden Cabinet.)
Moreover, you can try to fit the RPI Zero and display into custom cases. I bought a retro TV box made by WOODSUM, which was originally a smartphone video magnifier: you play some video on your phone and put it at the back of the box, so it would be like you're watching a mini cathode-ray tube TV.
Download Raspberry Pi Zero's Arcade firmware (choose arcade-cardboard.zip) and unzip everything directly into your microSD card. The firmware is basically a simplified RPi operating system that can boot up immediately.
Setup displayOk, you may still need to configure the display first. In the firmware files you just unzipped, there's a config.txt just like normal Raspbian OS. You use it to configure your display before you boot up the RPi Zero. (It doesn't seem to work after.)
The simplest way is probably to find a standard computer display with VGA input and use a HDMI to VGA adapter - by this way you don't need to change a thing. (Some adapter also has a 3.5mm audio output so you can hear game audio as well.) A HDMI to Mini HDMI adapter is also required.
In my case, I used a 4" HDMI LCD made by Waveshare (via a HDMI to Mini HDMI adapter), for which I need to add the following lines at the end of my config.txt:
hdmi_group=2
hdmi_mode=87
hdmi_cvt 480 800 60 6 0 0 0
dtoverlay=ads7846,cs=1,penirq=25,penirq_pull=2,speed=50000,keep_vref_on=0,swapxy=0,pmax=255,xohms=150,xmin=200,xmax=3900,ymin=200,ymax=3900
display_rotate=3
I changed display_rotate to 1 because I had to install it upside down.
Both the display and RPi Zero need power. For the RPi Zero I connected a micro USB cable to RPi Zero's USB OTG port - it can be used to power up the board as well as file transfer to your computer.
When you connect the USB OTG port to your computer, a storage named ARCADE would appear. You can simply drag and drop the game file you downloaded from MakeCode Arcade (a .uf2 file) into the Projects directory (one at a time). It would be added into the game system.
MakeCode Arcade uses 9 buttons - up, down, left, right, A, B, menu, reset (restart game) and exit (go back to menu). You can attach any types of switch between a pin and GND. When the RPi Zero pin is connected to ground - like when the button is pressed - the "button" in the game would be triggered.
When your boot up the RPi Zero for the first time, you'll see a button configure screen like below. Simply connect buttons as instructed and test them. After you are ready, click between A and B several times to exit it.
I found this 5-way button module, which has 7 buttons together in a small board with only one GND pin. I add another switch button, and leave the menu button unconnected (I can go to the menu in the system anyway).
It seems that the game system supports as many as 4 players' control. For the first player, the default pins are as below: (any GND pin can be used as ground)
This little retro TV arcade machine works pretty well, although some games I downloaded from MakeCode Arcade may crash at some point. I don't have game audio either. But at least I can try to design some game as well in the future (when I have time, that is).


Comments
Please log in or sign up to comment.