Alberto Zanon
Published © GPL3+

Obstacle avoiding robot

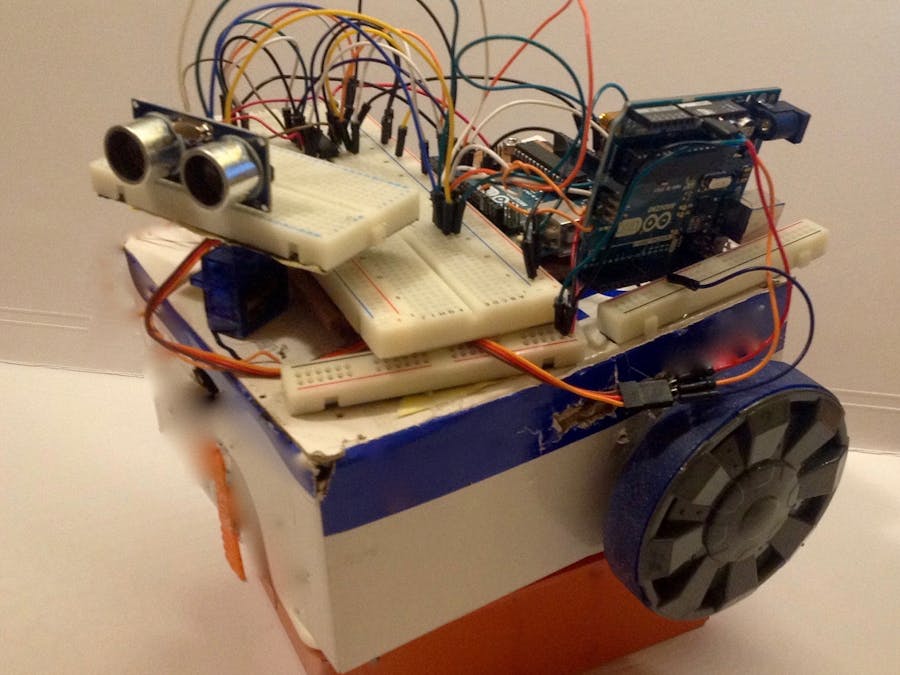
In this project, I built an obstacle avoiding robot using an ultrasonic sensor and an Arduino microcontroller.

AdvancedShowcase (no instructions)2 hours18,835
Obstacle avoiding robot

Things used in this project

Hardware components

Servos (Tower Pro MG996R)
×1
Ultrasonic Sensor - HC-SR04 (Generic)
×1
Breadboard (generic)
×3
Male/Male Jumper Wires
×1
Arduino UNO
Arduino UNO
×2
Dual H-Bridge motor drivers L293D
Texas Instruments Dual H-Bridge motor drivers L293D
it's possible use also L293B
×1
9V battery (generic)
×2
9V Battery Clip
9V Battery Clip
×2
DC motor (generic)
×2
Male/Female Jumper Wires
×1
Female/Female Jumper Wires
×1

Software apps and online services

Arduino Web Editor
Arduino Web Editor
Arduino IDE
Arduino IDE
use normal app

Story

Read more

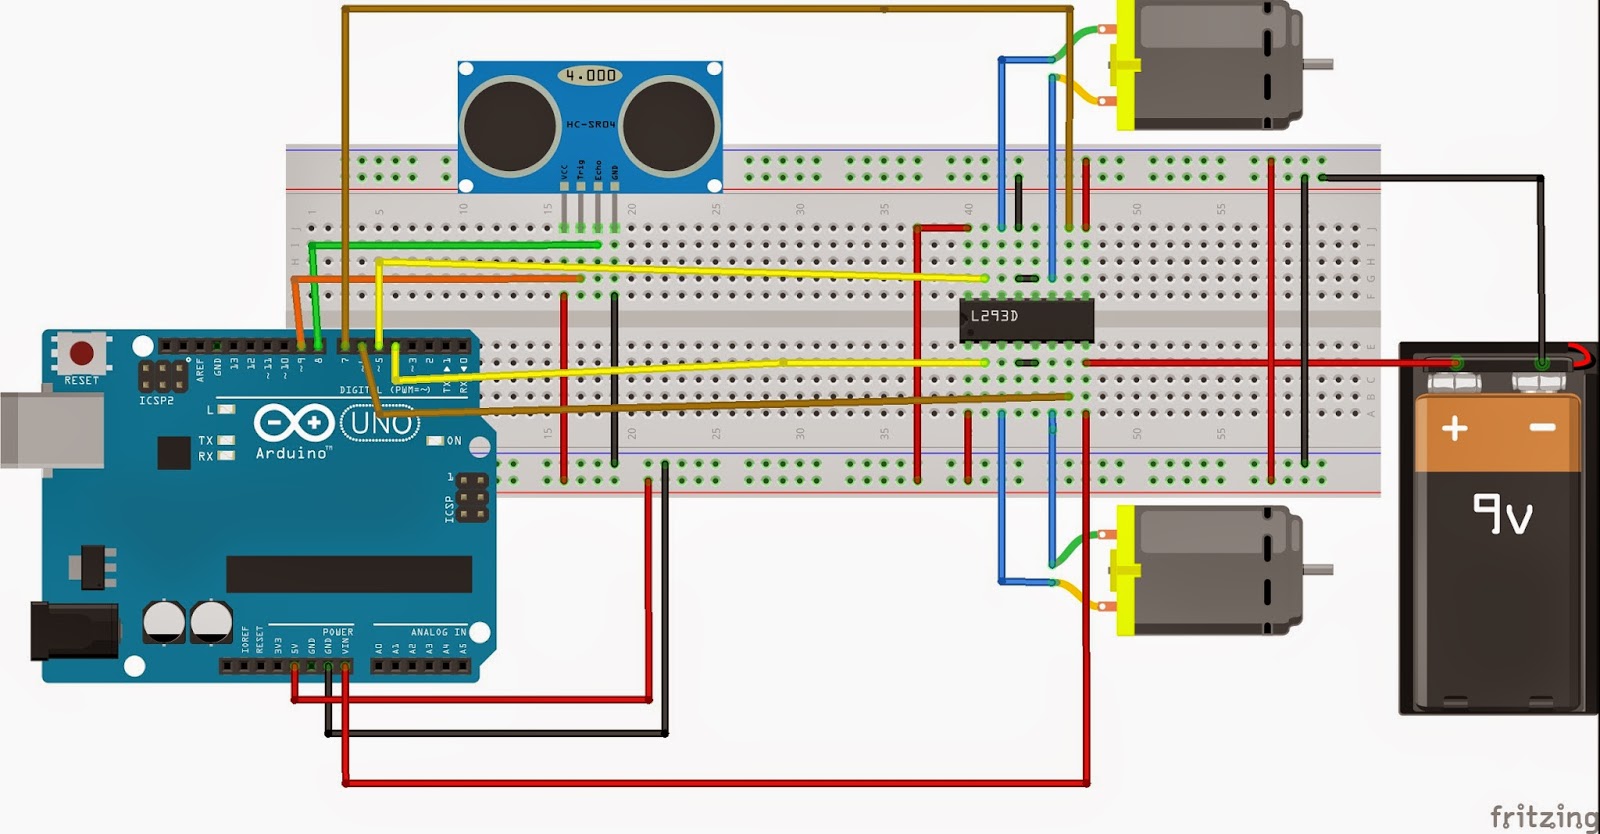
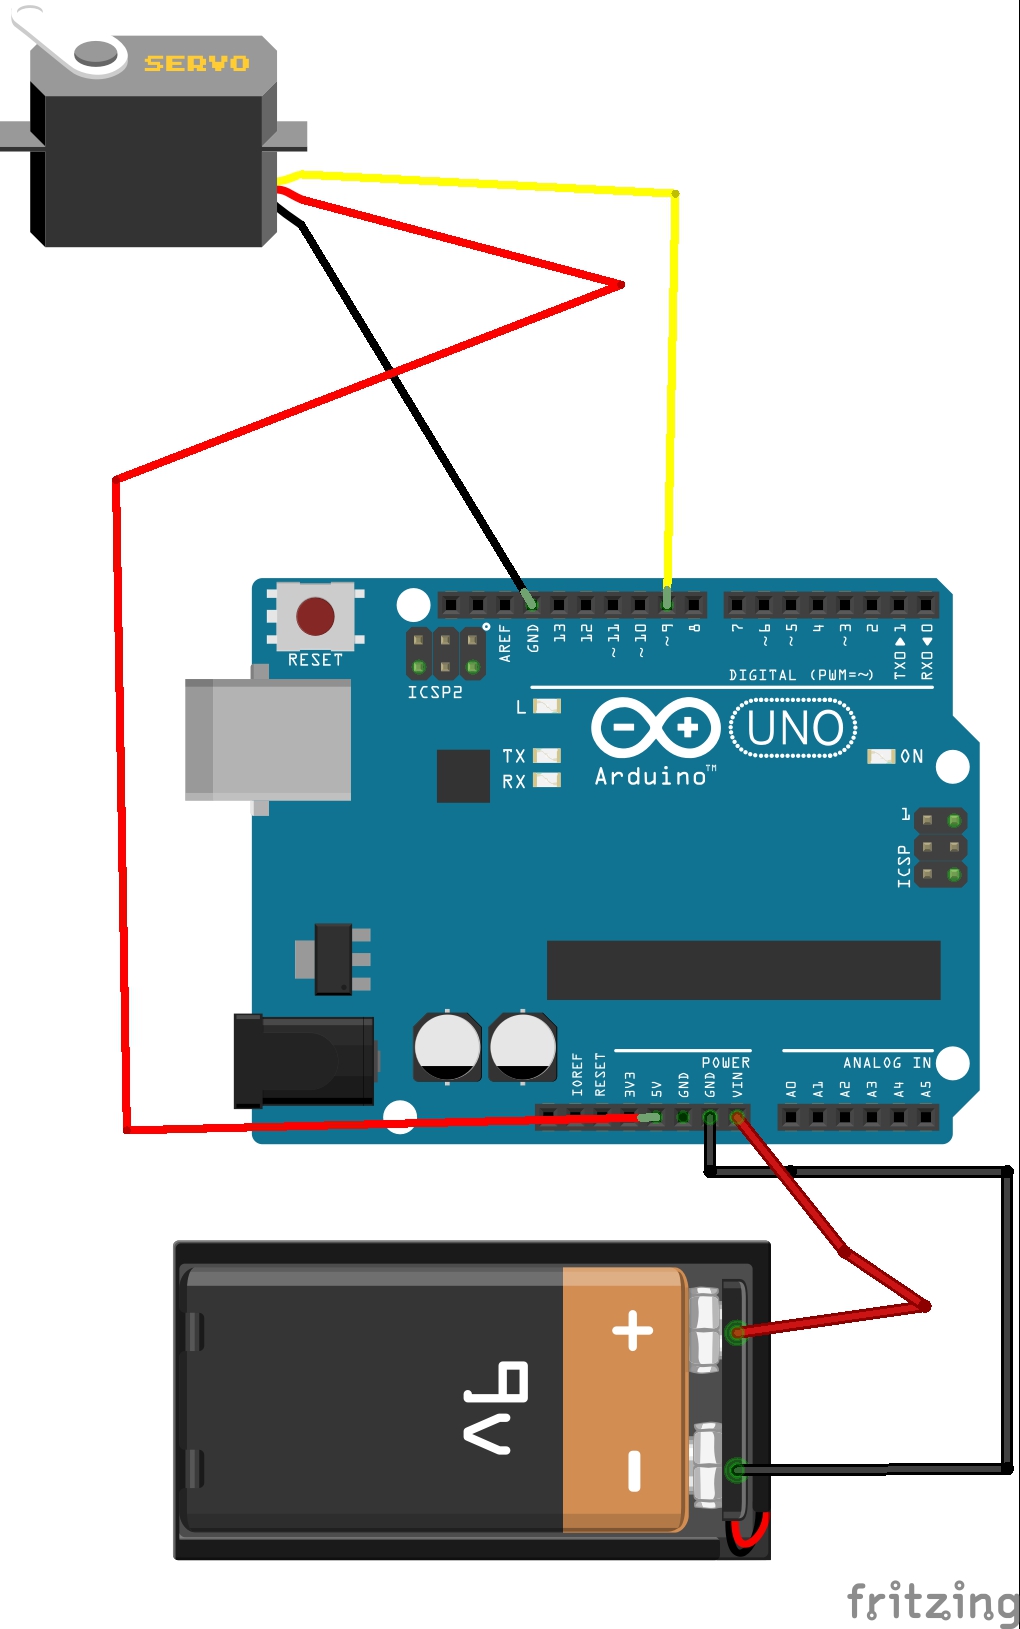
Schematics

obstacle robot

servo control

Code

robot software

Arduino
#define echopin  8 // echo pin
#define trigpin 9 // Trigger pin


int maximumRange = 30;
long duration, distance;

void setup() {
  Serial.begin (9600);
  pinMode (trigpin, OUTPUT);
  pinMode (echopin, INPUT );
  pinMode (4, OUTPUT);
  pinMode (5, OUTPUT);
  pinMode (13, OUTPUT);
  pinMode (6, OUTPUT);
  pinMode (7, OUTPUT);
}

void loop ()
{

  {
    digitalWrite(trigpin,LOW);
    delayMicroseconds(2);
    
    digitalWrite(trigpin,HIGH);
    delayMicroseconds(10);
    
    duration=pulseIn (echopin,HIGH);
    
    distance= duration/58.2;
    delay (50);
    Serial.println(distance);
  }
  
  if (distance >= 30 ){
    digitalWrite(4,HIGH);
    digitalWrite(5,HIGH);
    digitalWrite(6,LOW);
    digitalWrite(7,LOW);
    delay (200);
  }
  
  else if (distance >=15 && distance <= 25) {
    digitalWrite (4,HIGH);
    digitalWrite (5,LOW);
    digitalWrite (6,LOW);
    digitalWrite (7,LOW);
    delay (1000);
  }
 else if (distance < 15){
   digitalWrite (4, LOW);
   digitalWrite (5, LOW);
   digitalWrite (6,HIGH);
   digitalWrite (7,HIGH);
   delay (1000);
   digitalWrite (4,LOW);
   digitalWrite (5,HIGH);
   digitalWrite (6,LOW);
   digitalWrite (7, LOW);
   delay (1000);
   
     
 }

}

servo software

Arduino
#include <Servo.h>
 
Servo myservo;
 
int pos = 0;
 
void setup()
{
  myservo.attach(9);
}
 
void loop()
{
  for(pos = 0; pos < 180; pos += 1)
  {
    myservo.write(pos);
    delay(15);
  }
  for(pos = 180; pos>=1; pos-=1)
  {
    myservo.write(pos);
    delay(15);
  }
}

Credits

Alberto Zanon

Alberto Zanon

1 project • 12 followers
I create projects with Arduino and Raspberry Pi. Recently I have made two application for business.

Comments