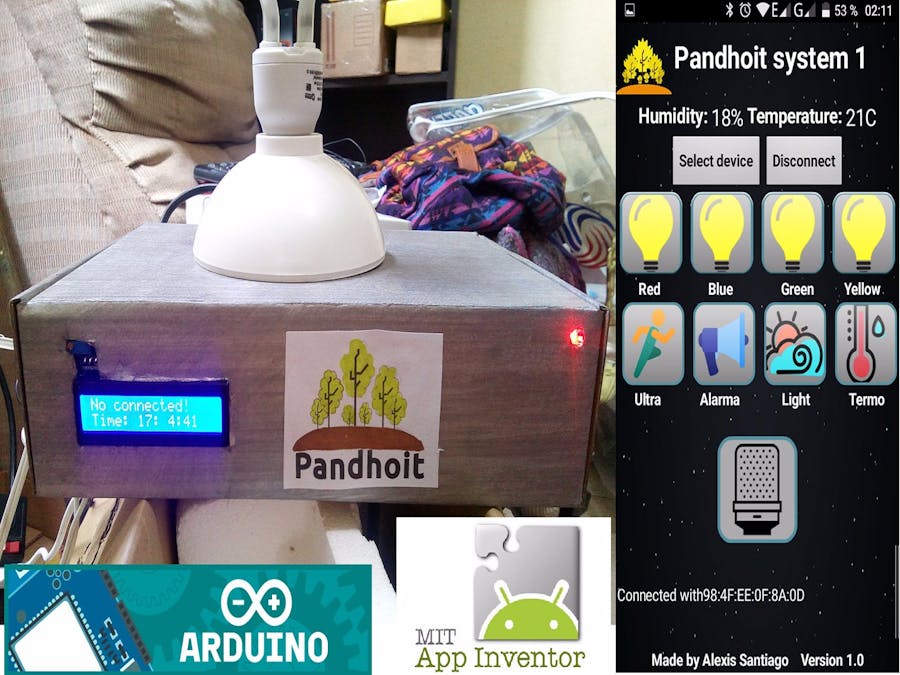
The home automation box.
The home automation has been improving over the years to offer a more robust and easy to handle control experience for the final consumer. In this project I want this prototype that is a domotic box for personal use that offers the advantages of being simple to handle for the user, has a android app that offers operating facilities. To make this project i use the arduino 101 that has integrated the bluetooth of low energy that is the one that we used to communicate with the smartphone and the application was made with app inventor 2.
The idea
I want to automate my house, but I am a student and as a student, I live in a house shared by several students and each has a room. And I think the best way to automate the house is through independent modules, since each person has different needs and each person wants their own privacy. And using my knowledge, arduino, and its components, would be an economic task.
Implementation
To participate in the contest I needed to use Arduino 101, so that aspect was essential, the next aspect is the application and I decided to do it through App Inventor 2 since it is easy to implement a bluetooth communication between arduino and my android device.
The code
The part that was important and difficult for me was the use of the services and features offered by bluetooth 4.0. All that includes the bookstore CuriBLE and on the other side of the screen I show as my bluetooth service and then use 2 features, one to send data to Arduino and another to receive the data from the sensors.
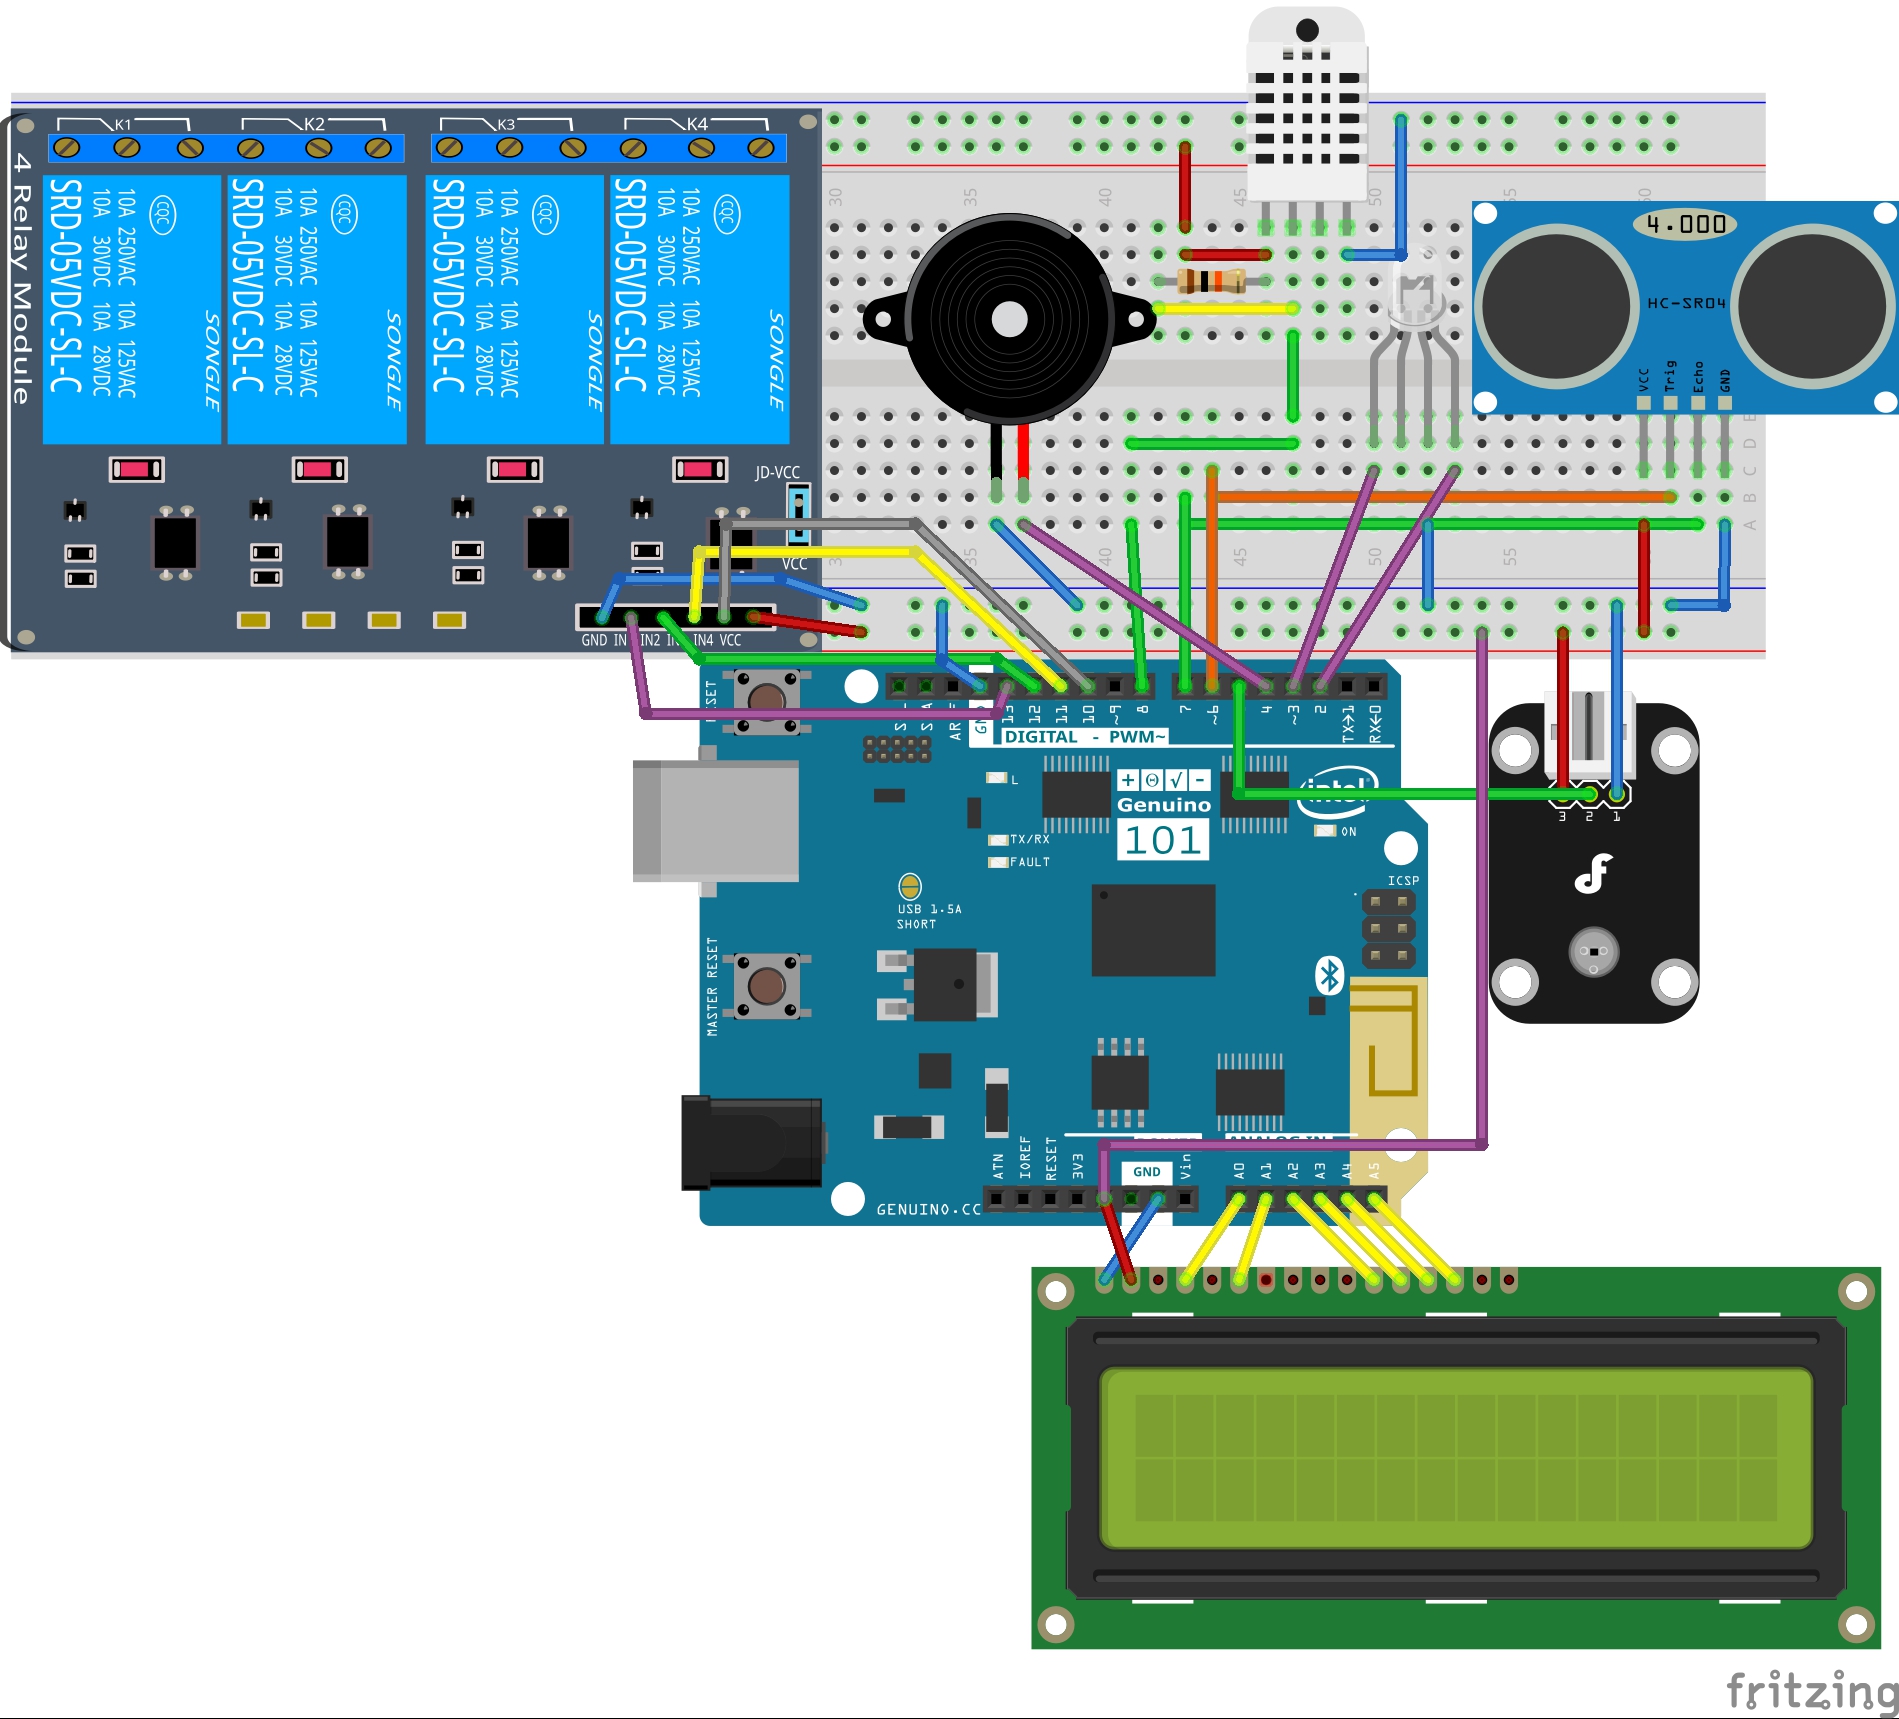
Use a 16X2 LCD to display data related to the system and on the bottom the pins that were used are shown.
The DHT22 sensor uses pin 8.
The ultrasonic sensor uses pins 6 and 7.
In the image below you can see how they used the rest of the pins of the Arduino 101
Now I will explain the operation of the system, the code can review it, is properly commented.
My system
When the box lights up you can see actually time thanks for RTC integrated in Arduino 101 and the status LED in red which means it is not connected and on your screen the following message.
But so the system has activated the ambient light sensor that turns on or off an output depending on whether there is light or not. In this example you will be connected to a light bulb. This is commonly used for exterior lights. Also in this mode, the ultrasonic sensor is activated, if someone approaches within 30cm of the box, it will emit an alarm. It is useful for intruders.
The system changes state when a bluetooth device is paired with it. And then the status LED changes to blue and the message on the lcd screen changes. The "App connected" message is now displayed on the first line and the second shows the temperature and humidity sensor (DHT22)
In this, the intruder sensor and the light sensor, which can be re-enabled from the application, are disabled here, the application already has complete control over the system.
The app inventor code
The screen of my application is shown below.
I made it simple and with large control buttons because I have my fingers wide and in any application, I am usually clumsy and the buttons do not fit with me.
When opening the application, start looking for a device with bluetooth, if it finds it, the button appears with the legend "Select Device" and pressing the button, the nearby devices exit.
My application is called Pandhoit and I choose it.
And then in the lower part you can see the legend "connected" and the values of the temperature and humidity can be seen and are being updated every 10 seconds. The control buttons are gray, meaning they are disabled, if pressed change color and that means that they light something. The buttons on show below.
The first 4 (bulb icons )are the ones that control the outputs of the relay module and can turn on or off things like light bulbs, waffle machines, fans, appliances, etc. The button with the name Ultra, is the one that activates or deactivates the ultrasonic sensor so that when detecting someone less than 30cm then emits an alarm. The next button (alarm) is to test the alarm, check its correct operation.
The next button is to activate or deactivate the light sensor, if the sensor is activated then the button 4 (bulb) is deactivated and the output 4 will light according to the value of the sensor. The last button is that of the temperature sensor, if it is activated, then when the temperature reaches 25 degrees, it will emit the alarm and alert the user, when the temperature drops to 24 or less, then the alarm will stop, this option can be Use for air conditioning or just a fan instead of the alarm.
All of these buttons can be manually activated by means of the application, but also have the voice command service, the button with the microphone icon when pressed, access to the Google voice recognition service and with it Activate all the above mentioned modes just saying the name of each button.
My box
Below you can see how the boxes are made, the front part is where the status LED is, and the LCD, on the right side is the ultrasonic sensor and on the back is the temperature and humidity sensor, also the buzzer and the connections of the arduino 101, on the left side are the outputs of the relay module and on the top is the ambient light sensor.
Conclusión
It was a first project difficult, but in the end it does a good job, I think I make a good contribution, since the objective is met and now my friends try to make their box and so we can all have an own experience of the domotics in our places, Easily and economically.
If anyone is interested, attach the .aia file so they can use my project and the corresponding arduino code. Thanks for reading my project.
APK file
https://app.box.com/s/c15nq7bgmmon95lxen1c3ctkd134a4rg
.aia file


_baVEVgguW1.jpg?auto=compress%2Cformat&w=48&h=48&fit=fill&bg=ffffff)


Comments
Please log in or sign up to comment.