Hello!
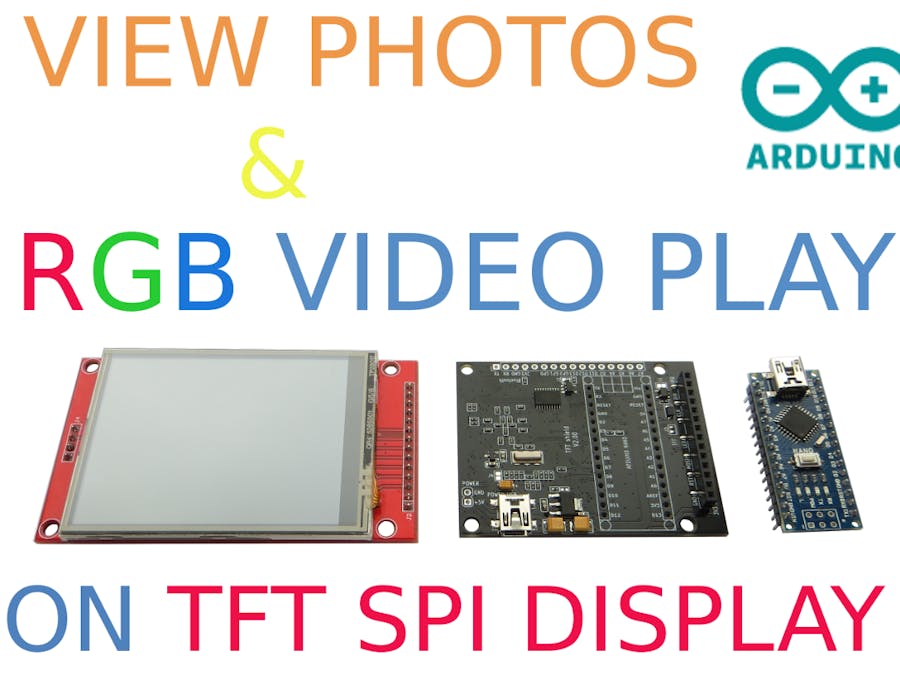
In today's article, I would like to talk about how you can view pictures or photos (*.jpg format), as well as video (RGB565 format) on the screen of the TFT SPI display (320x240, 2.8").
First, a small demo video:
HardwareNeeded components:
- SPI TFT display (320x240) with touchscreen,
- uSD card >1GB,
- TFT shield for Arduino Nano.
Putting all the parts in the order shown in the video (or you can read the previous article: https://create.arduino.cc/projecthub/alf81010/tft-shield-for-arduino-nano-start-f4391e .
SoftwarePreparation Micro SD card.
A micro SD card must be formatted in FAT32. Images can be recorded directly to the card (without any processing). It is desirable that the size of the images was not more than 2560x1920.
To play video in rgb565 format files must be prepared in advance. To convert video, use ffmpeg (http://ffmpeg.org). Download and install on your computer. Then use the example command line ffmpeg, which displays a video compatible with this demo:
ffmpeg -i video.avi -s 320x240 -pix_fmt rgb565 video.rgb
Download and install the library needed to work with the TFT shield for Arduino Nano: https://github.com/YATFT/YATFT.
Download the following sketch in Arduino Nano:
/******************************************************************************
* SOFTWARE AND DOCUMENTATION ARE PROVIDED "AS IS" WITHOUT WARRANTY OF ANY
* KIND, EITHER EXPRESS OR IMPLIED, INCLUDING WITHOUT LIMITATION, ANY WARRANTY
* OF MERCHANTABILITY, TITLE, NON-INFRINGEMENT AND FITNESS FOR A PARTICULAR
* PURPOSE. IN NO EVENT SHALL AUTHOR OR ITS LICENSORS BE LIABLE OR
* OBLIGATED UNDER CONTRACT, NEGLIGENCE, STRICT LIABILITY, CONTRIBUTION,
* BREACH OF WARRANTY, OR OTHER LEGAL EQUITABLE THEORY ANY DIRECT OR INDIRECT
* DAMAGES OR EXPENSES INCLUDING BUT NOT LIMITED TO ANY INCIDENTAL, SPECIAL,
* INDIRECT, PUNITIVE OR CONSEQUENTIAL DAMAGES, LOST PROFITS OR LOST DATA,
* COST OF PROCUREMENT OF SUBSTITUTE GOODS, TECHNOLOGY, SERVICES, OR ANY
* CLAIMS BY THIRD PARTIES (INCLUDING BUT NOT LIMITED TO ANY DEFENSE THEREOF),
* OR OTHER SIMILAR COSTS.
*******************************************************************************/
#include <YATFT2.h>   // Hardware-specific library
#include <SPI.h>
#include <XPT2046_Touchscreen.h>
#include <util/yasdc.h>
YATFT tft(0);
SDC   sdc;
#define CS_PIN  A0
// MOSI=11, MISO=12, SCK=13
XPT2046_Touchscreen ts(CS_PIN);
/*
  If using the shield, all control and data lines are fixed, and
  a simpler declaration can optionally be used:
*/
uint16_t  frame = 0;
uint32_t  total_time = 0;
bool      f_first = true;
uint8_t   mode = 0;
/*************************************************************************************************/
void  setup(void)
{
   Serial.begin(115200); // initialize the serial port
   Serial.println(F("Photo And Video Play example!"));
   tft.begin(0x4391,-8); // initialize the display
   tft.SetColor(BLACK);
   tft.ClearDevice();    // Clear screen
   ts.begin();           // Init Touchscreen
   SPI.end();
   Serial.print(F("FS Init... "));
   uint8_t state = sdc.FSInit();
   if (state == 0)  Serial.println(F("unsuccess."));
   else             Serial.println(F("success."));
   sdc.currentFileType = DEMO_FILE_TYPE_RGB;
   total_time = millis() + 500;
}
void  loop(void)
{
   if (total_time < millis()) {
       total_time = millis() + 2000;
       if (f_first == true) {
           if (-1 != sdc.FindFirst("*.*", ATTR_ARCHIVE, &sdc.nextFile)) f_first = false; // Clear flag
           else  total_time = 0;
       } else {
           if (sdc.GetFileType(sdc.nextFile.filename) == DEMO_FILE_TYPE_JPEG) {
               if(sdc.currentFileType != DEMO_FILE_TYPE_JPEG) {
                   // Set YUV mode to display JPEG
                   tft.SetColor(0x007F); // Black in YUV
                   tft.ClearDevice();
                   tft.SetYUV();         // Switching shows a little green flicker
                   sdc.currentFileType = DEMO_FILE_TYPE_JPEG;
               }
               Serial.print(" JPEGPutImage:");
               Serial.println(sdc.nextFile.filename);
               FSFILE * jpeg_file;
               JPEG_DECODE  jpeg_decode;
               jpeg_file = sdc.FSfopen(sdc.nextFile.filename, "r");
               if (!jpeg_file) { Serial.println(F("Open failed!")); return (FALSE);}
               jpeg_decode.stream = (void *)jpeg_file;
               sdc.JPEGReadFromSD(&jpeg_decode, 0, 0, GetMaxX()+1, GetMaxY()+1);
               uint8_t err = sdc.FSfclose(jpeg_file);
               if (err) { Serial.println(F("Close failed!")); return err;}
               frame++;
               frame&=0xF;
               total_time = millis() + 2000;
           }
           else if(sdc.GetFileType(sdc.nextFile.filename) == DEMO_FILE_TYPE_RGB)
           {
               if(sdc.currentFileType != DEMO_FILE_TYPE_RGB) {
                   // Set YUV mode to display JPEG
                   tft.SetColor(BLACK);    // Black in RGB is dark green in YUV
                   tft.ClearDevice();
                   tft.SetRGB();    // Switching shows a little green flicker
                   sdc.currentFileType = DEMO_FILE_TYPE_RGB;
               }
               Serial.print(F("Play RGB video: "));
               Serial.println(sdc.nextFile.filename);
               FSFILE * pFile = sdc.FSfopen(sdc.nextFile.filename, "rb");
               if (!pFile) { Serial.println(F("Open failed!")); return (FALSE);}
               tft.SetColor(BLACK);
               tft.ClearDevice();
               sdc.RGBReadFromSD(pFile, &ScanTouch);
               mode = 0;
               tft.SetColor(BLACK);
               tft.ClearDevice();
               sdc.FSfclose(pFile);
               total_time = millis() + 1000;
           }
           if(-1 == sdc.FindNext(&sdc.nextFile)) {
               f_first = true; // Set flag
           }
       }
   }
}
uint8_t  ScanTouch(void)
{
   uint16_t  x, y;
   // Touch
   // When the SS pin is set as OUTPUT, it can be used as
   // a general purpose output port (it doesn't influence
   // SPI operations).
   SPI.begin();
   if (ts.touched())
   {
       TS_Point p = ts.getPoint();
       delay(3);     // Delay for filtering
       SPI.end();
       // Calculate coordinates x, y from code ADC
       if (p.x < 450) p.x = 450;
       if (p.y < 500) p.y = 500;
       x = (uint16_t)(320L - ((uint32_t)p.x - 450L)*10L/106L);
       y = (uint16_t)(240L - ((uint32_t)p.y - 500L)*10L/140L);
       if (x<130 && y>100 && y<140) {          // Stop
           mode = 1;
           Serial.println(F("mode = 1"));
       } else
       if (x>140 && x<180 && y>100 && y<140) { // Pause
           mode = 2;
           // Draw buttons
           tft.SetColor(BRIGHTRED);
           tft.DrawFillCirc(GetMaxX()/4,GetMaxY()/2,50);
           tft.SetColor(BRIGHTYELLOW);
           tft.DrawFillRect(GetMaxX()/4-30,GetMaxY()/2-30, GetMaxX()/4+30,GetMaxY()/2+30);
           tft.SetColor(BRIGHTRED);
           tft.DrawFillCirc(GetMaxX()/4*3,GetMaxY()/2,50);
           tft.SetColor(BRIGHTYELLOW);
           for(uint8_t i=0; i<60; i++) {
               tft.DrawLine(210+i, 90+i/2, 210+i, 150-i/2);
           }
           Serial.println(F("mode = 2"));
       } else
       if (x>190 && y>100 && y<140) {          // Play
           mode = 0;
           Serial.println(F("mode = 0"));
       }
       return mode;
   }
   SPI.end();
   return mode;
}
I tried to make a short article and describe the main points in it. Moreover, there is nothing difficult in this project. But if you have any questions - ask, do not hesitate. ;-) I will try to add an article.
Thanks for attention!
To be continued.
Previous articles:
1) Unique TFT Shield for Arduino Uno - Start,
2) Unique TFT Shield for Arduino Uno - OV7670 Cam Live View,
3) Unique TFT Shield for Arduino Uno - Arduino Bluetooth Camera (ABC),
4) TFT Shield for Arduino Nano - Start.
Update 01.04.2021:
Hello again! There is an updated library for a series of screens, which currently consists of two shields and two breakout boards. The sketch is compiled depending on the selected version (from 1 to 4) and the type of microcontroller (MegaAVR or ESP-32). Added photos, examples. More information can be found in the https://github.com/Ekaburg/EkaTFT.


Comments
Please log in or sign up to comment.