


Hardware components | ||||||
| × | 1 | ||||
| × | 1 | ||||
Software apps and online services | ||||||
| ||||||
Hand tools and fabrication machines | ||||||
 |
| |||||
 |
| |||||
I have a door with electric lock that I wanted to open also when I don't have the keys with me, or when I want to let someone in but I'm not there.
The best candidate for the project was a Shelly 1 relay, because:
- It's inexpensive and easily available on Amazon
- It's small and comes with its little plastic enclosure (so it can be fitted in an existing electric box)
- It can be powered at 110-240V AC or 12-60V DC without the need of any additional power supply
- It provides a dry contact (so it can drive my 24V electric lock directly)
- It's super easy to program with Arduino
For the software side of things I decided to use the IoT Remote mobile app from Arduino, which is available for free and allows you to create a simple interface without writing any code. This solution handles all the network part for me, so I don't have to worry about setting up a web server, exposing it to the public Internet, handling authentication, coding a remote communication protocol etc. Everything is already managed by Arduino Cloud and my code becomes very simple.
A few words about securityWhen it comes to opening a real-world door, we all should be a bit paranoid. The Arduino IoT Remote app requires authentication, and you can configure your Arduino account to require two-step authentication for additional security so this is already a good start. However, I wanted to do something more by implementing a simple One-Time Password (OTP) mechanism like the one you use to access your bank account. I do trust Arduino Cloud, but with this solution even if someone can somehow step into the communication channel between my phone and the device, they won't be able to open the door because they'd need an OTP to be generated by the Google Authenticator app configured on my phone.
Step 1: configure Arduino CloudThis part is very simple, just follow these steps (in case of doubts have a look at the official tutorials):
1. Create a free account in Arduino Cloud
2. Create a new device, selecting "Generic 8266 Module" as board type. You'll get a secret key: copy-paste it somewhere.
3. Create a new thing, and configure it with your WiFi credentials as well as the secret key you just got.
4. Add one variable to the thing, called "access_code". Make it a string variable and leave all the defaults unchanged.
5. Create a new dashboard and add a "messenger" widget to it. Link the widget the the access_code variable.
That's it! Pretty easy, huh?
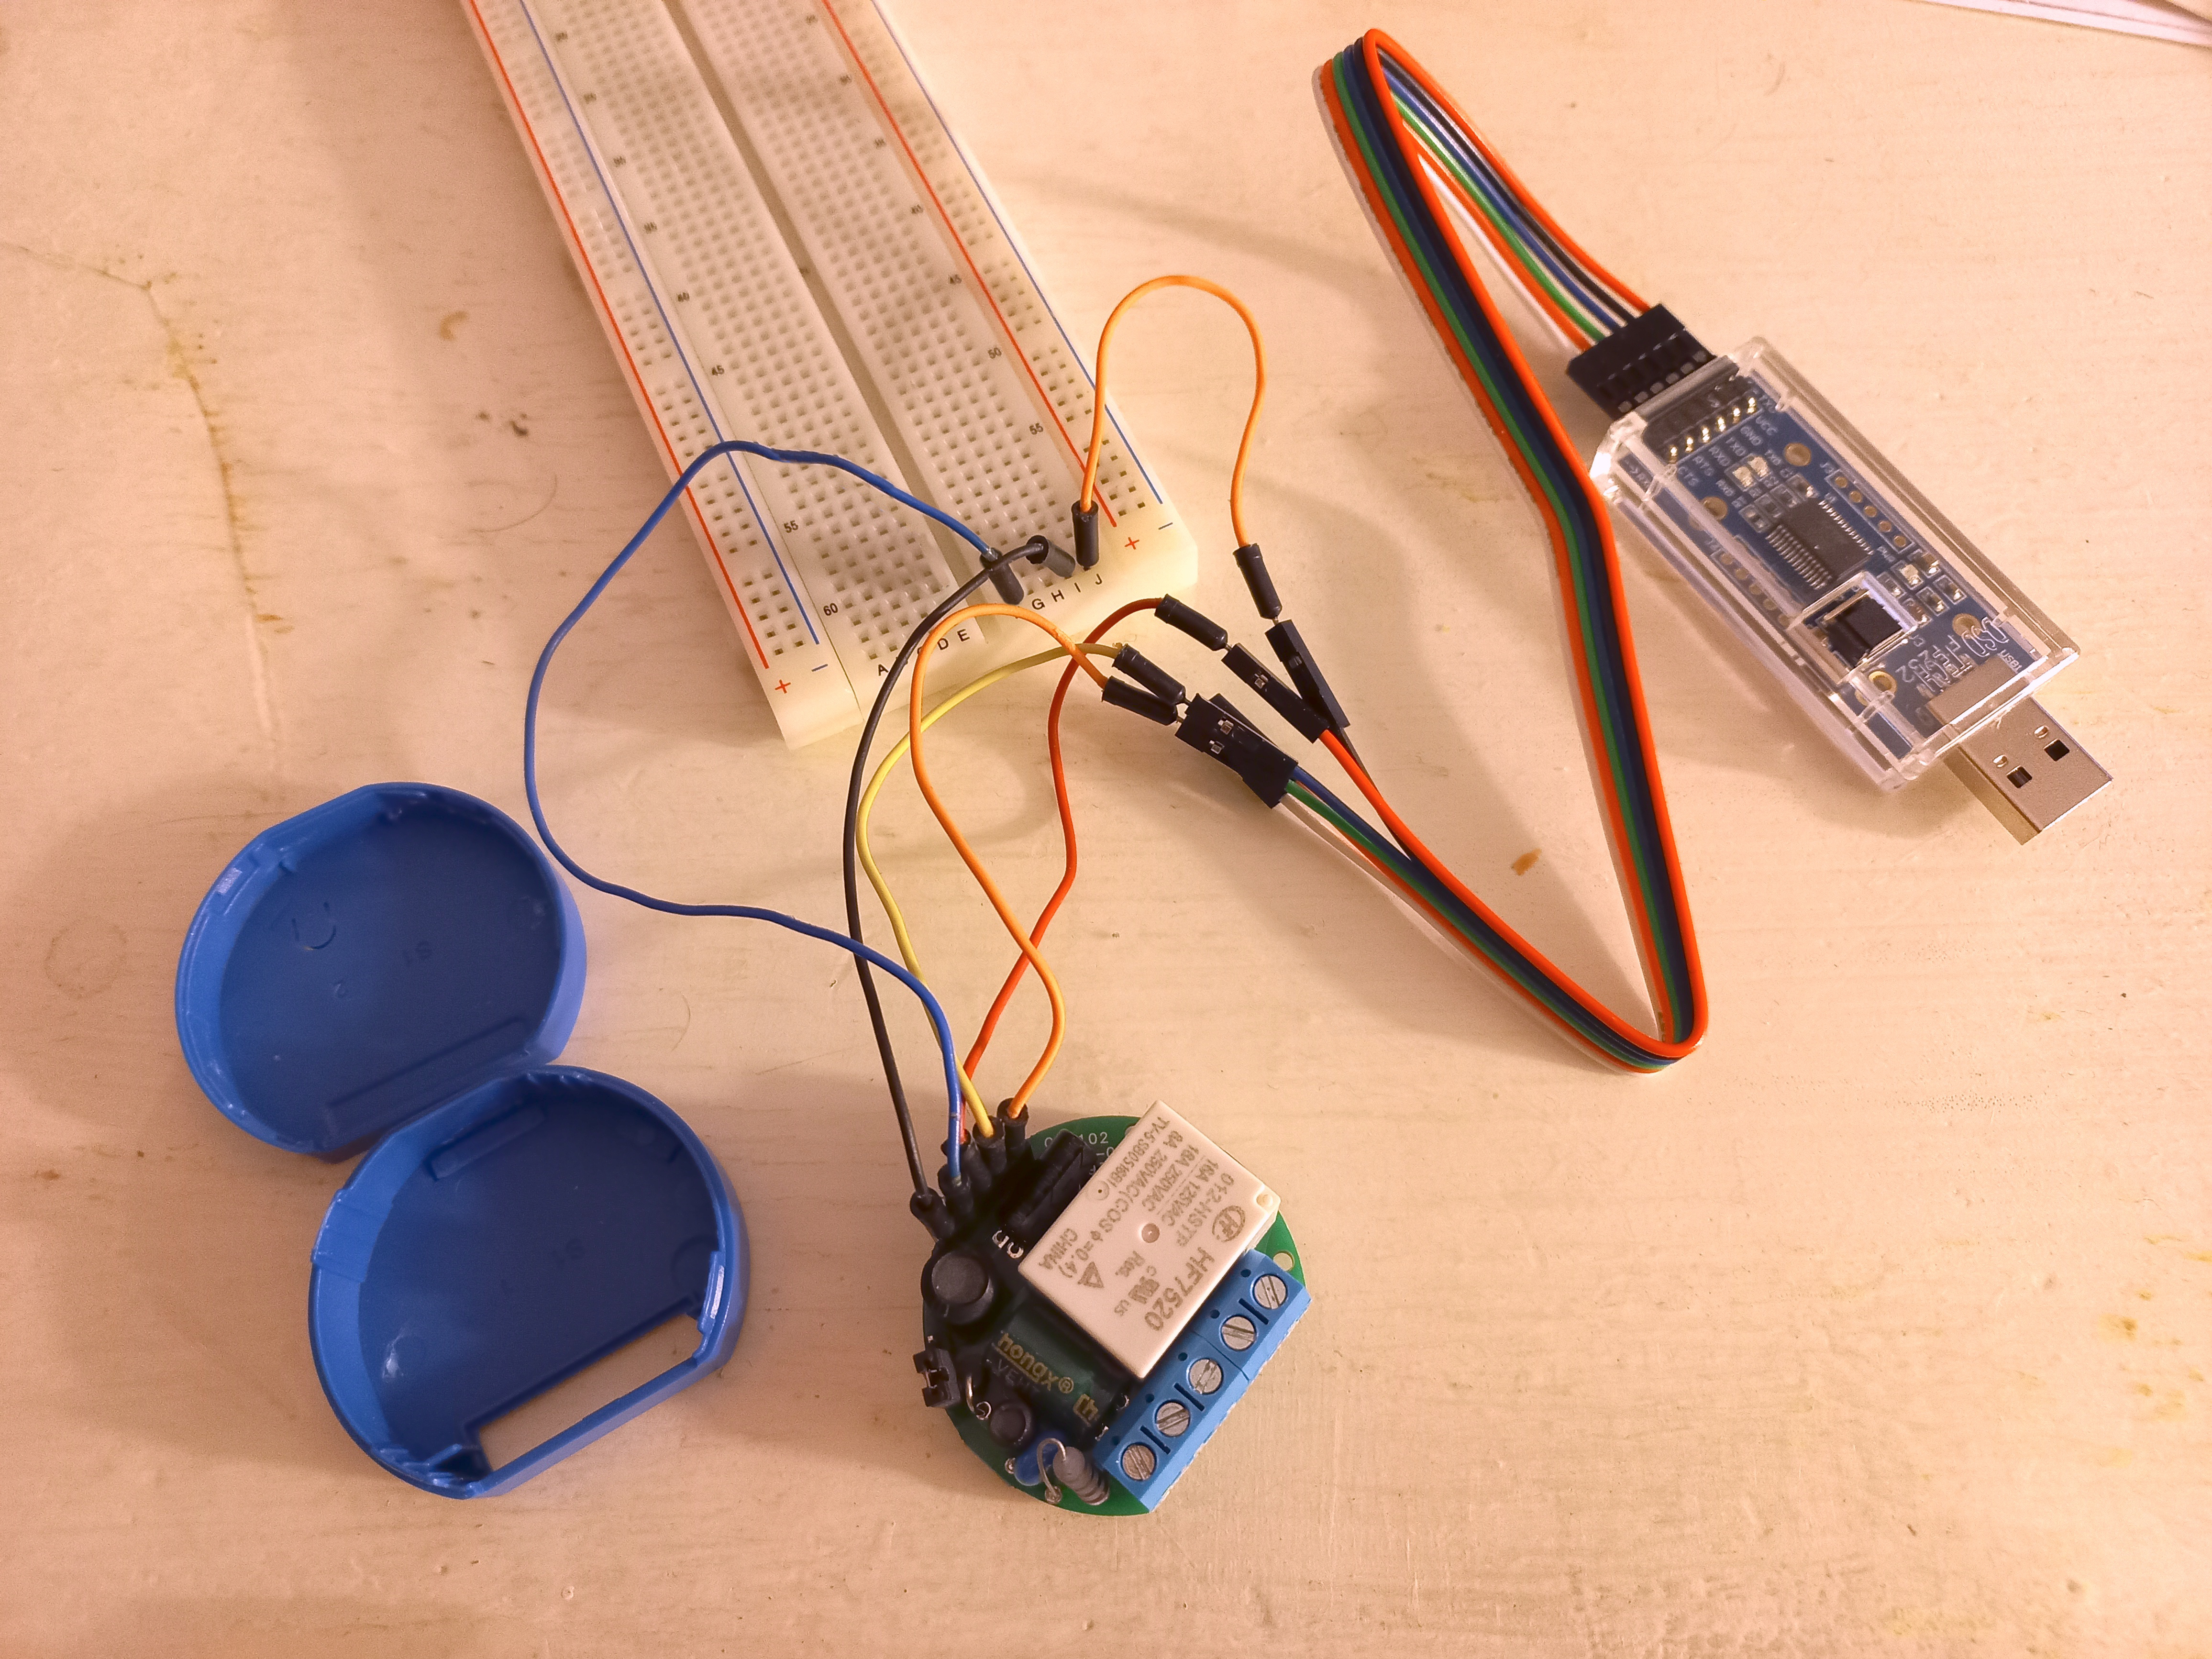
Step 2: connect the Shelly 1 to your PC1. Get your USB-TTL serial adapter and make sure it's working at 3.3V.
2. Dismantle the Shelly 1 enclosure to access the programming pins.
3. See the pinout on the Shelly website and connect its pins as follows [Shelly -> USB-TTL adapter]:
- GND -> GND
- GPIO0 -> GND
- 3.3V -> VCC
- RXD -> TXD
- TXD -> RXD
In order to connect both GND and GPIO (on the Shelly) to GND (on the USB-TTL adapter) you may want to use a breadboard, but any other method is fine.
Now plug the USB-TTL adapter into your PC.
Step 3: configure Google AuthenticatorIn order to use the One-Time Password approach you'll need to set up Google Authenticator on your phone, which is very easy as it just requires a QR code and it will do everything.
To generate the QR code you can use this very convenient online page provided by Luca Dentella (author of the TOTP Arduino library). Configure the fields as follows:
- Account name: empty (doesn't matter)
- Issuer: the name you want to see in Google Authenticator (eg. "My Door")
- Secret: a random series of characters, make sure it's very random and nobody knows it. You don't need to write it down elsewhere.
- Algorithm: SHA256
Now press the "Go" button and you'll get a nice QR code: scan it with Google Authenticator and you're all set!
Finally, copy the values of the "Arduino HEX array" and "Key length" fields into the sketch code provided in this page. Your phone and your Arduino code are now paired.
Step 4: program the Shelly 1Now follow these steps:
1. Take the sketch code and copy-paste it into the "Sketch" section of the thing you just created, in the web interface of Arduino IoT Cloud.
2. Click on "Open full editor"; then click on the three dots and select "Download sketch" to download the sketch locally.
3. Open the sketch with the Arduino IDE.
4. Fill the values in the arduino_secrets.h tab (your WiFi credentials and the secret key you got in step #1).
5. Install a recent esp8266 core:
- Open Preferences
- Add "https://arduino.esp8266.com/stable/package_esp8266com_index.json" to the Additional Board Manager URLs field
- Open Boards Manager from Tools > Board menu and find the "GenericESP8266Module" board
- Click Install to install the latest core
6. Install the following libraries:
- ArduinoIoTCloud by Arduino
- TOTP library by Luca Dentella
7. Select the board serial port.
8. Hit "Compile & Upload"
At this point, your Shelly 1 device should be flashed and ready to be used!
NOTE: downloading the sketch and using the Arduino IDE is usually not necessary with Arduino Cloud as everything can be done from the web interface (which by the way has all cores and libraries preinstalled). However this project requires a recent esp8266 core which is not available yet on Arduino Cloud. As soon as the Arduino team upgrades the esp8266 core on the cloud, this paragraph can be replaced by a much easier web-based procedure.
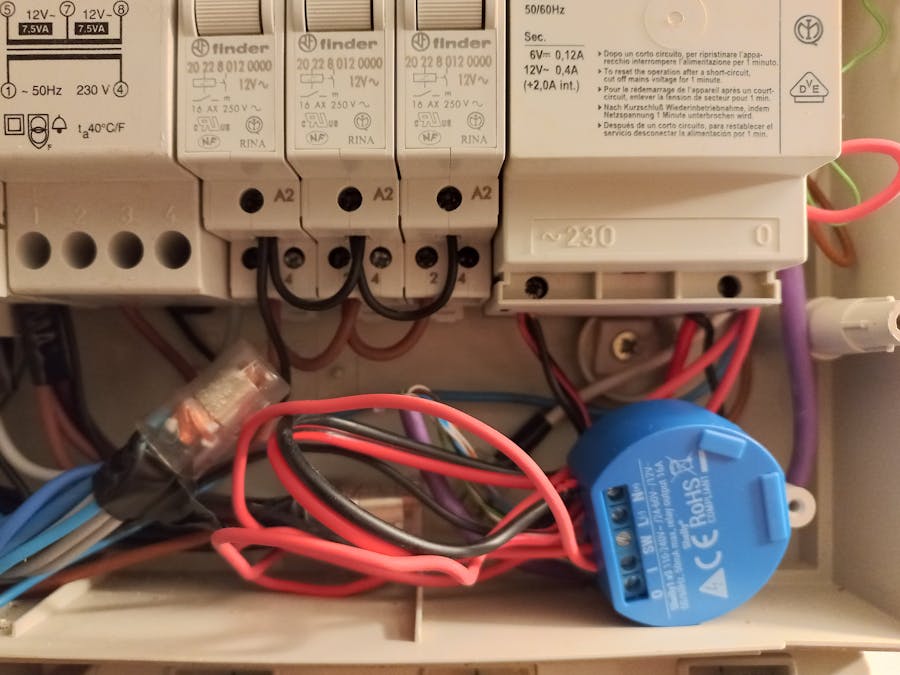
Step 5: install your Shelly 1At this point, you're ready to install everything:
1. Remove any wires from the Shelly 1.
2. Make sure you set the jumper on the Shelly according to the desired voltage (see the Shelly documentation, this is very important).
3. Wire the Shelly 1 to your electric lock and input power.
Step 6: test everythingAt this point you should be able to generate an OTP code from Google Authenticator and write it in the dashboard widget you created earlier: your door will open!
If it doesn't seem to work, here are some troubleshooting hints:
- Is the board replying "Invalid code" in the dashboard widget? If so, you need to redo more carefully the pairing with Google Authenticator. Make sure you copy the hex array into the sketch before flashing it to the Shelly.
- If the messenger widget is totally silent after you send a code, it means the board is not connected to the cloud. Open the "thing" page in IoT Cloud and check if the board is marked online with a green dot. If it's not, double check the WiFi credentials you wrote in the sketch.
- Also, double check the input power of your Shelly: the jumper should be set according to your desired input voltage (AC vs. DC), and polarity must be respected (L/N for AC, +/- for DC). If you set the jumper to the wrong position, good chances are you fried your Shelly!


Comments
Please log in or sign up to comment.