I wanted to make a smarter tray - one that had a dedicated place for drinks as well as having a space that would stay hot. I wanted to be able to control it remotely and I wanted a contactless way to trigger the hot mode on and off. Using the Kemet Proximity Sensor along with the Adafruit Feather Huzzah and Adafruit IO allowed me to accomplish my goal.
Kemet Proximity SensorPowering the kemet sensor with 5V seems to result in analog readings of 1024 consistently when my hand is over the sensor. I receive a string of high readings when I place my hand and then I receive another string of high readings when my hand moves from the sensor. Because of this, I waited until I had two pulses before I triggered the on/off function in my code. The sensor itself uses a SHR connector but functionally only uses three of the five pins. See the Things section for the exact connector. I followed the example that was provided in the tutorial of this contest but had to make some adjustments in order to get it to work.
As you can see from the picture above, the colors from left to right are White, Purple, Green, Red, and Black respectively. From left to right for the sensor are Vin, Tx, Rx, Vout and Gnd respectively. This means for the device to be wired correctly, White should be connected to Vdd (5V in our case), Red should be connected to our analog input and black is connected to ground.
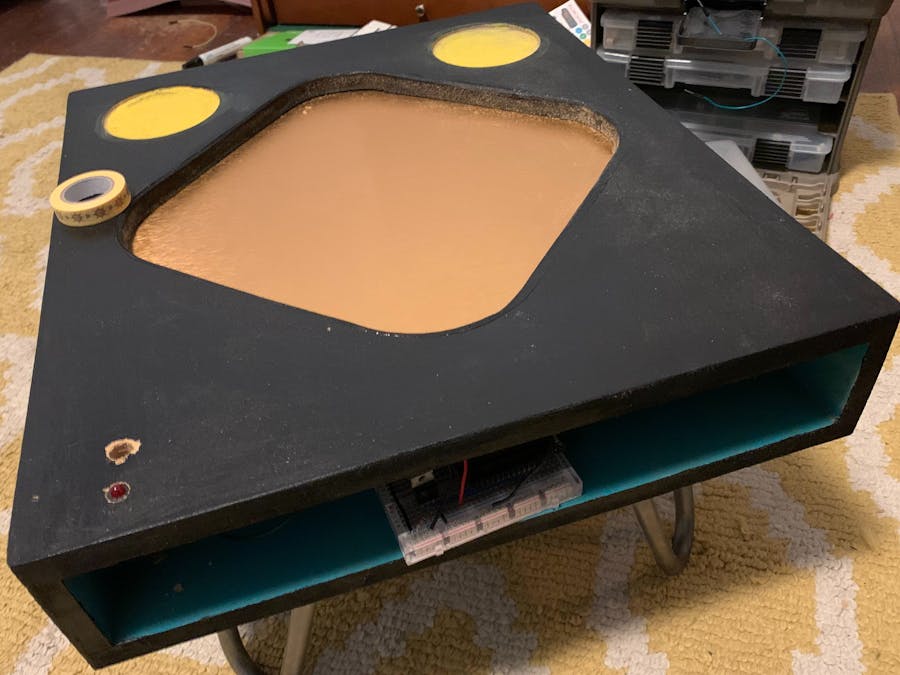
Building the CaseI wanted to make a nice looking enclosure that could have space for a couple of drinks as well as a relatively large space that could be heated with the heat pad. I needed to drill a hole for the proximity sensor as well as another hole when I wanted to give the user an easy indicator for when the device was on. I used my Shapeoko CNC to cut out the enclosure and a compound miter saw and a whole lot of sanding to get it just right. I decided to put some hairpin legs on it but it is not necessary whatsoever to have. I used a copper sheet and cut it to the hole size. The heat pad will warm up the copper and make the surface hot enough to maintain whatever the food's temperature is. I added a support underneath it because the copper is not strong enough to maintain the weight of even a small plate. See pictures below for the assembly.
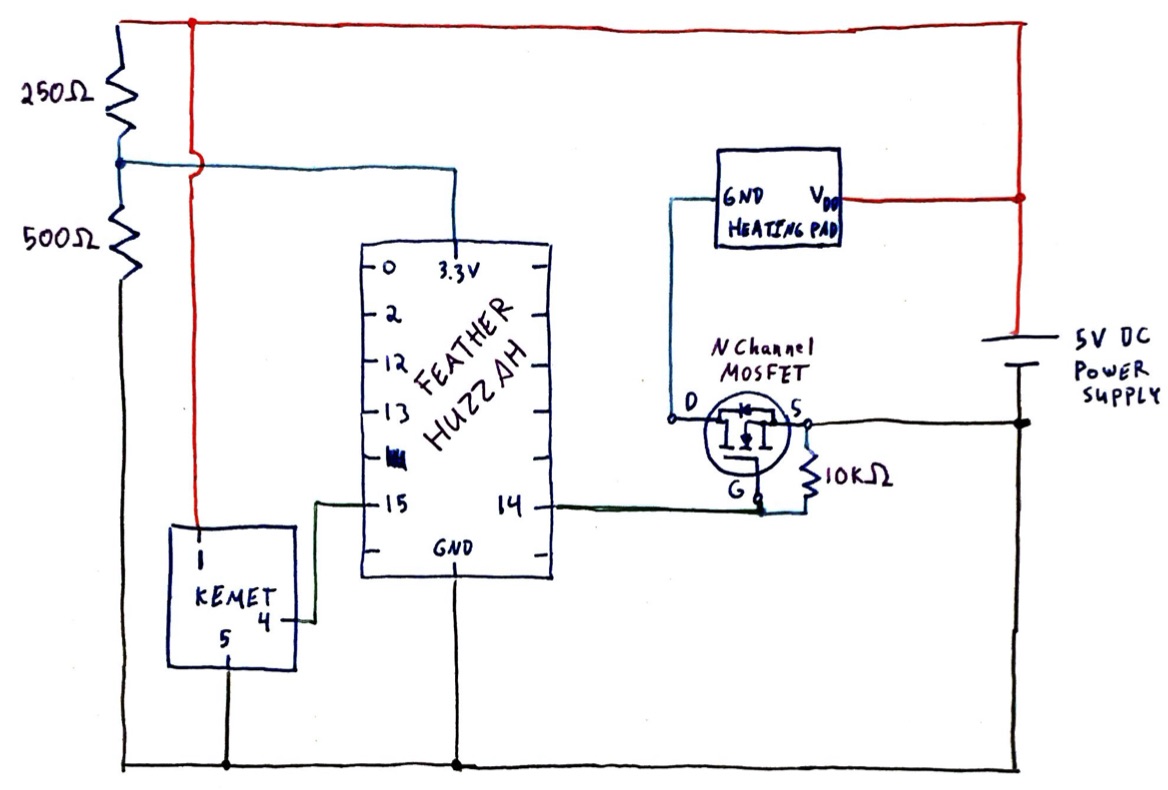
The circuit design can be found in the attachments and isn't anything too fancy. I used the Adafruit Feather Huzzah because it has WiFi on board and I had a spare one. You could use any ESP8266 module and probably have limited changes to what I did. The Kemet Vout does go to an analog in which I had to change after making the circuit design and I added a LED but both of those are pretty minor and the pins I used are in the code that I attached. See pictures below for my circuit design.
I'm trying to use the Adafruit IO platform more so I decided this would be a good project for it. I followed along with their tutorial for Digital In and Digital Out. You can find the instructions here. The design of the page was very basic with just a 0 and a 1 and a bar. Mixing both of the digital in and digital out examples allowed me to control the device locally and remotely. See the code attached for details.
After assembling the device and programming it, you should be able to turn on the heat pad locally and remotely. If it works right, you should be able to do the same thing as in this video:


Comments
Please log in or sign up to comment.