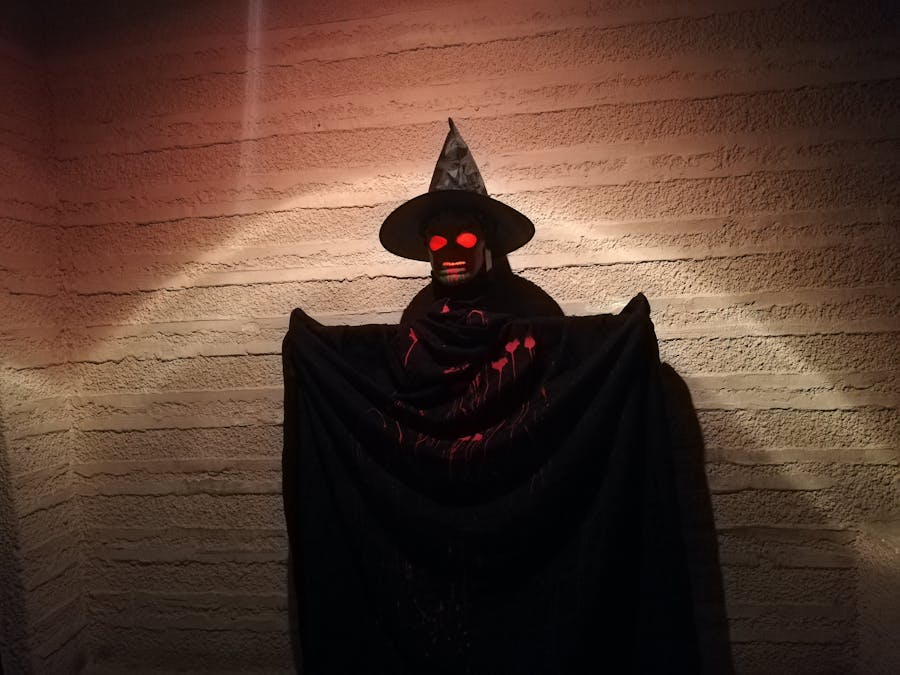
Wooooow, guys! It's the Halloween tonight so are you ready for making it the most scared Halloween night ever? I have searched a lot for new Halloween tech ideas that are extremely terrified and funny to make.
Finally, I have ended with a Halloween Robot that can act like a spirit from the grave which has returned back to chase and haunt people in the Halloween night!
Yeaaaah!! That's a real Halloween robot that can move and controlled remotely from your smartphone with playing scary lights from his evil eyes and bloody mouth. And if you want to make it more deadly night then ask the robot to turn the autonomous mode on with playing the scary soundtrack you want...
All these things are done with just your smartphone.
So, let's get started with the making of this project...
Getting StartedI have used the lovely Arduino board with 1Sheeld. 1Sheeld is an Arduino shield that empowered me to use many of its easy-to-use 47 shields, like: Gamepad Shield, Voice Recognition Shield, Keypad Shield, Music Player Shield.
The greatness of 1Sheeld is that it has all these shields into only 1 board that makes use of your smartphone capabilities and sensors.
So, if this is your first time to deal with 1Sheeld or you want to learn more about it, I recommend checking this quick and easy getting started tutorial.
Step 1: Robot BodyI have designed the robot body frame from wood to be easy and cheap to laser cut it. All 2D laser cutter parts are attached as (.DXF) extension and the full open source (.SLDPRT) files too.
Note: you are going to cut some parts more than one to have multiple of them so that you glue them together to get a 3D-shaped part, like the joint part:
Once you have all the wooden parts glued then go ahead and fix all together with L shaped metal corner brace, screws and the screwdriver to a curtain tube of inner diameter 24.5 mm or less.
And I have used screws of 4mm with lengths between 10mm and 50mm.
If you got any problem with screw holes in the cutted wood, you can easily fix it by using the Drill for increasing a fault small hole diameter or even make a new hole.
Motors Installing:
make sure to use a proper geared motors with high torque that can carry the robot weight, like these:
And by using screws, attach motors with the free wheel also to the robot base using this 3D printed part:
Don't worry. All design parts files are included in the attachment of the project.
It should look like this:
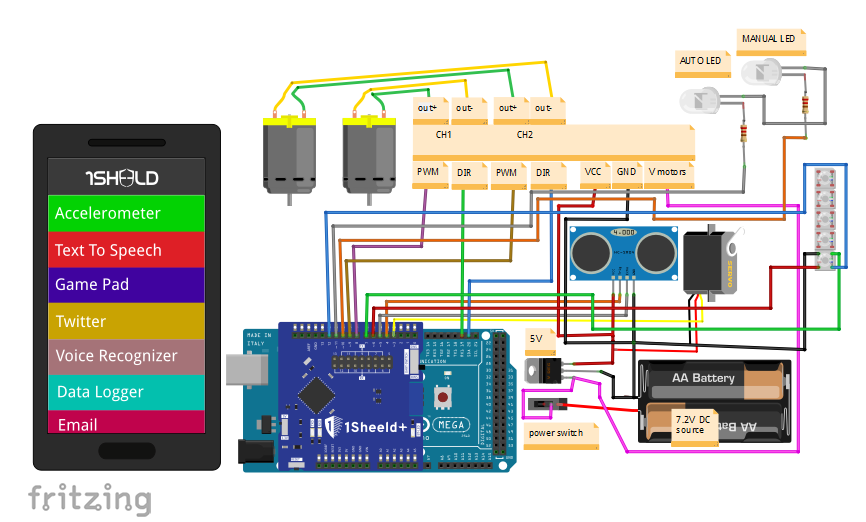
You will need Arduino Mega with 1Sheeld+ and a proper motor driver that can deliver the required current motors need. So, driver selection depends on your motors selection.
The driver in the previous image can deliver up to 4A for each motor of its 4 channel and uses fewer pins (1 PWM pin + 1 DIR pin) than traditional H-bridge motor drivers.
So, connect your components as showed up in the Schematics part below.
Step 3: Upload the Code- Hock the 1Sheeld to the Arduino Mega as illustrated in the video:
- Connect the Arduino via your PC using Arduino USB cable.
- Switch the 1Sheeld power to operate on 5v (Not the 3.3v):
- 1Sheeld have 2 modes: Uploading mode and Operating mode. You can switch between them using the switch close to the Digital pins and is called “UART SWITCH” on 1Sheeld and “SERIAL SWITCH” on 1Sheeld+.
Firstly, you slide the switch towards the “SWITCH” notation which turns the 1Sheeld board into the Uploading mode to let you upload the Arduino code.
Secondly, after you finish uploading the code, slide the switch towards the “UART” notation (or “SERIAL” at 1Sheeld+ board) which turns the 1Sheeld board into the Operating mode to communicate with your smartphone 1Sheeld App.
- Finally, pen the 1Sheeld app and connect it to the 1Sheeld board via Bluetooth.
Here comes the most exciting moment which is covering the robot skeleton we have made so far by using a cloak, Halloween hat, and a scary face.
Firstly, you will need to make a face support to act like the robot head.
I have made it from rectangular pieces of cardboard colored with a black spray.In addition, glue the RGB LED strip inside the head:
Then attach the head to the robot body:
And put the mask:
And the hat with the cloak:
And put some blood to make it more scary ")
Great! Now you finished it all!
Run ItOpen the 1Sheeld App from your smartphone and connect to the 1Sheeld+ and select the Gamepad Shield, Voice Recognition Shield, Keypad Shield, Music Player Shield.
You have 4 directions to navigate the Halloween prop remotely, [up], [down], [left], [right].
And also 3 colors from the colored buttons, [red, green, blue] where the robot will change its eyes and mouth color accordingly!
Or press [orange button] to turn lights of.
In the music player shield screen, add the scary music track you want your Halloween robot play(up to 10 tracks).
Now you are ready to control your robot manually from the gamepad shield screen to get your friends pranked with playing horror music by selecting it from keys [0 - 9] from the keypad shield screen.
Or press the [#] key to stop the music playing.
Also, press any key from [A, B, C, D] to adjust the robot speed to one of the 4 leve speed [A the slowest and D is the fastest].
And for activating the autonomous mode of the robot, press the [*] key or get the voice recognition shield screen and say[drive] and your robot will drive itself autonomously using the servo motor with the obstacle avoiding sensor (the Ultrasonic).
Press the [*] again to stop the autonomous mode and back to the normal mode or say [stop] using the voice recognition shield again.
I have used the robot to prank our friend on his arrival. Here is a nice GIF for the prank and the full scary video is at the beginning of the page.
If you liked and tried it then let me know me how the reaction of your friend was hence ")
And let me know if you got any questions in the comments below...
"Happy Halloween, Guys..." with the voice of my halloween prop. :D


_wzec989qrF.jpg?auto=compress%2Cformat&w=48&h=48&fit=fill&bg=ffffff)


Comments
Please log in or sign up to comment.