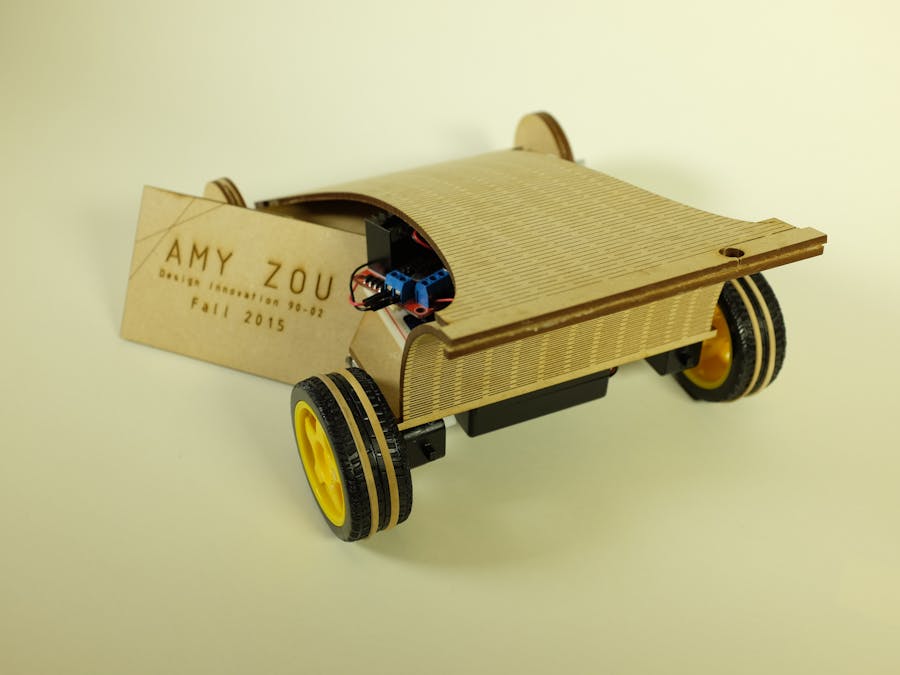
Our final project was to build a creative exterior to our original blue-tooth controlled vehicle chassis.
Steps:
1. Sketching:
I started out by looking for inspiration through my old class notes, googling concept vehicle designs, and looking for random cool projects on Thingiverse. My final sketches came from a mix from all of these- I remember Chris talking about how certain cuts made wood flexible. I also was inspired by the sleek exterior of the concept vehicle designs, and found a cool flexible wood cut template for a name card holder.
I used this as the basis for my new vehicle design. The vehicle is very flexible because of the laser cuts, with the intention that maybe in future iterations (or large scale iterations) it can help aid in absorbing possible shock from the road and other incidents.
2. Prototyping and Final Project:
I went through multiple phases of prototpying, first just cutting out the template name card holder to see how it would fit with my car.
I cut many versions ( some too small, some cuts too complicated, some cut the wrong way) before cutting my final body piece.
Then for the tail piece, I made more close together cuts to increase the flexibility of the tail.
The sides of the car are left empty (for supposed aerodynamic effect) but it also could be covered with two flexible sides. I thought it took away from the design, so I left the sides uncovered. Also, I thought it looked cooler showing glimpses of the wiring underneath.
Unexpected Complications:
- Adhesives: I found that wood glue actually takes a while to dry, so getting the main body to stay was an issue. Same with the tail to body and tail to frame areas. The small surface area didn't help.
Overall, this project was very satisfying to make. I found that I learned quite a lot even just building up on my previous chassis.
Final Thoughts:
I really enjoyed this project and this class as a whole. Although there were times where I felt like there were no instructions, I think I gained the most out of those times.


Comments