For Windows:
1. Install Python, Esptool and AmpyIf you have no Python 3 installation on your computer please download the installer from https://www.python.org/downloads/ and execute it. Then install Esptool and Ampy with
> pip3 install esptool
> pip3 install adafruit-ampy
on the command line.
2. Download and Install FirmwareDownload https://micropython.org/resources/firmware/esp32-20220618-v1.19.1.bin. Connect your M5Stack ESP32 Basic to your computer via USB. Open the Windows Device Manager and look into "COM & LPT" to find the correct COM port, e.g. COM6. Then install the firmware with
> esptool.py --chip esp32 --port COM6 erase_flash
> esptool.py --chip esp32 --port COM6 --baud 460800 write_flash -z 0x1000 esp32-20220618-v1.19.1.bin
Reset your device after the installation is finished.
3. Download and Install LibrariesCreate a folder named lib on your computer. Download the files cooperative_multitasking.mpy, graphic_terminal.mpy, ili9341.mpy, logo.mpy, mqtt.mpy, mqtt_client.mpy and turtle.mpy from https://bitbucket.org/amotzek/micro-python/downloads/ into that lib folder. In the command line navigate to the folder above lib and then execute
> ampy.exe --port COM6 --delay 3 put lib
to upload the folder to your device.
4. Edit and Upload main.pyFrom the Code section of this project copy the file main.py to your computer and fill in your WLAN credentials in line 68, a user name in line 66 and a MQTT topic name in line 69. Execute
> ampy.exe --port COM6 --delay 3 put main.py
to upload the file to your device.
5. TestIn your browser go to http://www.hivemq.com/demos/websocket-client/. Click the Connect button. Enter the topic name from line 69 into the Topic field. Enter
{ ":message": "Hello!" }
into the Message field. Click the Publish button. Your M5Stack ESP32 Basic should display Hello! now.
Enter
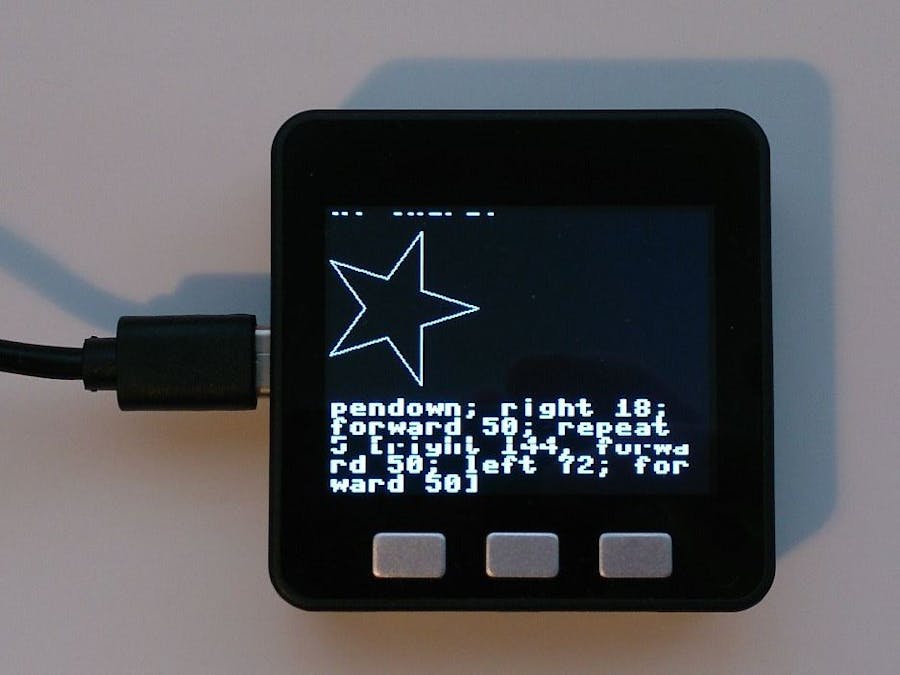
{ ":logo": "pendown; right 18; forward 50; repeat 5 [right 144; forward 50; left 72; forward 50]" }
into the Message field. Click the Publish button. Your M5Stack ESP32 Basic should display a star now.
Supported Logo CommandsThe following arithmetic expressions are supported:
- Integer numbers, e.g.
0,23,-17 - Parameters are names that start with a ":", e.g.
:size,:length - Arithmetic expressions combined with the operators
+,-,*or/, e.g.2 + 3,:size - 1 - Arithmetic expressions in round brackets, e.g.
(2 + 3)
The Logo parser is simple and does not account for operator precedence. So please use round brackets where needed.
The following boolean expressions are supported:
- arithmetic_expression
<arithmetic_expression, also with<=,>,>=,=or!= - boolean_expression
orboolean_expression
There is no support for and. If you need that, please use nested ifs.
These are the supported Logo commands:
penuppendownsetpencolorarithmetic_expression arithmetic_expression arithmetic_expressionrightarithmetic_expressionleftarithmetic_expressionsetheadingarithmetic_expressionforwardarithmetic_expressionbackarithmetic_expressionsetxyarithmetic_expression arithmetic_expression
You can define procedures with
toname :parameter[commands]where name is the name of the procedure followed by zero or more parameters followed by multiple commands in square brackets. The commands must be separated by semicolons.
You can call procedures the same way as you call the Logo commands.
There are three control structures implemented:
repeatarithmetic_expression [ commands ]ifboolean_expression [ commands ]ifelseboolean_expression [ commands ] [ commands ]
pendown; right 18; forward 50; repeat 5 [right 144; forward 50; left 72; forward 50]to square :side repeat 4 [ forward :side; right 90] pendown; square 50to cross :length :depth [ if :depth > 0 [ repeat 4 [ forward :length; right 90; cross (:length * 4) / 10 :depth - 1 ]]] pendown; cross 100 3


Comments
Please log in or sign up to comment.